Editing a model
This article applies to NBEE, SLASH 2 PLUS
Edit Mode provides various tools to view and edit data.
Trim a model
Use the various selection tools to select and remove unnecessary data.
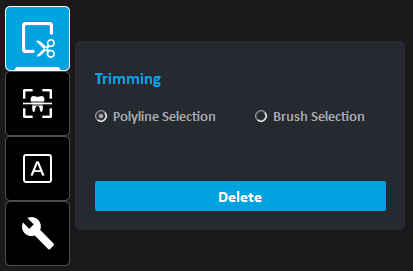
1.Select a selection tool: Polyline selection or Brush selection.
Polyline selection: Used to select all objects within a drawn polyline shape.
Brush selection: Used to select all objects on a freehand-drawn path. Only the front face will be selected.
2. Use the mouse to select data on the model.
3.Click Delete button or press Delete key on the keyboard to remove selected data.
Add base to model
Intraoral scan data is incomplete mesh and has uneven base. The Adding Base tool creates a flat base for intraoral scan data.
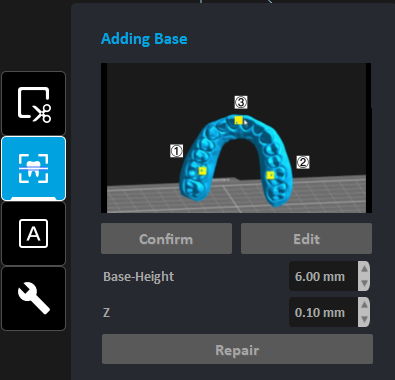
1.Pick three points with the left mouse on the model surface to determine the orientation of trimming plane.
If you want to modify the orientation of trimming plane, drag the yellow point on the model surface.
2.Click Confirm button to confirm the orientation of the trimming plane.
If you want to modify the orientation of trimming plane, please click Edit button.
3.Set the Base-Height to add additional height to the model's base.
4.Set Z value on dialog to adjust the z value of trimming plane and click Repair button to add a base below the trimming plane.
5.Or Move the mouse to adjust the z value of trimming plane, and click left mouse to add a base below the trimming plane.
Hollow
This tool enables the conversion of solid models into hollow structures with internal cavities. The wall thickness of the hollow model can be precisely controlled by adjusting the thickness parameter.
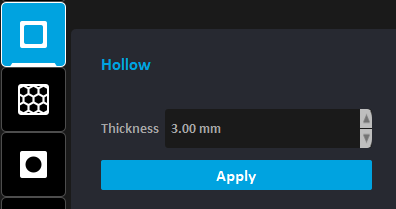
Steps to hollow a model:
1.Select the model to be hollowed.
2.Define the desired wall thickness.
3.Click the "Apply" button to generate a hollow model with the specified wall thickness.
Infill
This tool is used to apply a hollowed honeycomb pattern to the model. The Side Length parameter controls the length of the hexagonal cells' sides, while the Thickness parameter controls the spacing between the cells and the distance from the model's surface.
Note: If the honeycomb pattern needs to pass through the bottom of the model, ensure that the model's base is a flat surface.
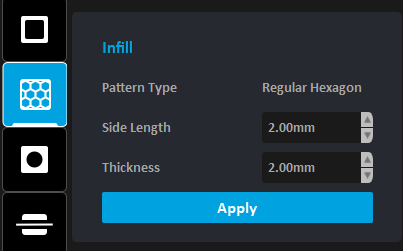
Steps for applying honeycomb infills:
1.Set the parameters (Side Length and Thickness).
2.Click the "Apply" button, and the model will be hollowed with the honeycomb pattern according to the specified values.
Hole
This tool allows users to create holes at specified locations on the model. The shape of the holes can be cylinder, cube, or hexahedron, controlled by selecting options in the "Shape" menu. The size and depth of the holes are determined by adjusting the respective "Size" and "Depth" parameters.
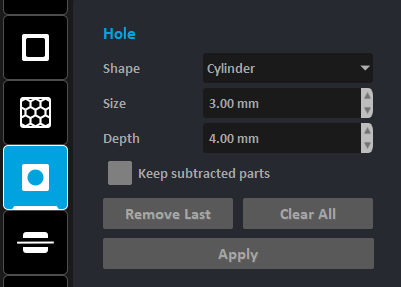
Steps for marking the drilling locations:
1.Set the desired options (Shape, Size, Depth).
2.Move the mouse cursor over the selected model and choose the preferred drilling location. Left-click to mark the hole's position on the model. Multiple positions can be marked in one session. If a marked position is unsatisfactory, use the "Remove Last" or "Clear All" buttons to undo the action.
3.After marking all desired locations, click the "Apply" button to execute the drilling.
Split
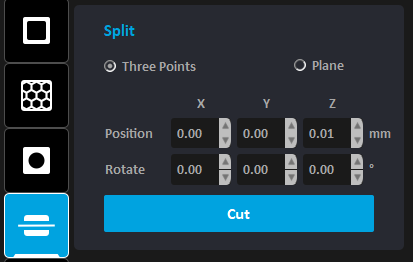
This tool offers two methods for defining a cutting plane:
1.Three Points: Select any three points on the model to determine the cutting plane. Adjusting the values in the "Position" and "Rotate" options will modify the plane accordingly.
2.Plane: Select a plane parallel to the base (platform) as the cutting plane. Only the height of the reference plane can be adjusted in this mode.
Steps for splitting the model:
1.Choose the method for generating the cutting plane (Three Points, Plane).
2.Adjust the cutting plane (Position and Rotate).
3.Click the "Cut" button or left-click the mouse. The reference plane will split the model into two parts and close the cut surface.
Label text on a model
Here you can label text on your 3D models. This function is useful when you planning to print dozens of models. You can mark your 3D models by adding labels on their surface, so you won't mixed up with printing results those are similar to each other.
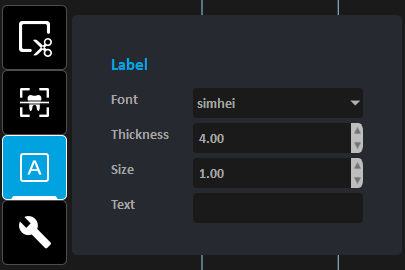
1.Choose a font.
2.Enter thickness, size. Enter the text to mark.
3.Move mouse on model. And then click on the model to generate the label.
Repair a model
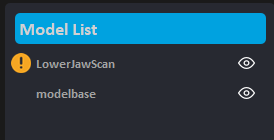
If a 3D model is defective, the software will prompt whether to repair it when loading. If you choose to ignore it, the model may fail to print. Once loaded, an exclamation point will appear in front of the item in Model List view.
Repair Model
1.Select one or more models.
2.Click Repair Model button, and the software will automatically repair the selected model.
If the repair fails, a message indicating failure is displayed.
Node: If Only small holes is checked, the repair speed will be greatly improved when there are large holes that cannot be repaired.
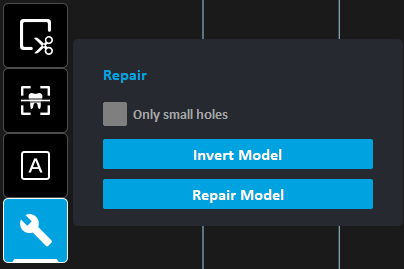
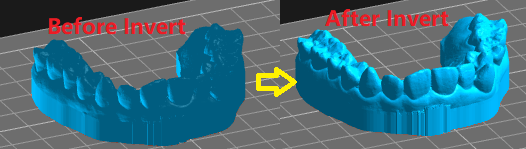
Invert Model
1.Select one or more models.
2.Click Invert Model to complete repairing.
Note: The external surface of a normal model is bright blue, if the external surface of the model is dark blue, it means that the surface of the model is inverted