Printing and Maintenance
1. Check up Before Printing
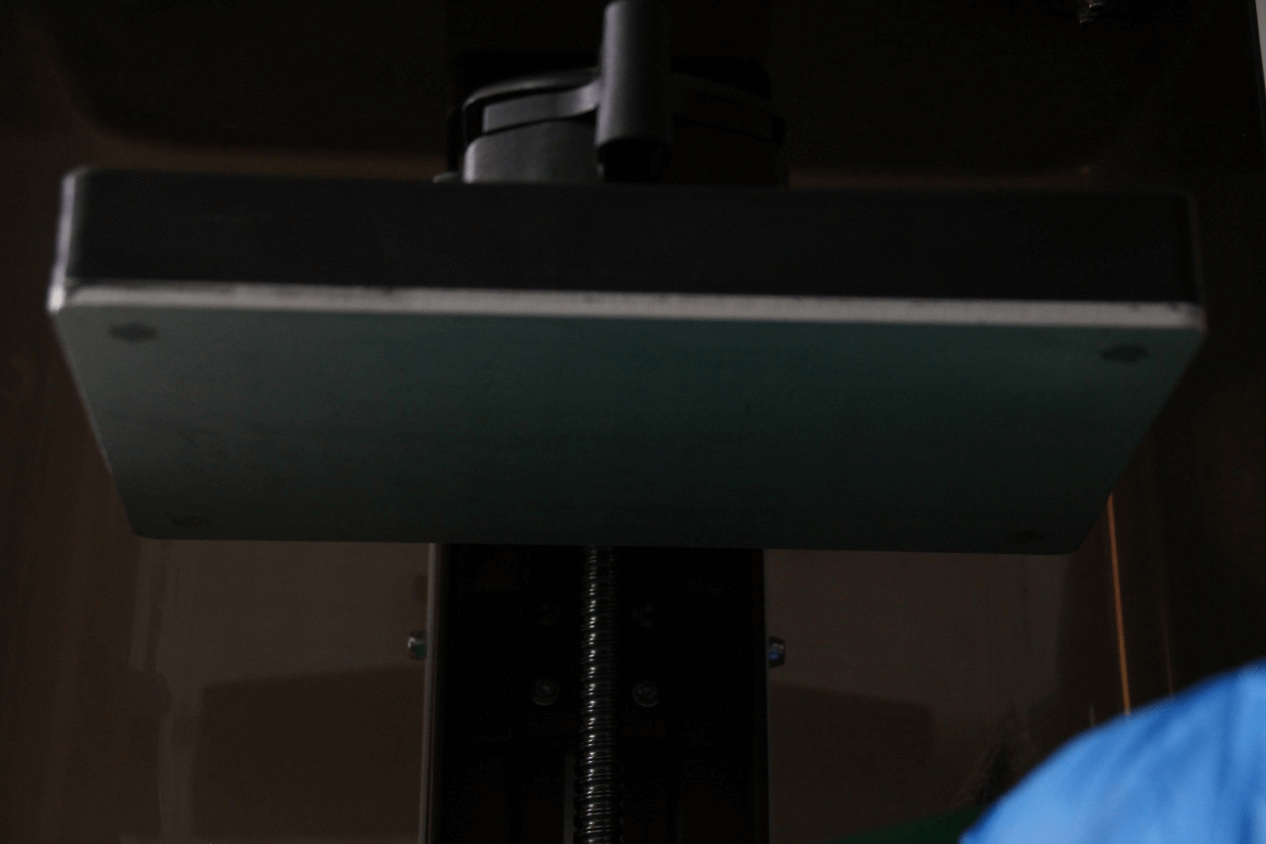
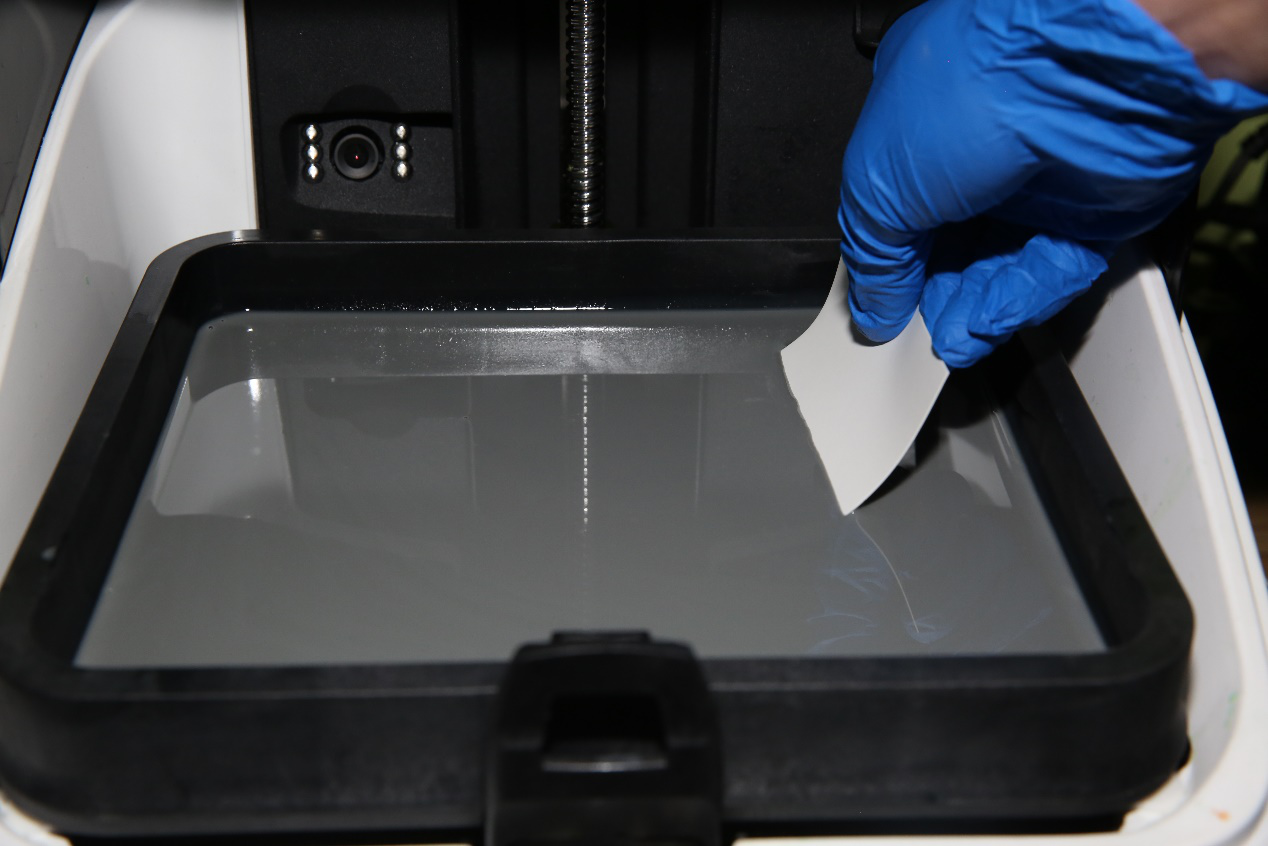
Before every print job, both Build Platform and Resin Tank surfaces must be checked for debris and damage. Make sure there are no models or residues from last print job left on the Build Platform or in the Resin Tank to prevent damage to the Tank film and LCD screen.
Note: If you notice there are debris that may damage the LCD after the Build Platform started moving, unplug the power cord as emergency stop to prevent damages.
2.Cleaning and Maintenance
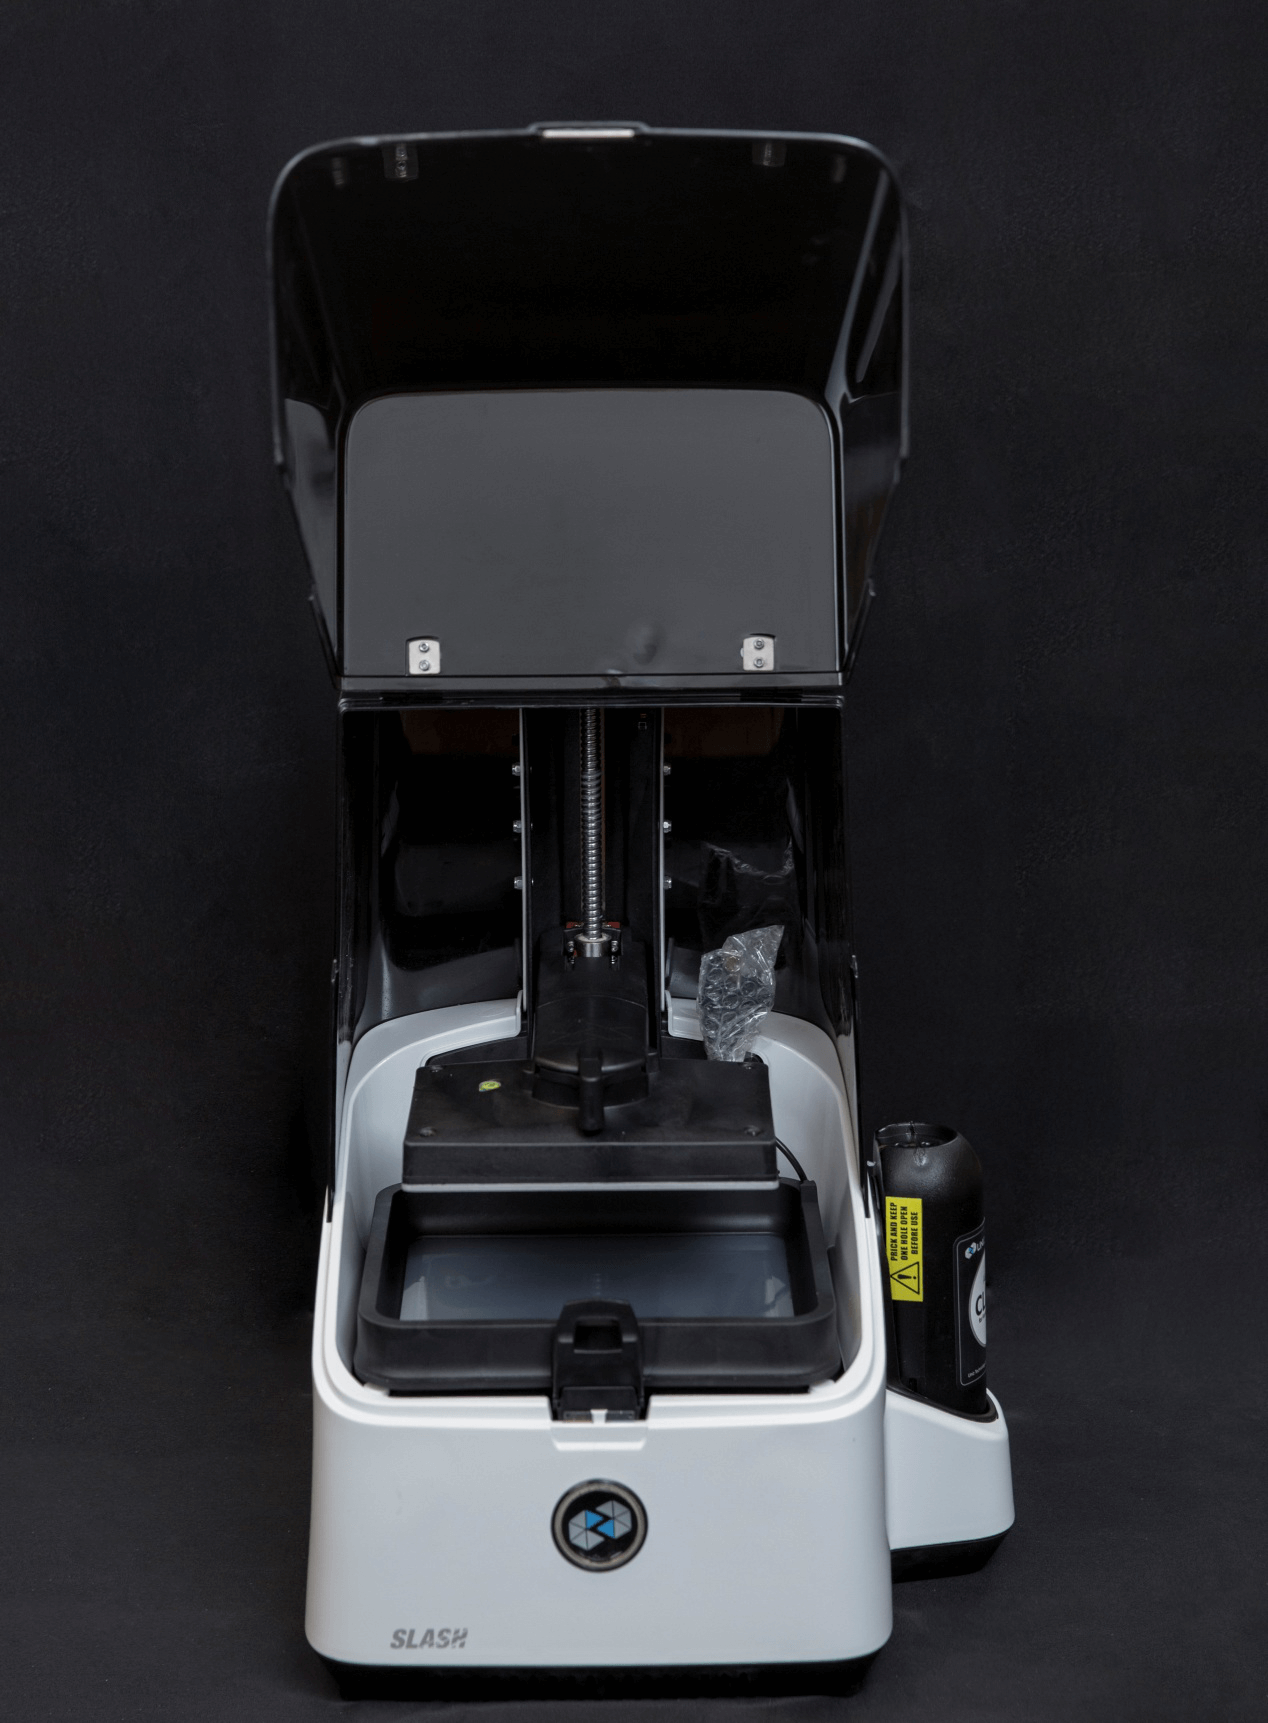
Please keep the printer and Build Platform clean during use, resin stuck to the printer exterior surface may be cured by ambient light and cause unnecessary damage.
3. Cleaning Build Platform and Resin Tank
(1)Debris on the Build Platform: Leftovers of failed prints may stuck to the build platform. Remove the Build Platform from the printer and use the scraper to scrap them off and keep the Build Platform surface flat and clean.
(2)Debris in the Resin Tank:
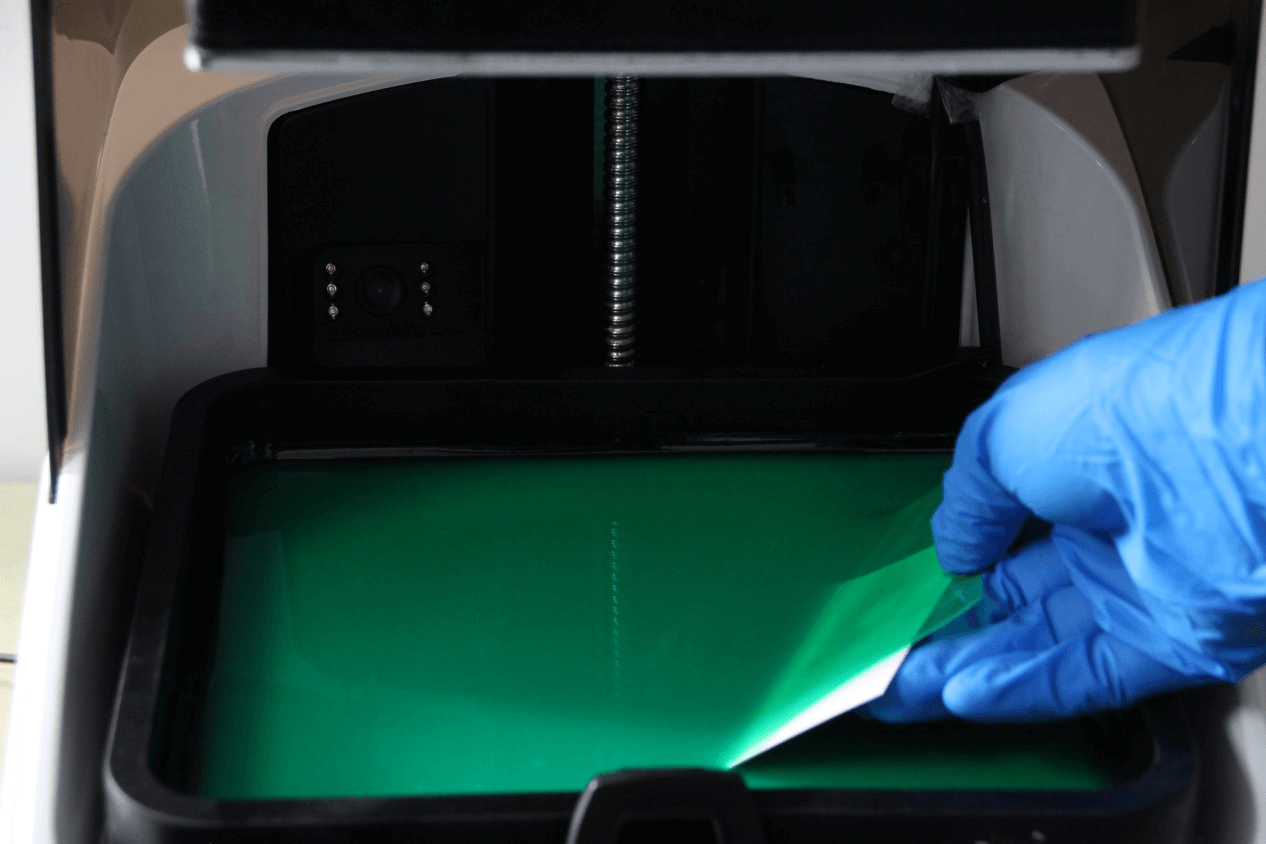
①If there is only one single piece, use the paper card to remove it;
②If there are multiple pieces, use the Clean function in the software to expose the entire printing area to fuse them into one single piece, then remove the piece with the paper card.
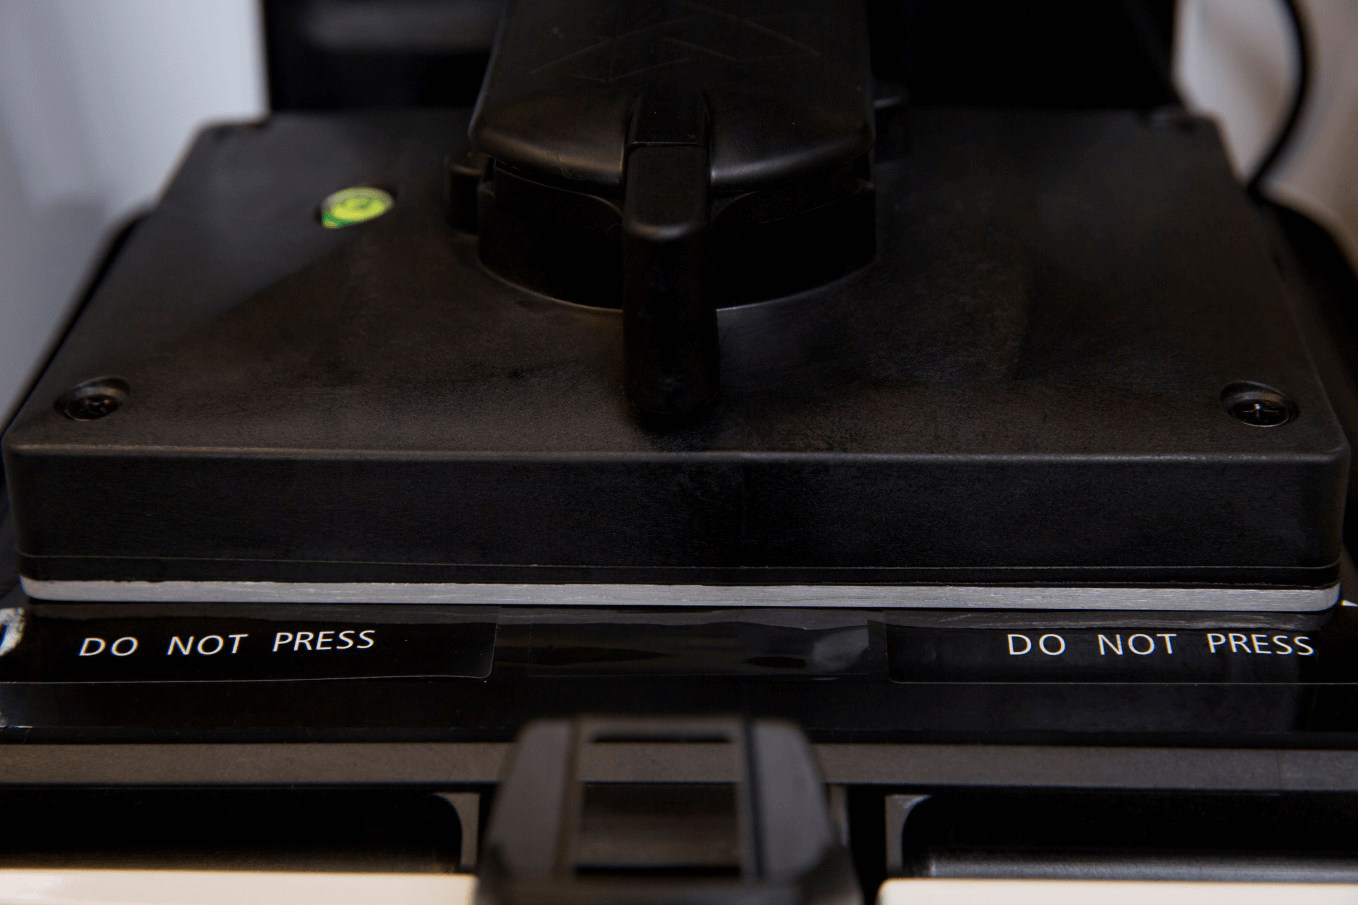
Note: Avoid the “DO NOT PRESS” area when perform the cleaning to prevent damage to the LCD screen.
4.Replacing Resin Tank
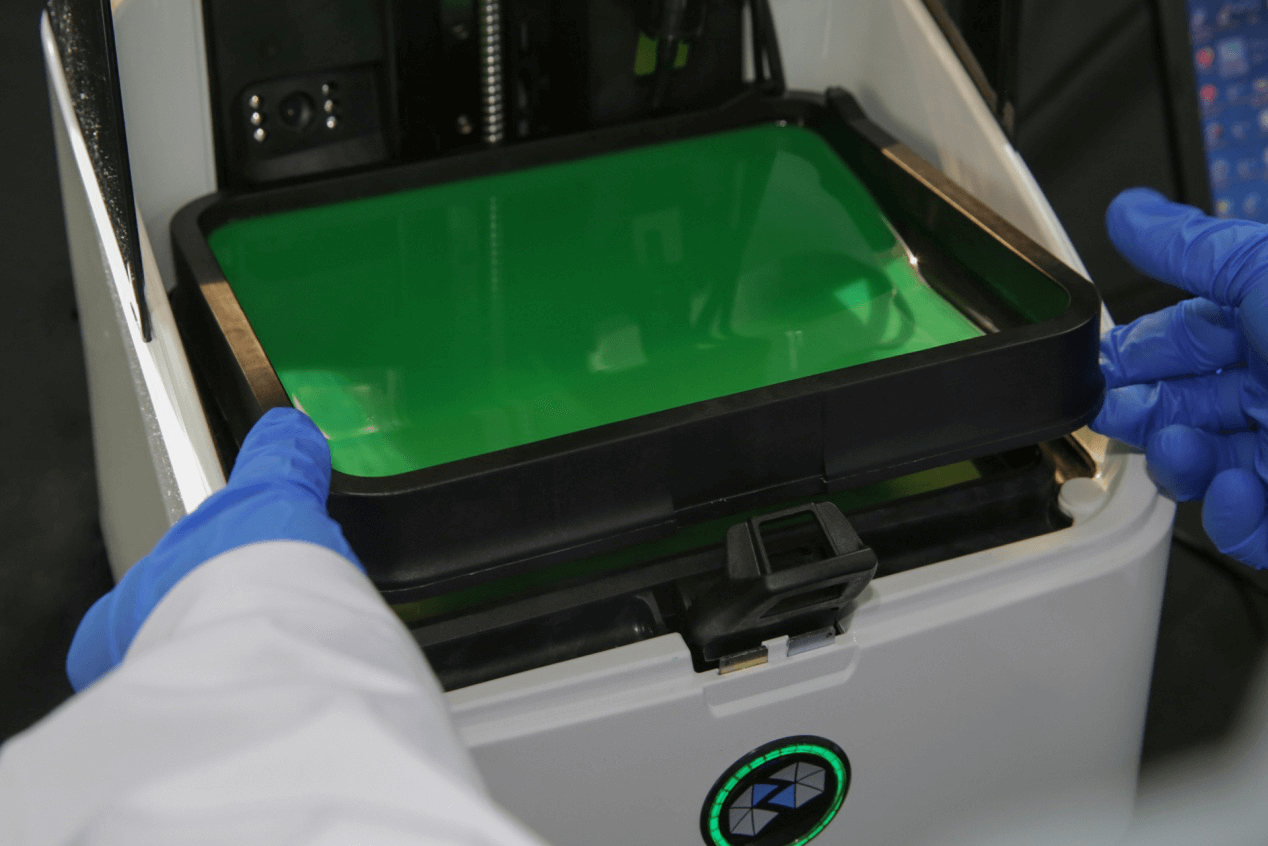
The Resin Tank is considered consumable and has a typical life time of 3000-10000 layers for UDP mode, and 15000-25000 layers for normal mode. Prior to changing the Resin Tank, you may use the Pumping function to pump the unused resin back into the bottle. Remove the Resin Level Sensor.
(1)Remove Resin Level Sensor;
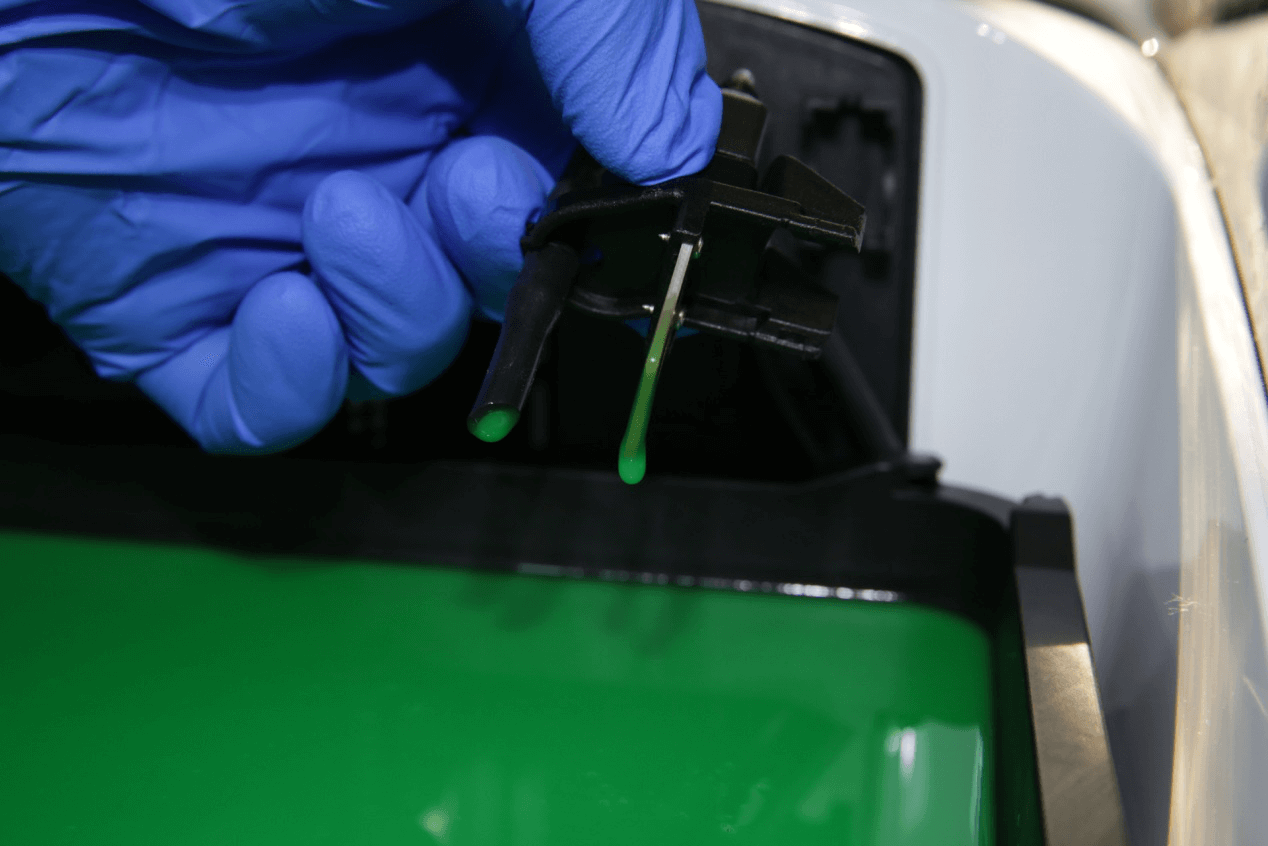
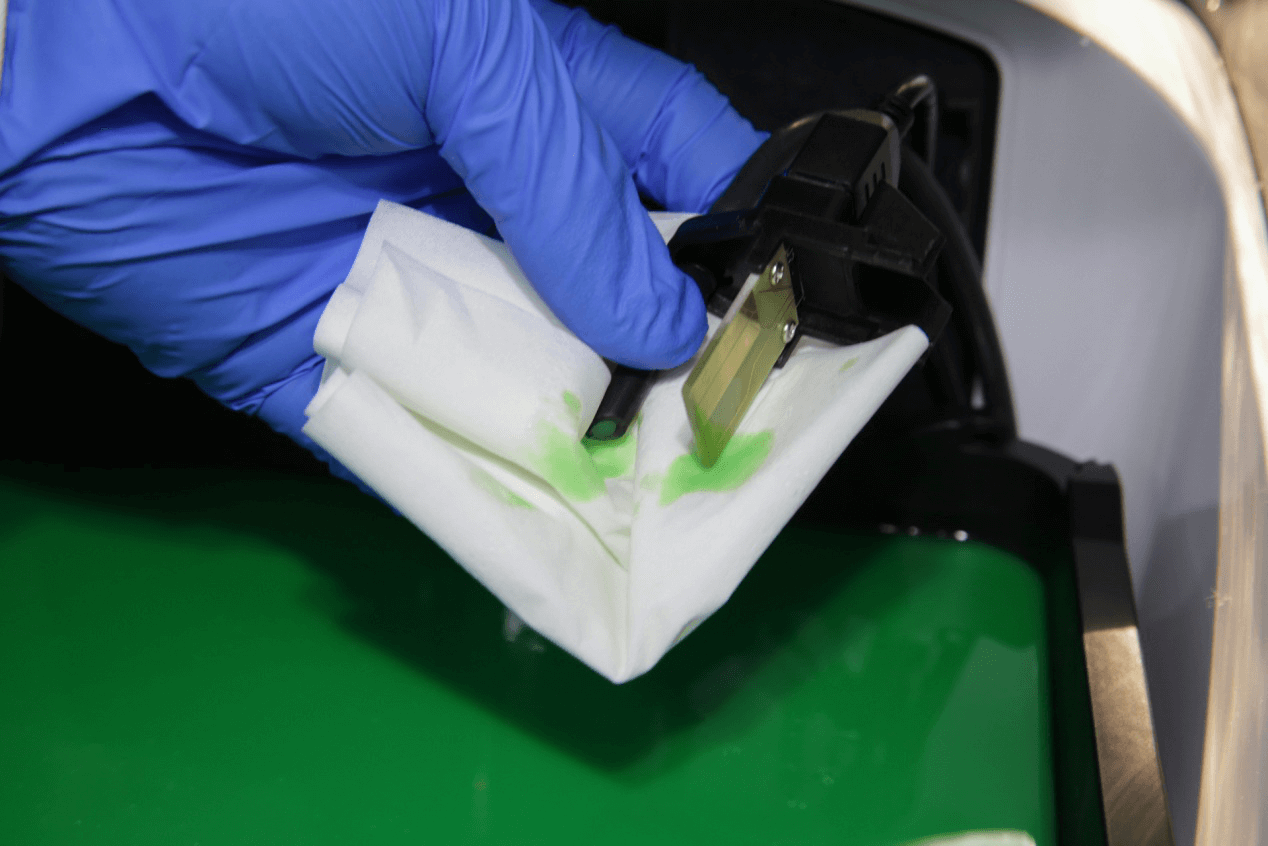
(2)Clean residue resin on the Sensor;
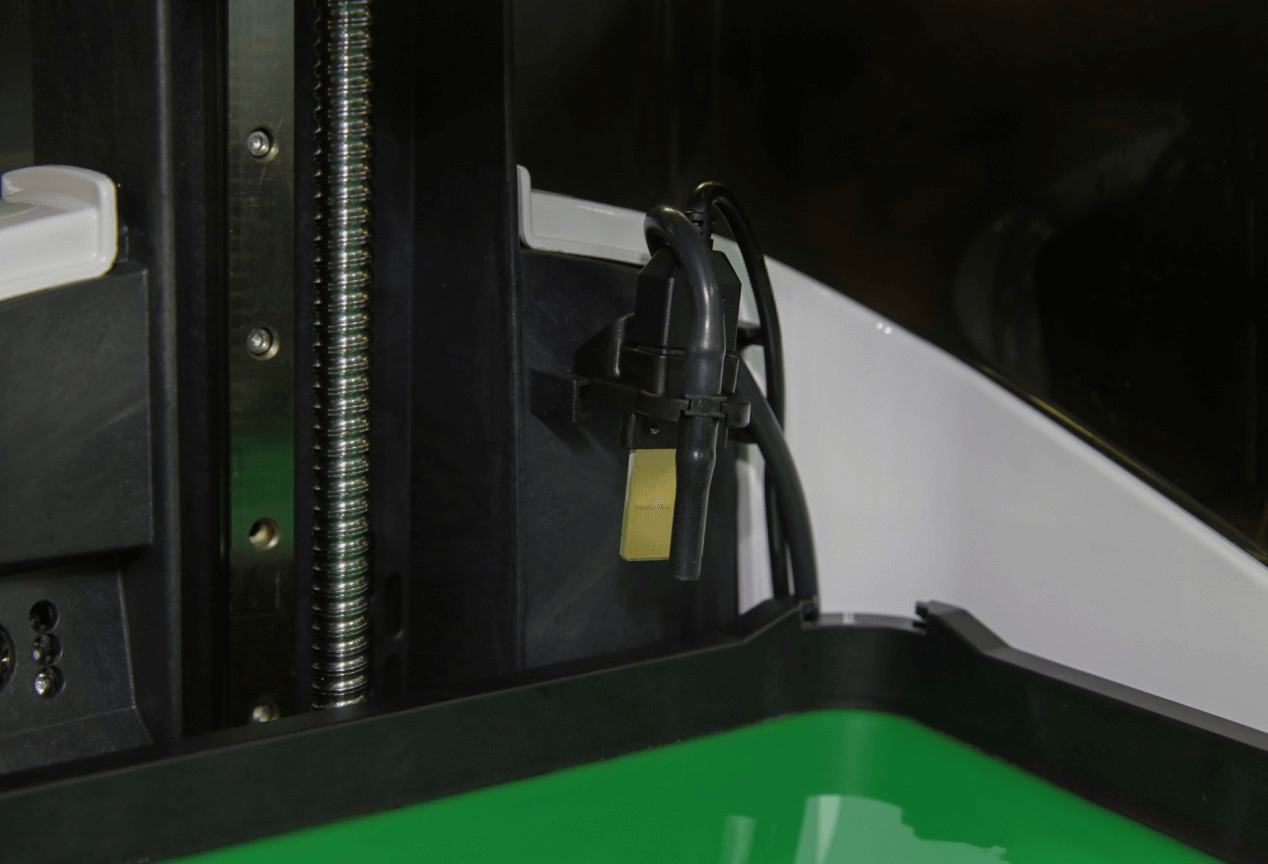
(3)Fix the Sensor on the Sensor rest;
(4)Open Resin Tank Lock;
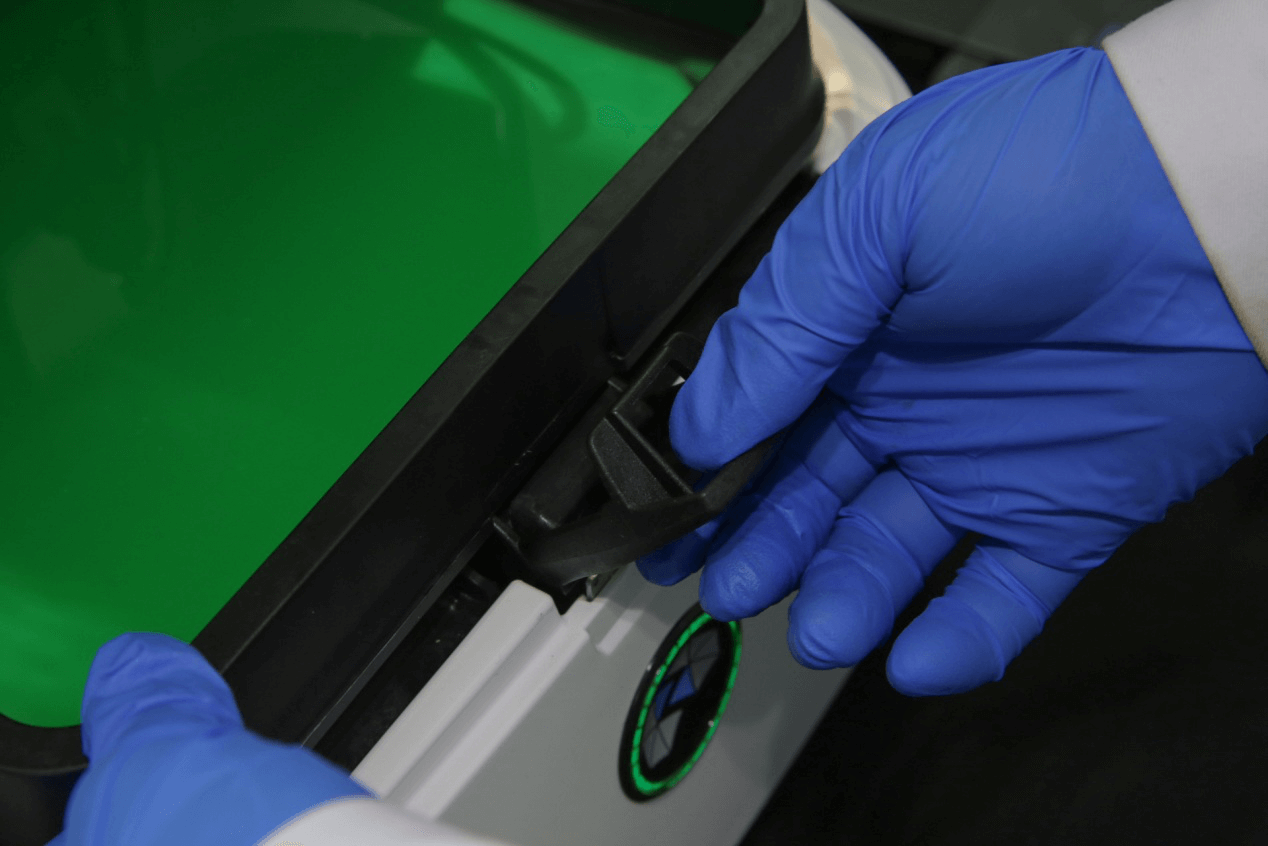
(5)Tilt the Resin Tank for 30°~40° to unlock the rear hatch,and lift it away from the printer.
5.Storage of Resin Tank
The Resin is light sensitive. For long term storage, it is recommended to pump it back into the bottle. For short term storage, resin may be stored in the Resin Tank with the Resin Tank Cover to prevent ambient light curing.
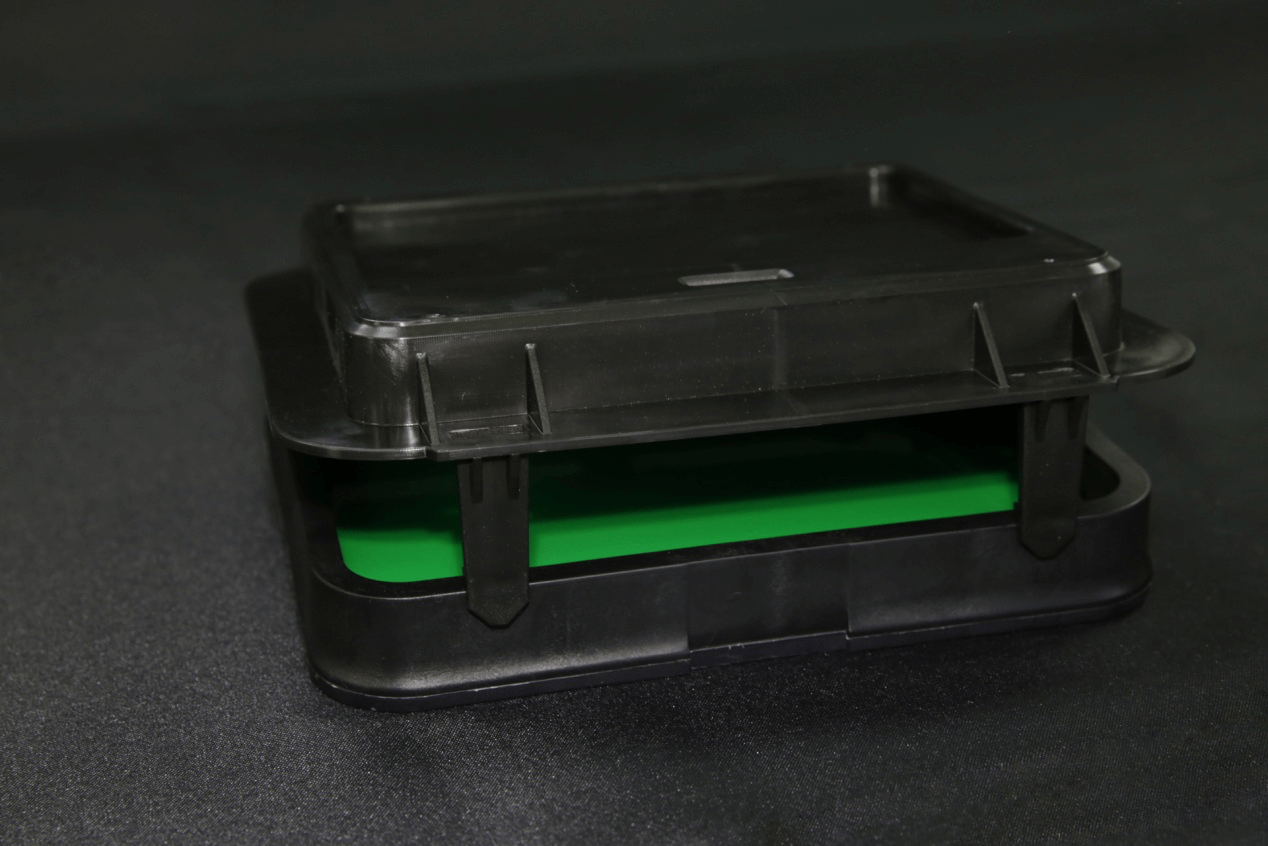
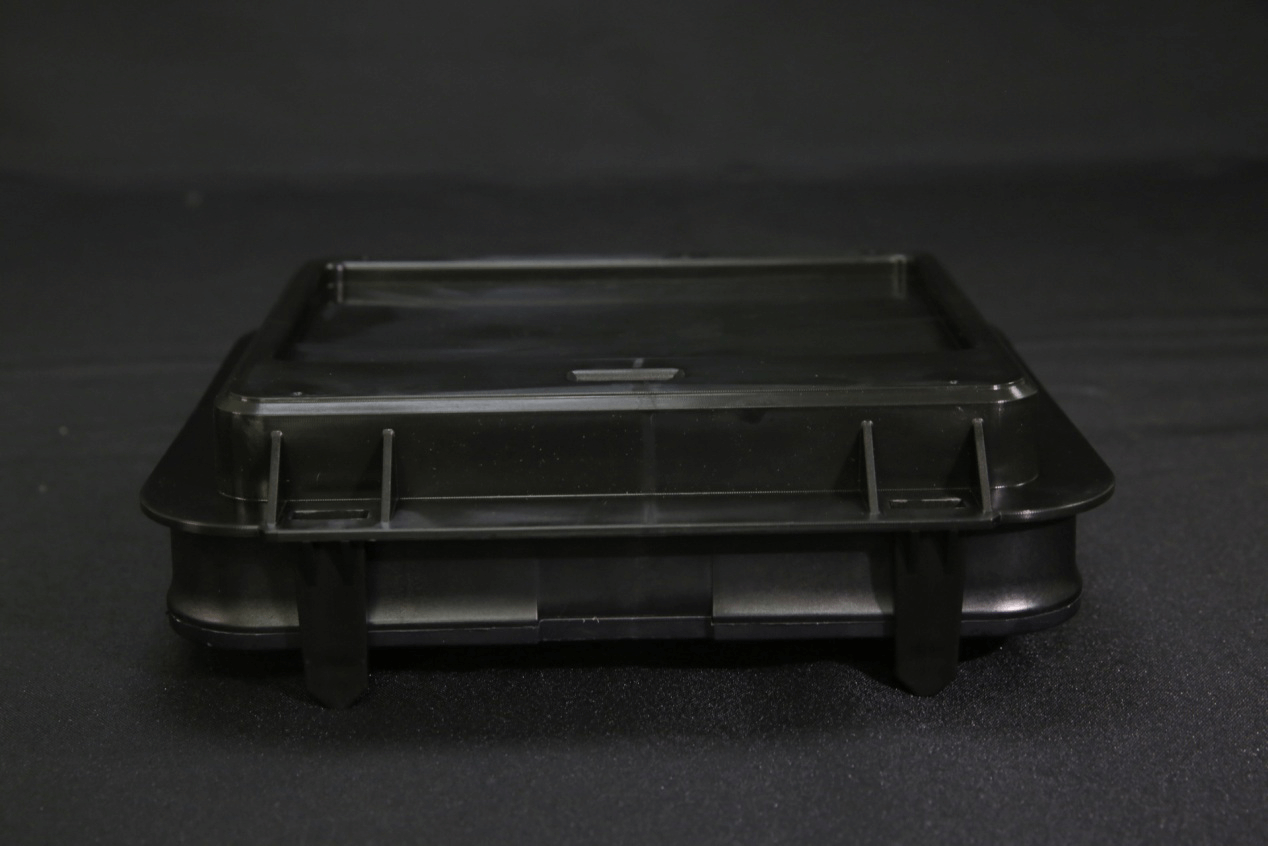
The double legs side should face front, and single leg side should face rear. The cover is in place when you hear a click, and it will be spill proof but not leak proof. Always store the covered Resin Tank horizontally.
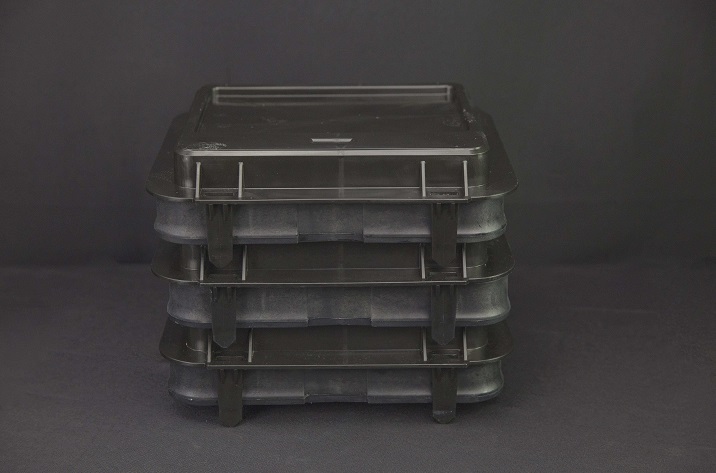
Covered Resin Tanks can be stacked to save space.
6.Sanding of Build Platform
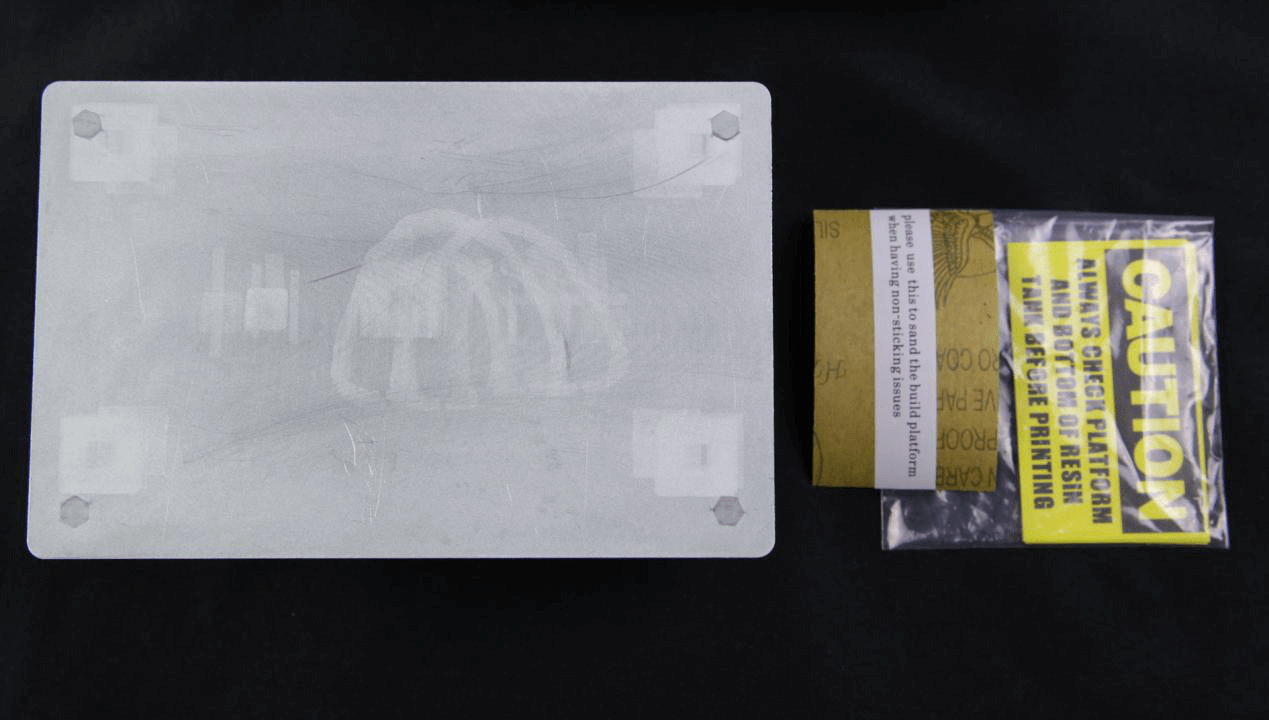
After certain period of time, the Build Platform may need sanding to improve adhesion with the first a few burn-in layers.
(1)Tools needed: Sand Paper ×1;
(2)Steps:
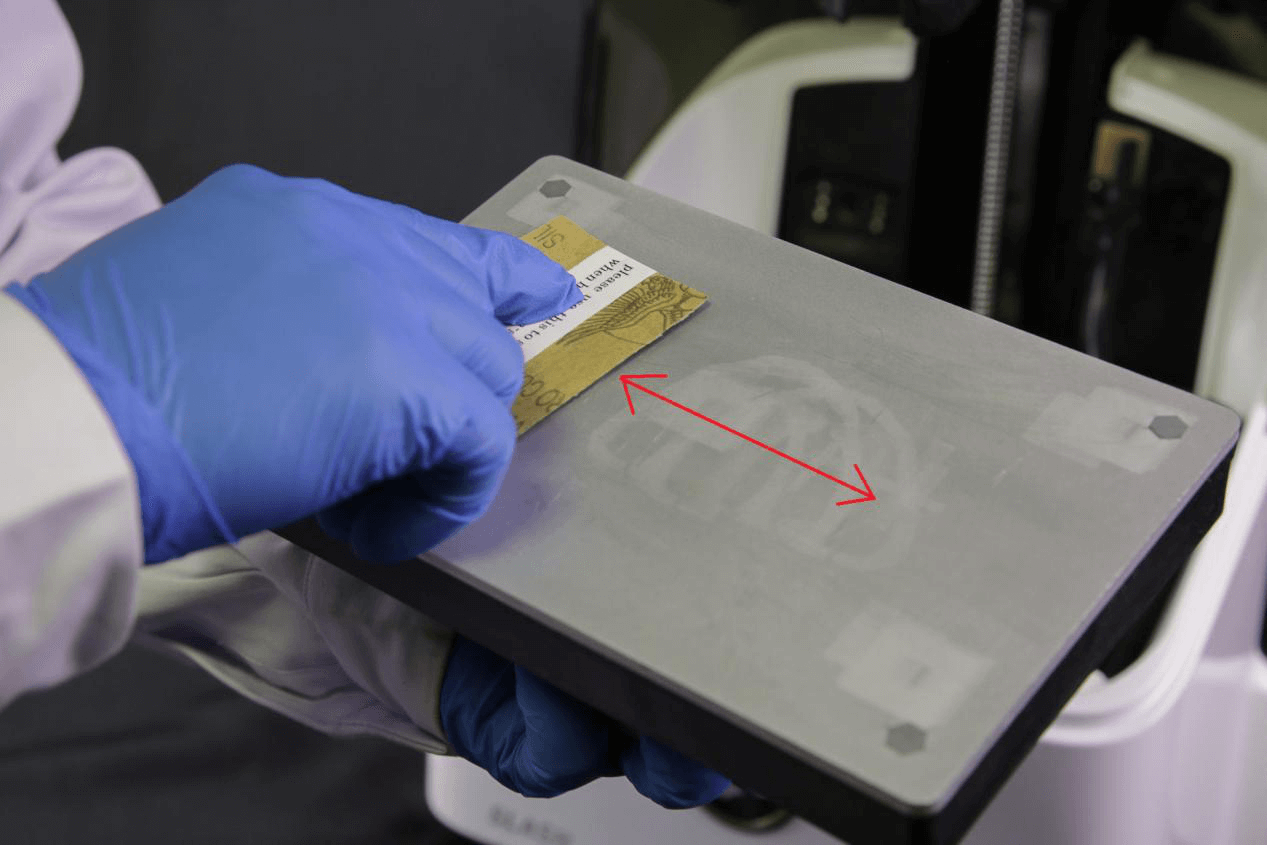
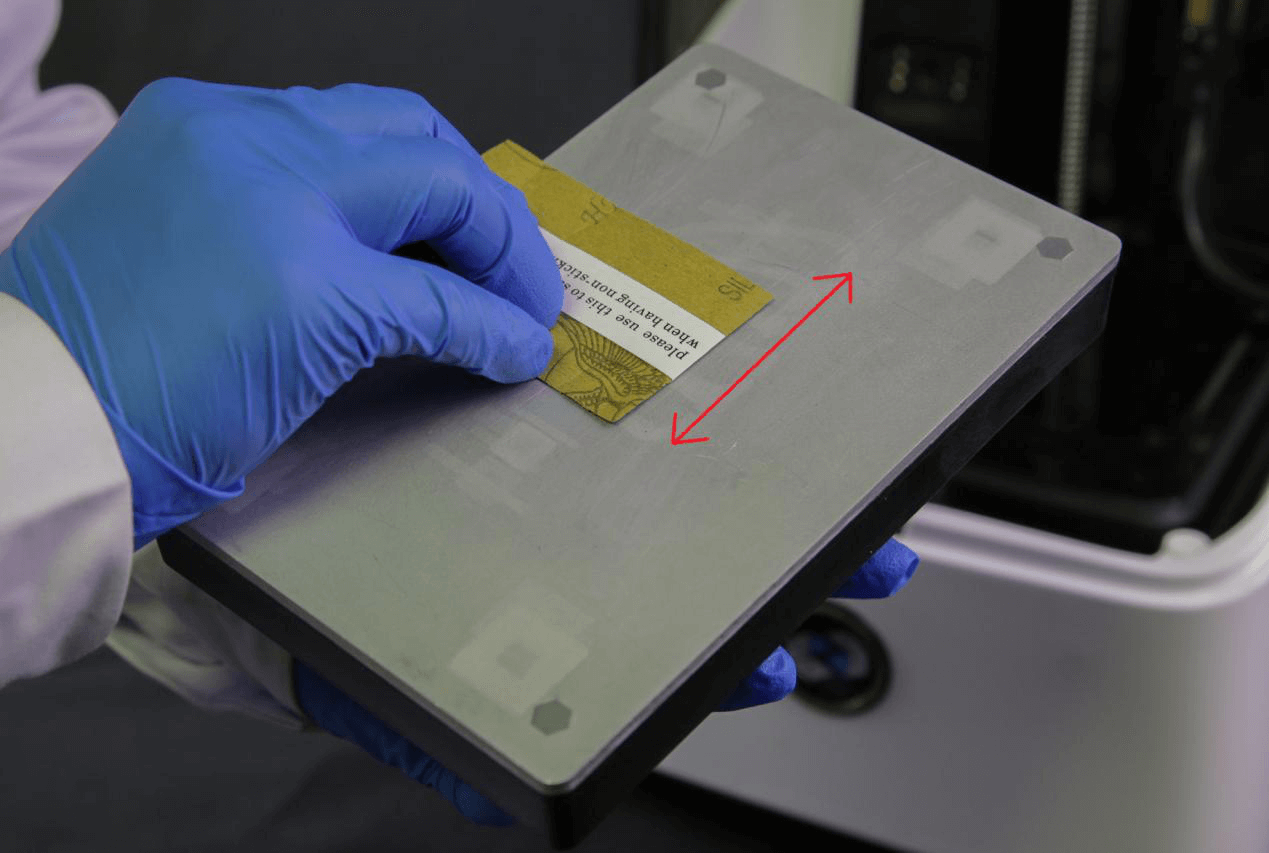
①Use the sand paper to make cross pattern on the platform surface to improve surface roughness;
②Use napkins with water or alcohol to clean the surface.
Notes: Sand the surface uniformly, and keep the surface clean. After sanding, re-calibrate Z axis.
7.Replacing LCD Screen
In case the LCD gets damaged and need replacement, please use the following steps:
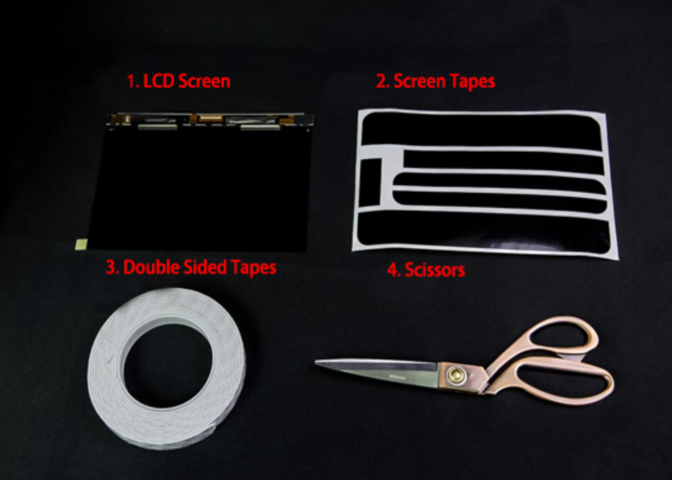
(1)Tools needed:Spare LCD×1,LCD Tapes×1,Double Sided Tapes×1,Scissors×1
(2)Steps:
The LCD screen is sensitive to static electricity, so discharge yourself and make sure you are well grounded before touching the LCD screens.
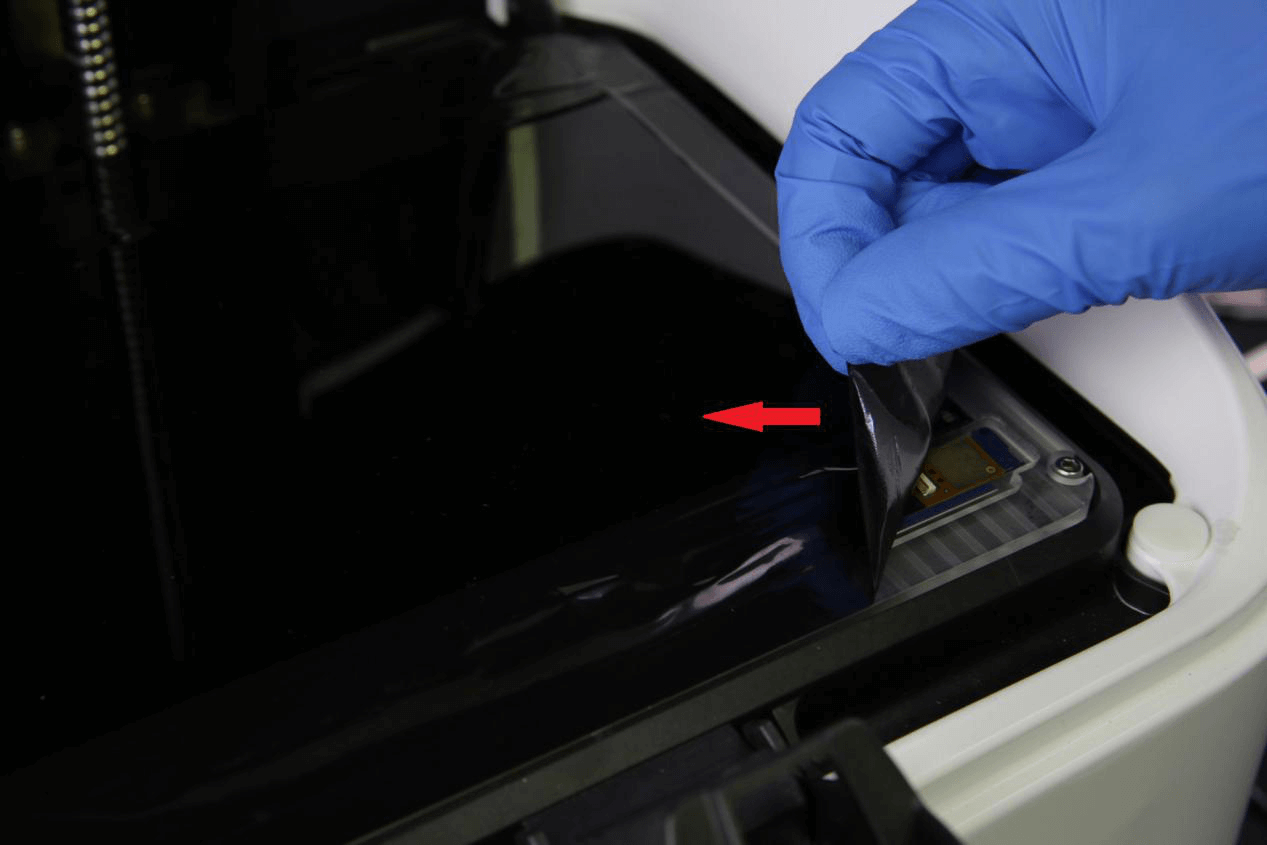
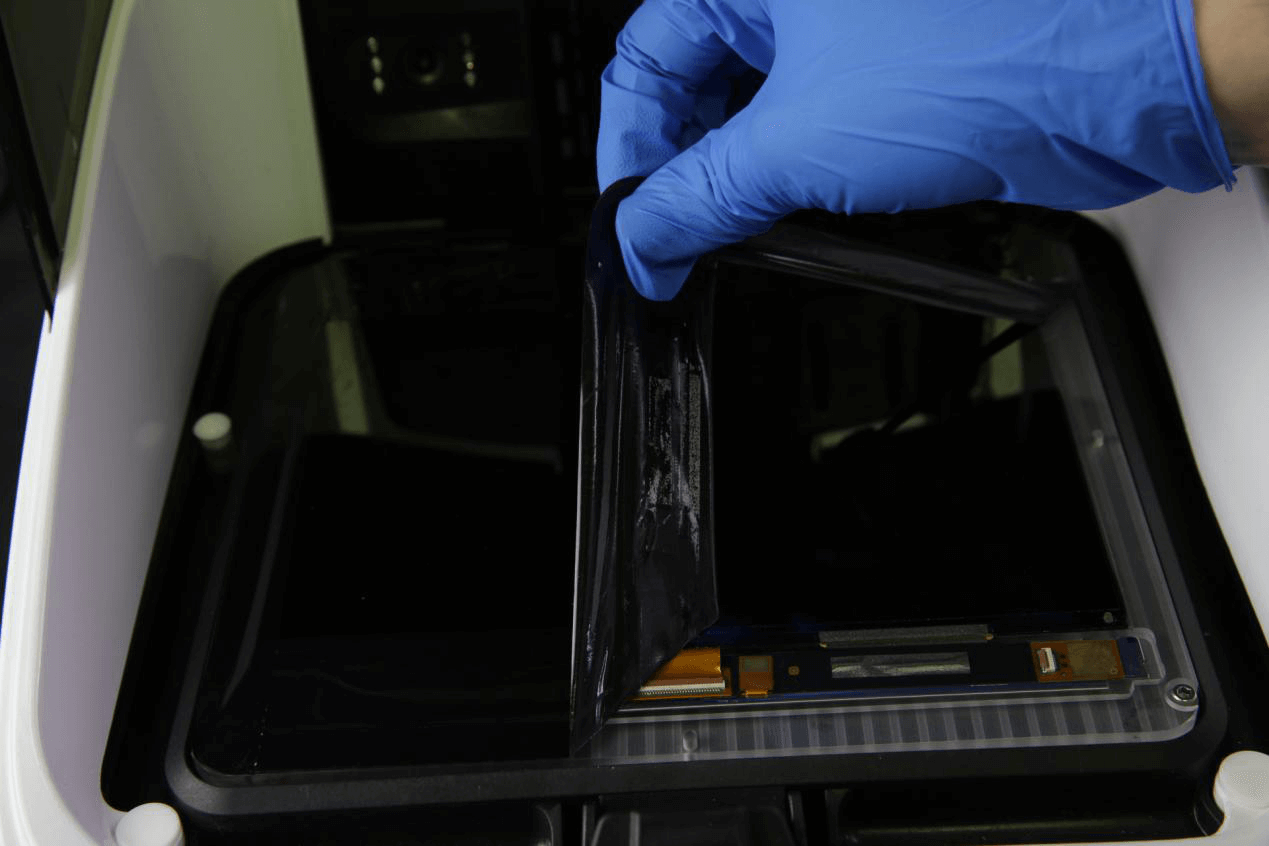
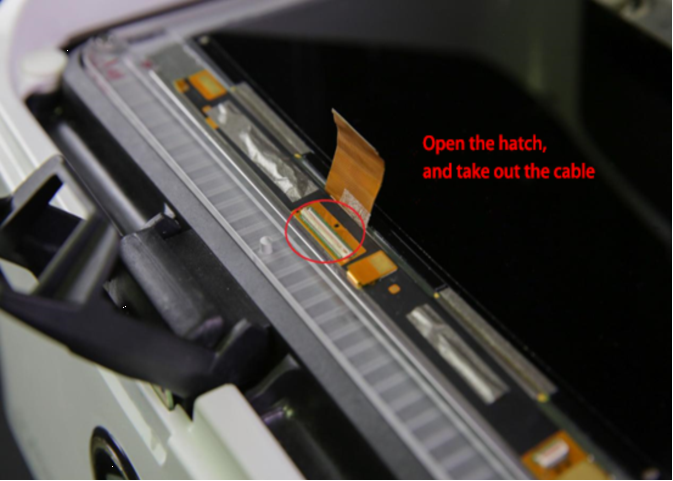
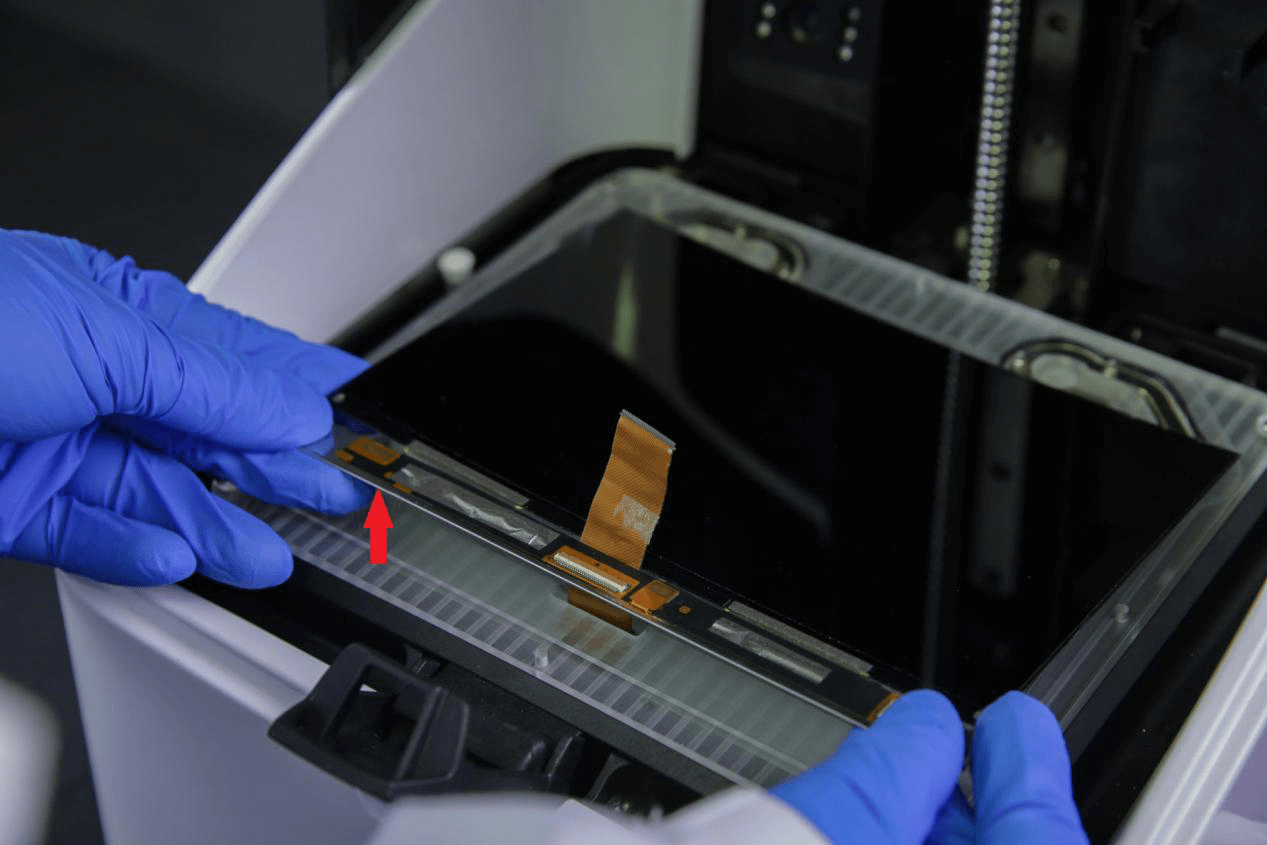
①Take off the damaged LCD:Start peeling off the old tapes from right bottom side, then open the LCD cable hatch, take out LCD cable;
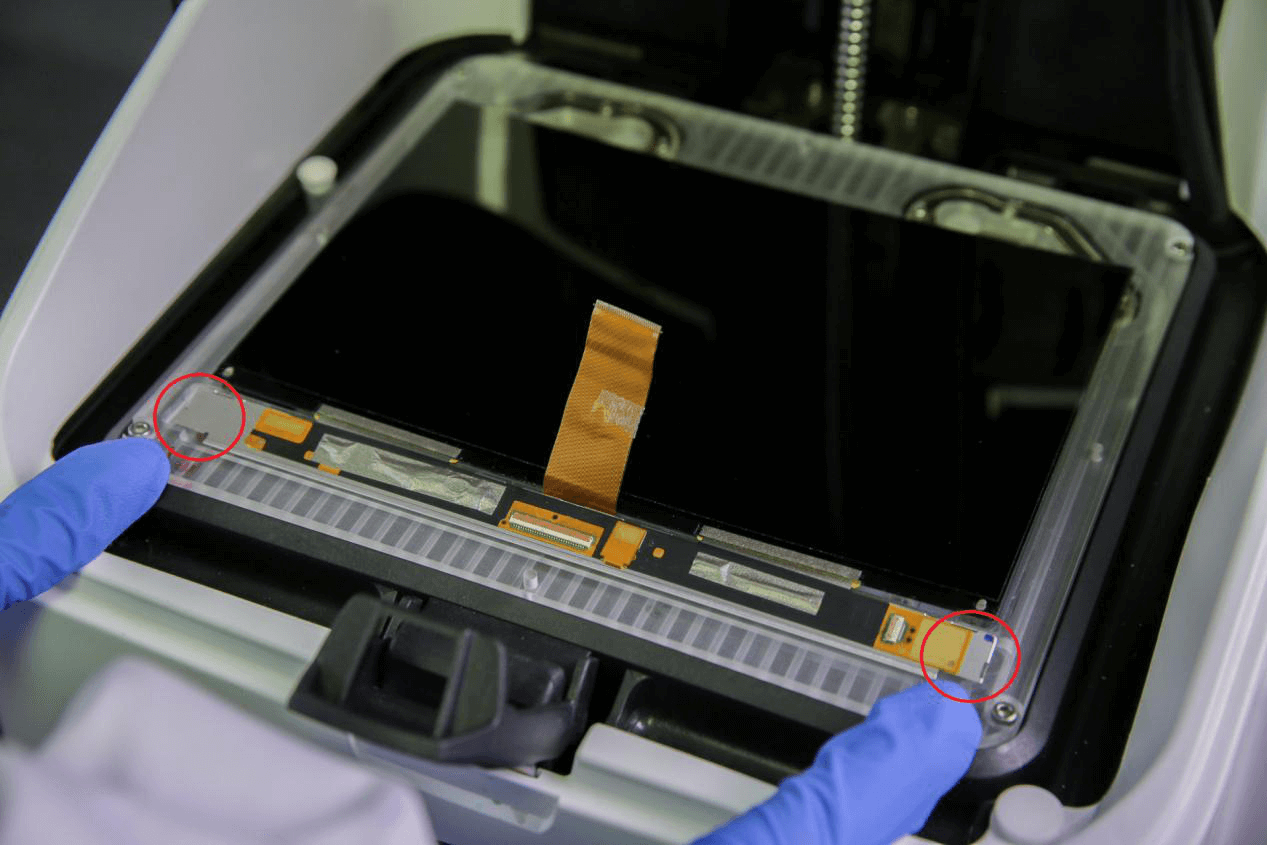
②Lift off the double sided tapes beneath the LCD, and peel the LCD from the cooling module;
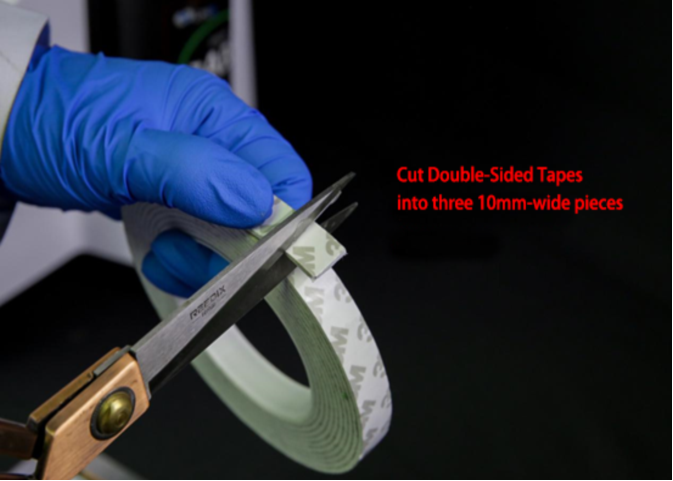
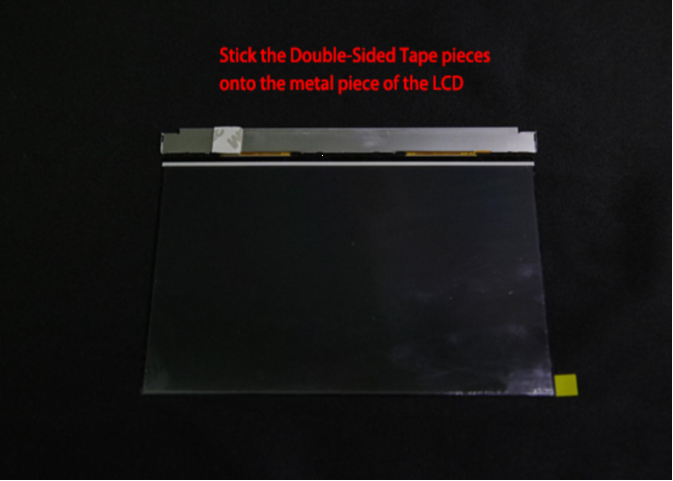
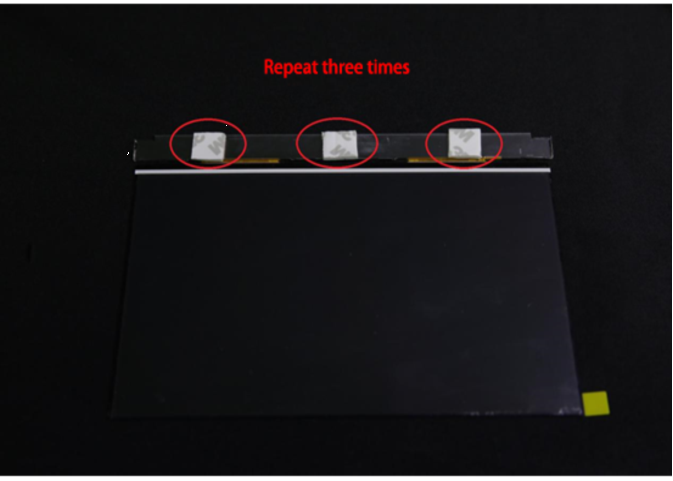
③Cut the double sided tape into three sections with 10mm wide, and stick them on to the metal part of the spare LCD;
④ Push the LCD cable through the hole of cooling module and slot of the LCD metal piece, align the new LCD and stick it on the Cooling Module;
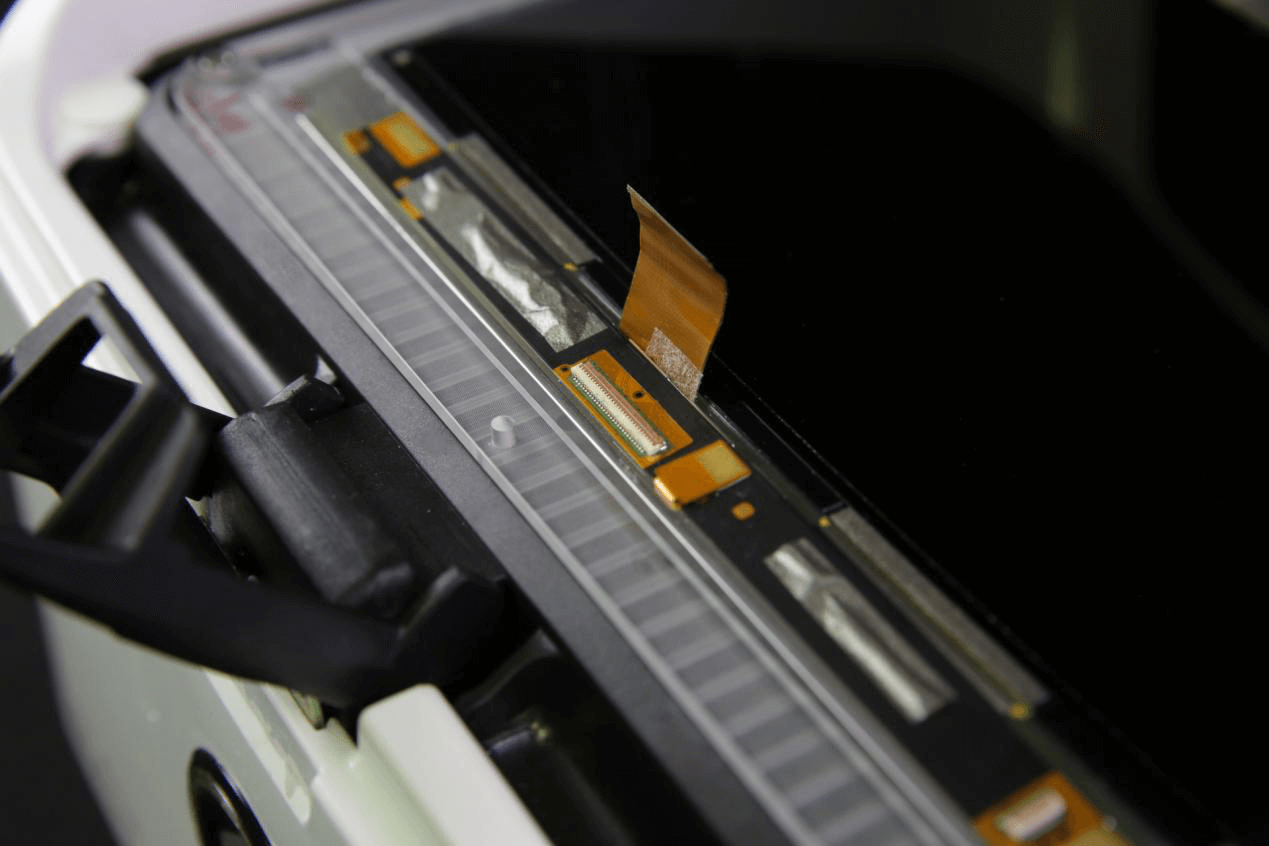
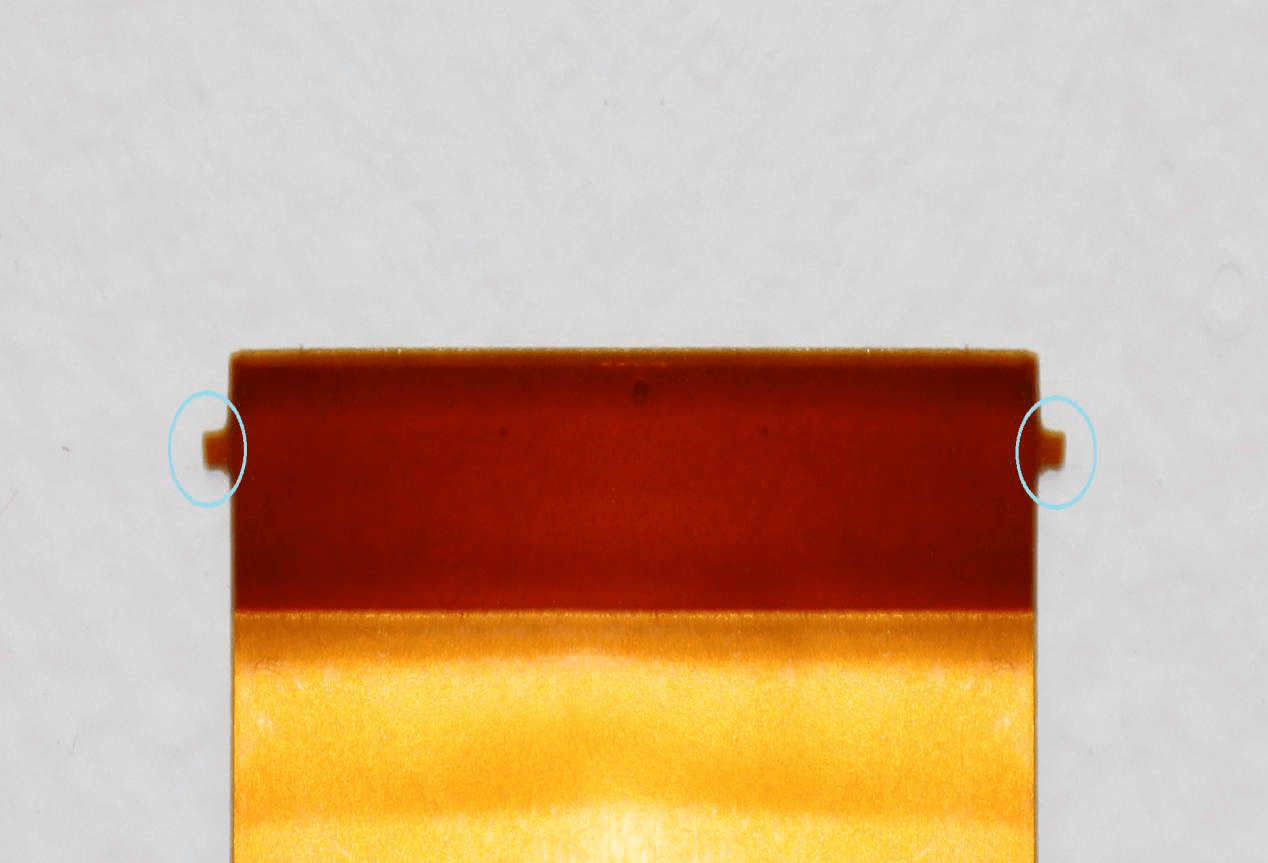
⑤Locate the positioner on the LCD cable;
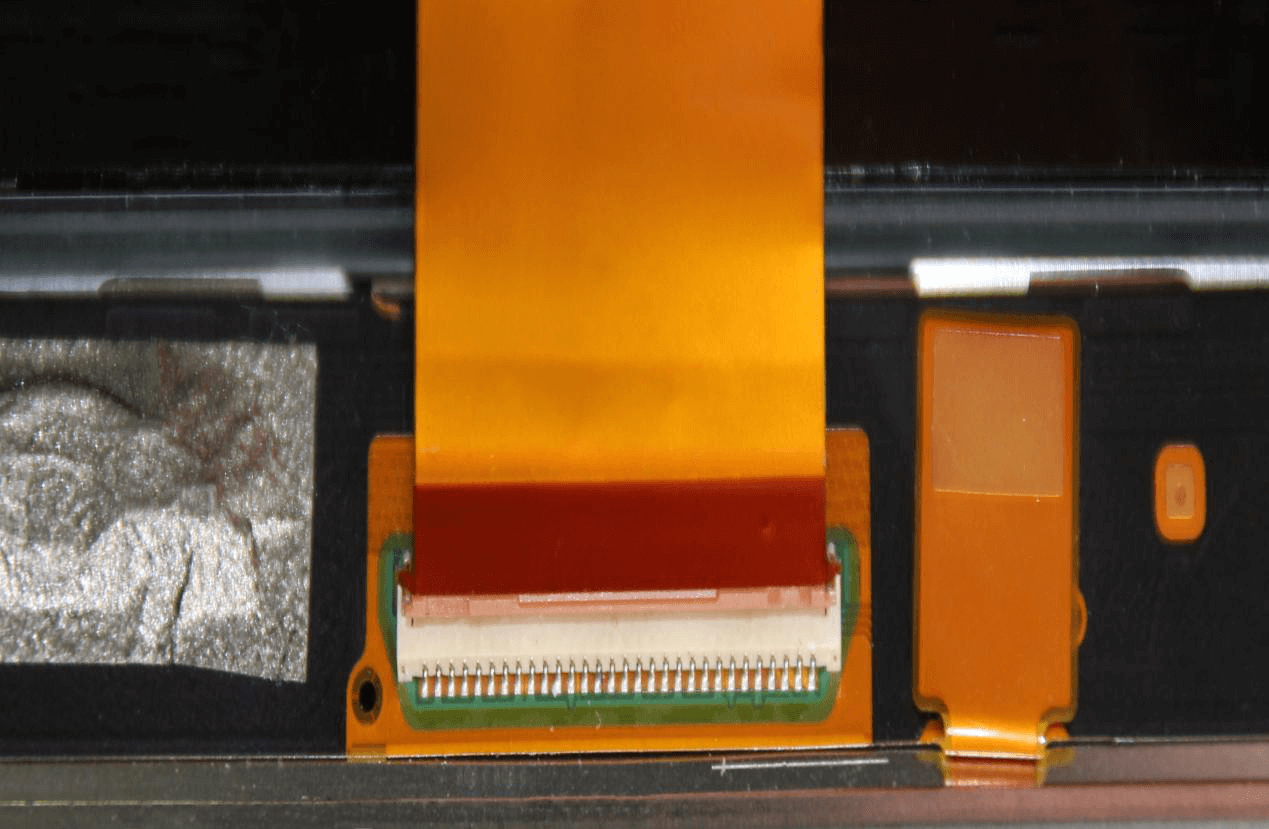
⑥Insert the LCD cable into the hatch, and close the hatch;
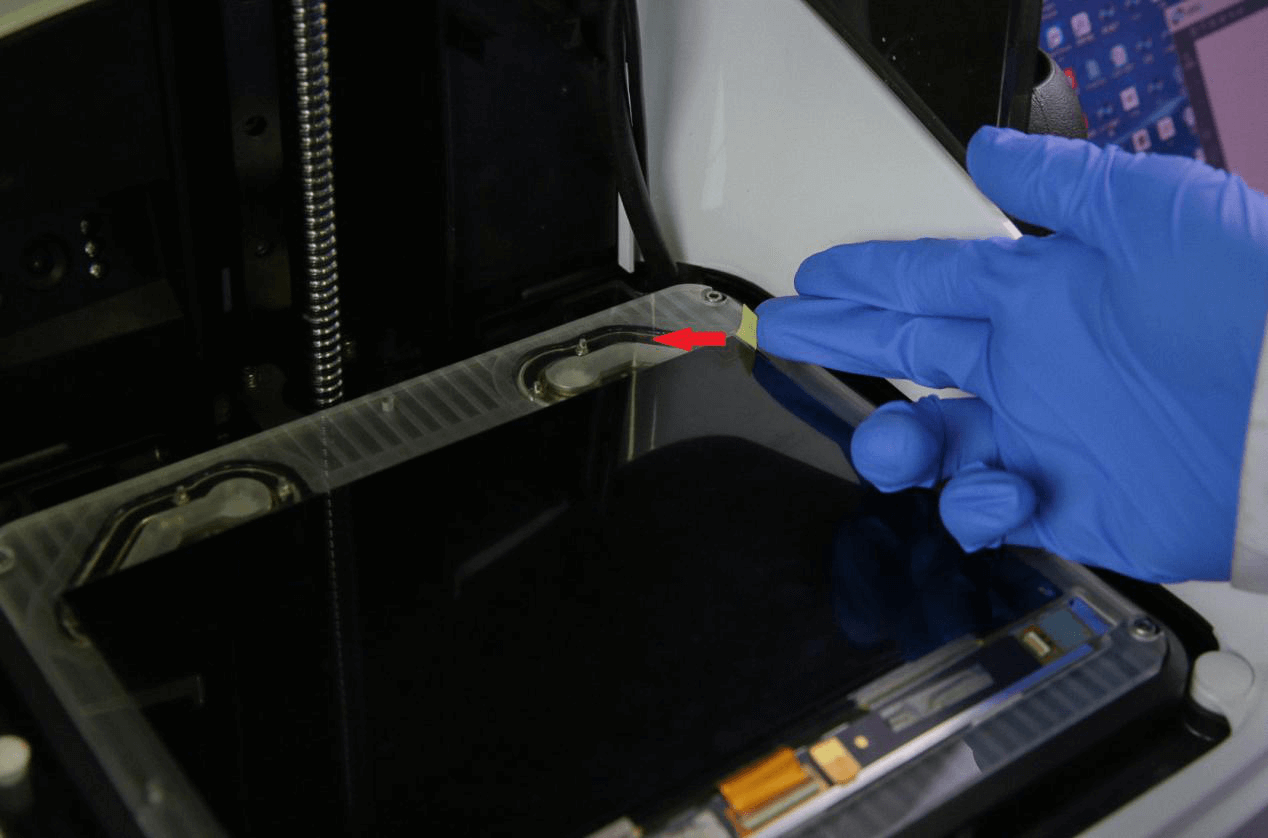
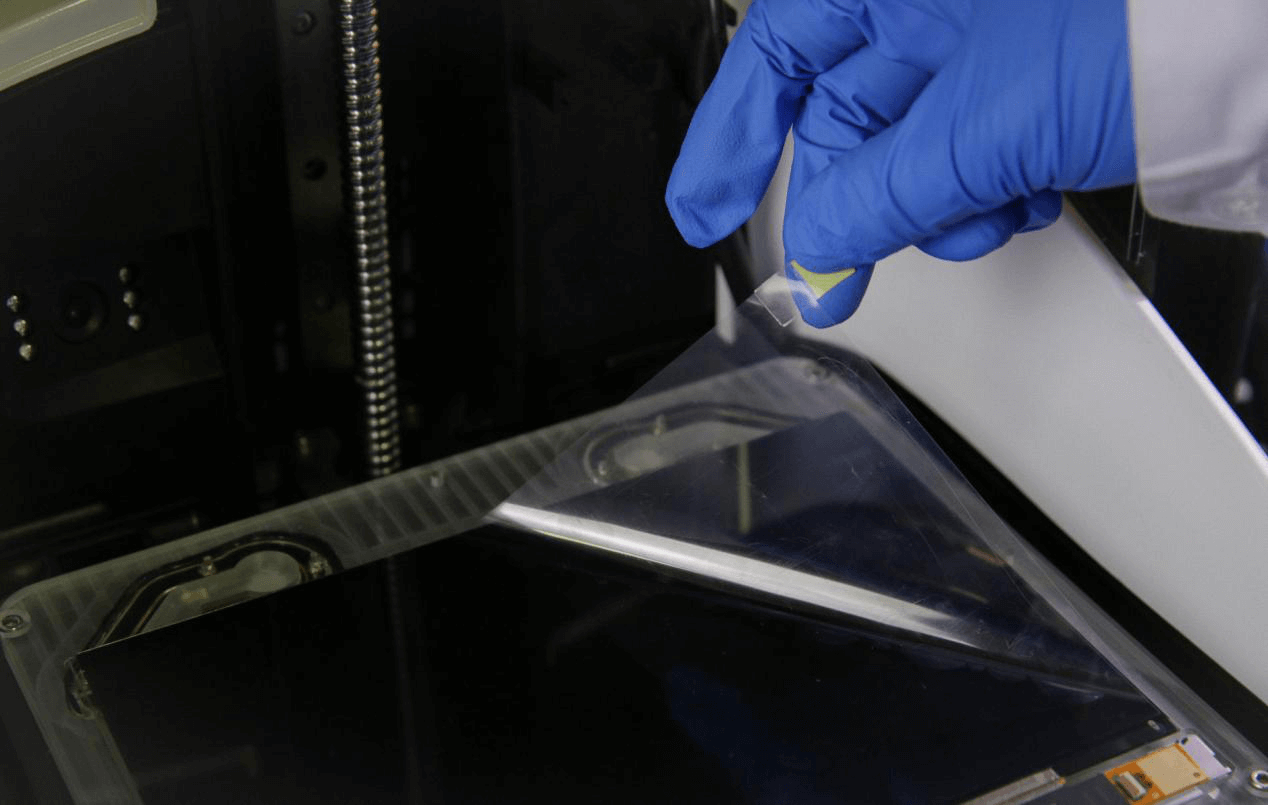
⑦Remove the protective film on the new LCD;
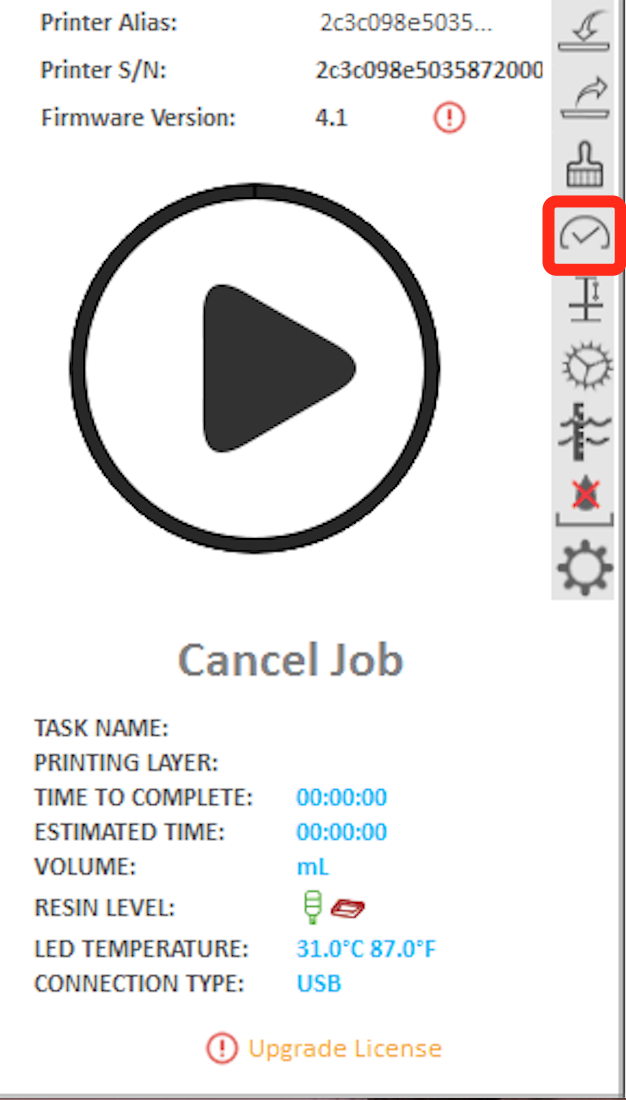
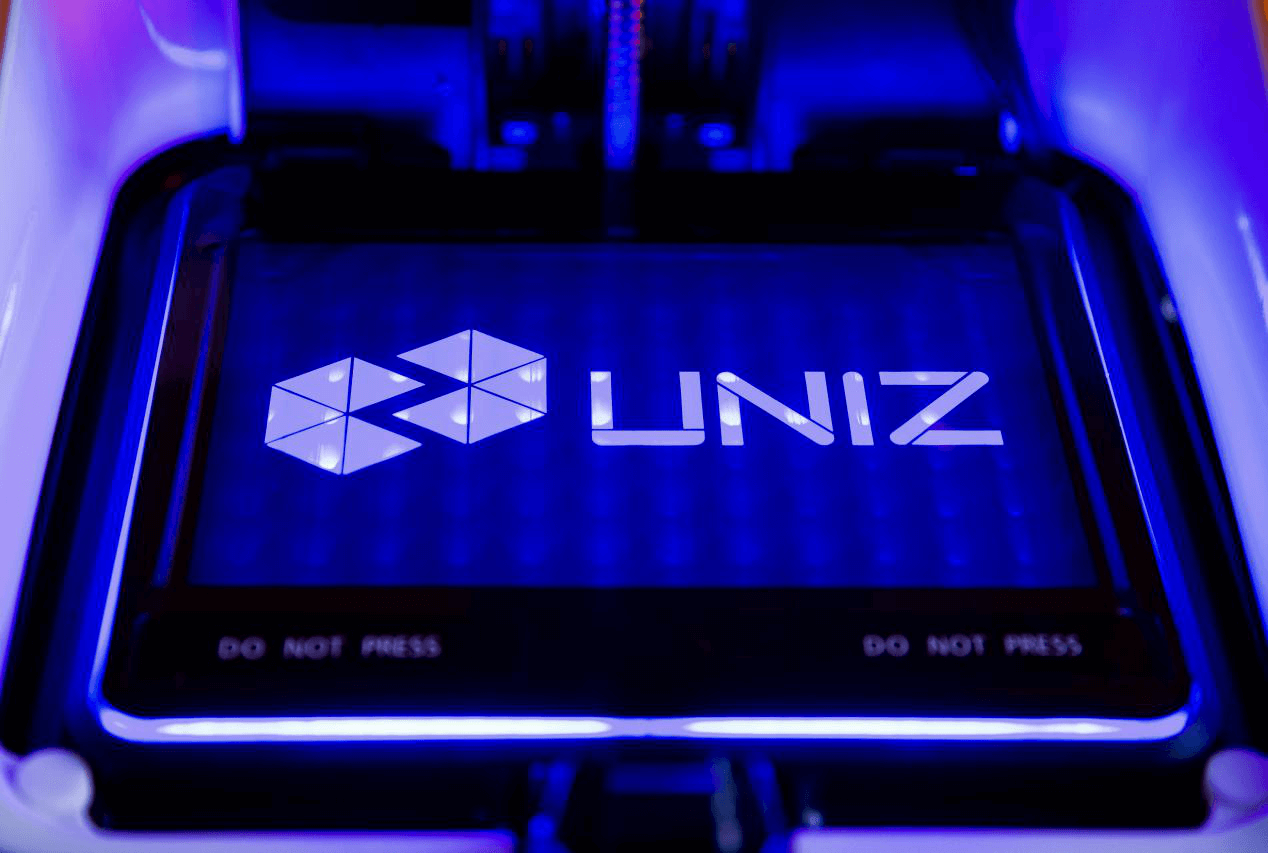
⑧ Power up, and use the software to test the new LCD;
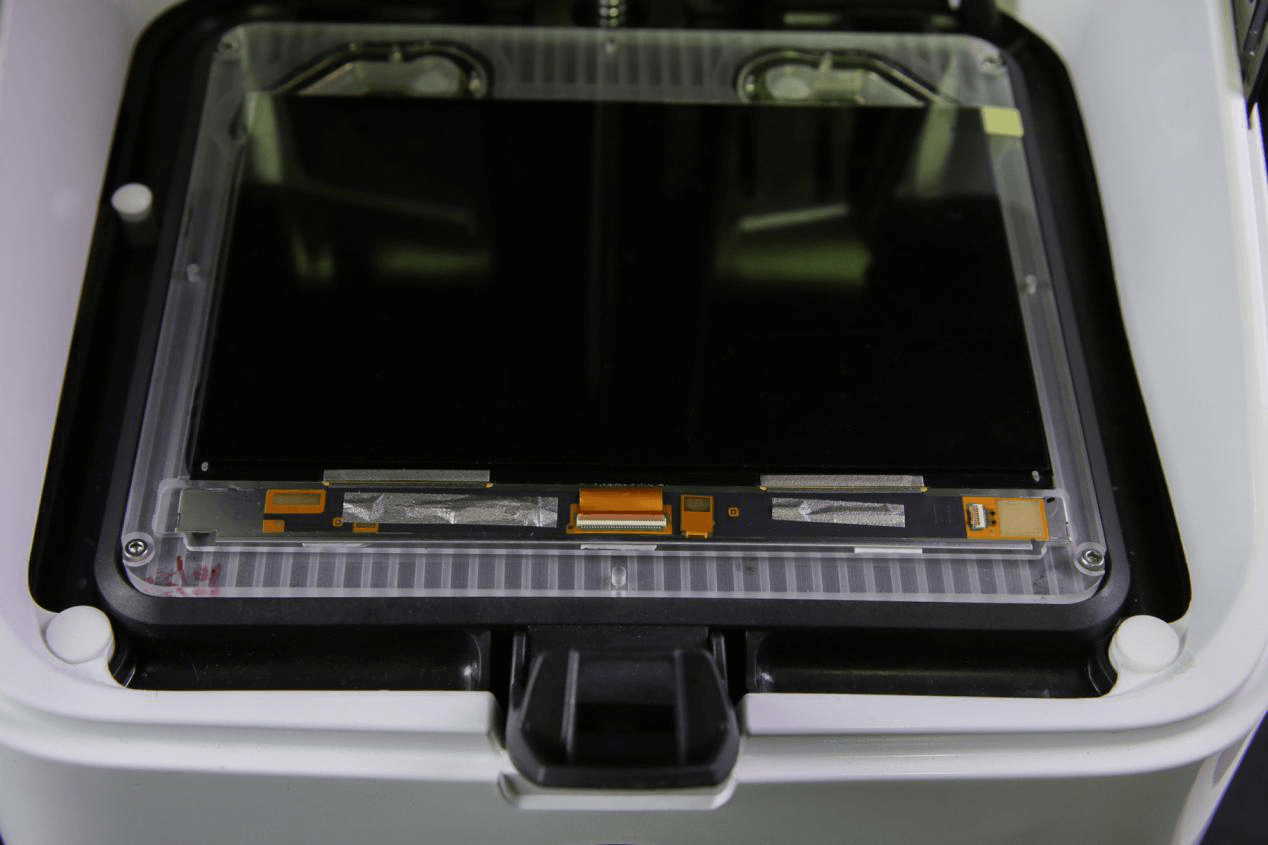
⑨Cover the surrounding of the LCD with screen tapes and the replacement is done.
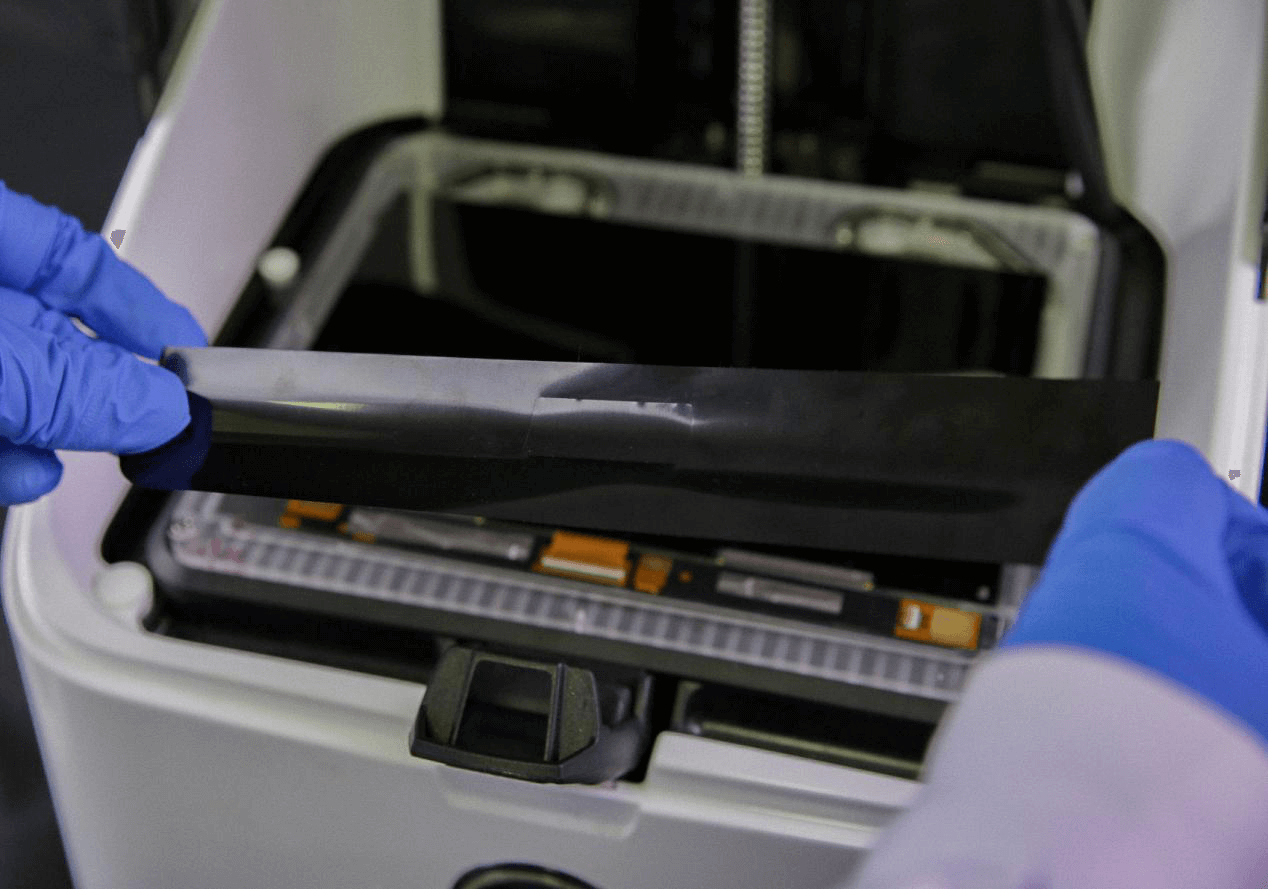
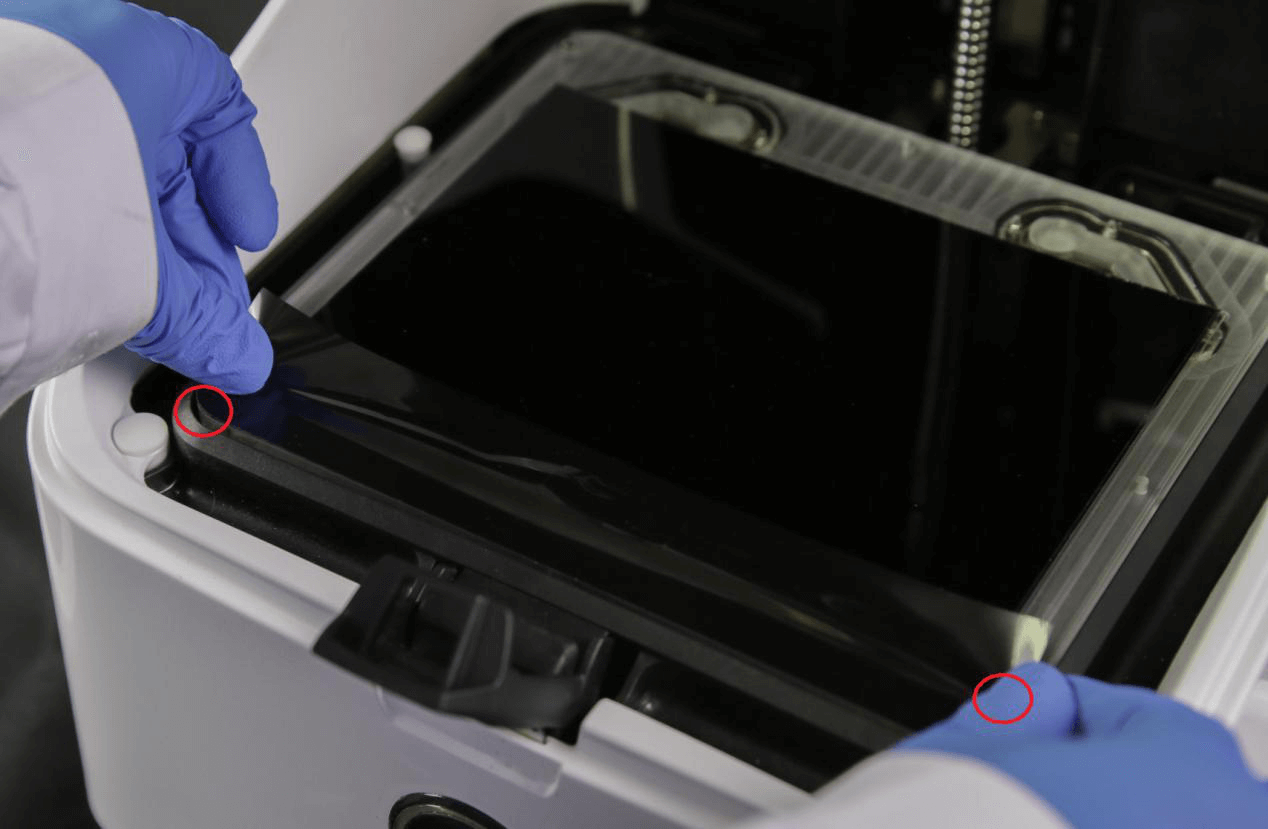
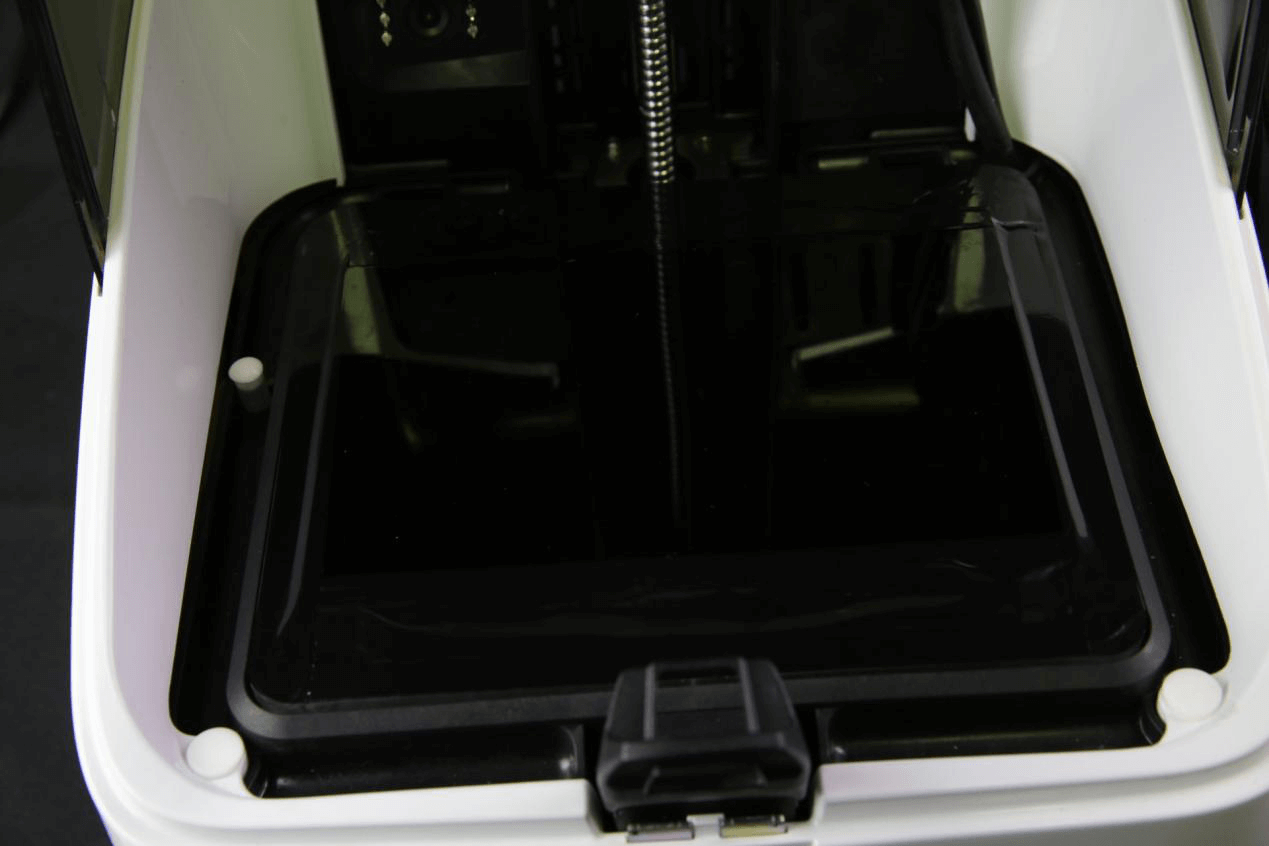
Note: Spare LCD is extremely sensitive to static electricity, always wear grounded electricity wristband when performing the replacement;
New LCD should be tested before sticking to the Cooling Module, and LCD cable must be inserted in place and locked properly by the hatch.
8.Replacing Resin Pump Tube
(1)Tools needed: Spare Peristaltic Pump Tube×1, Scissors×1。
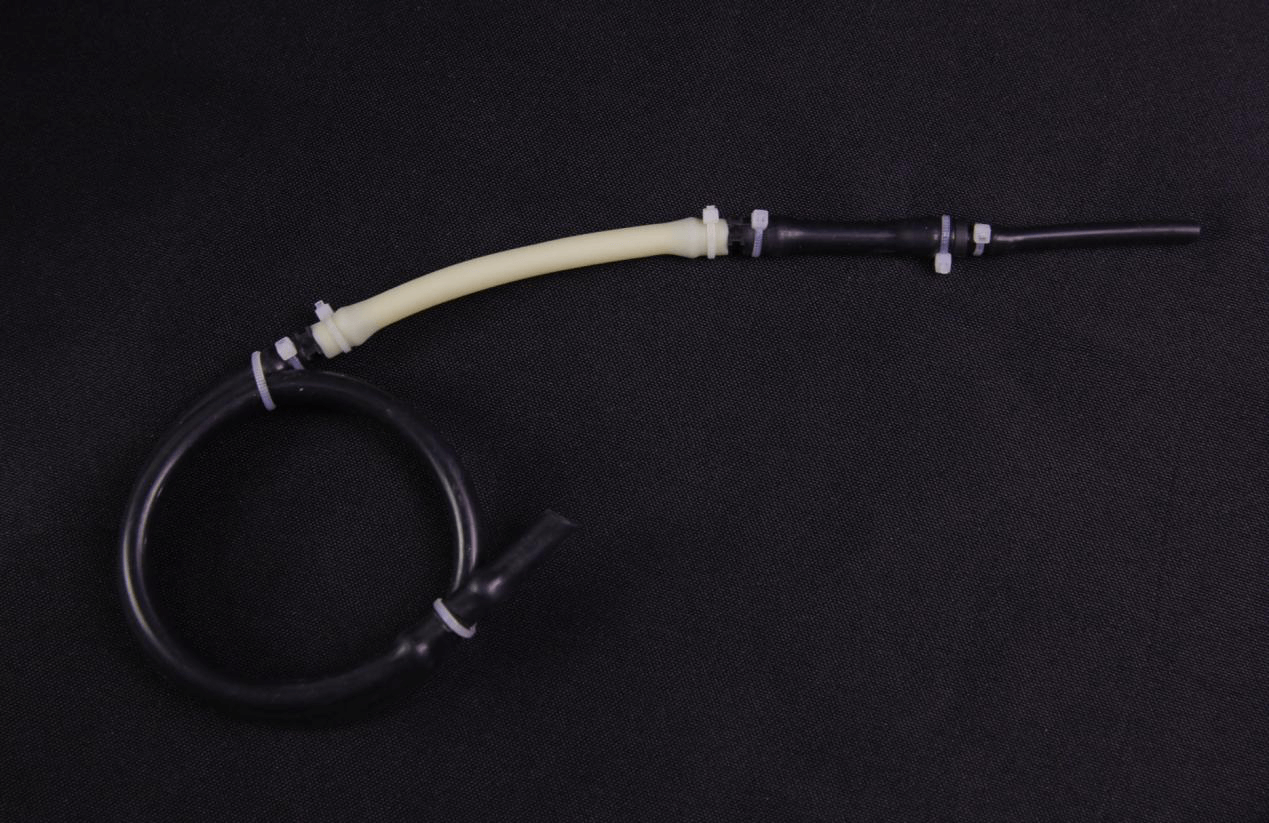
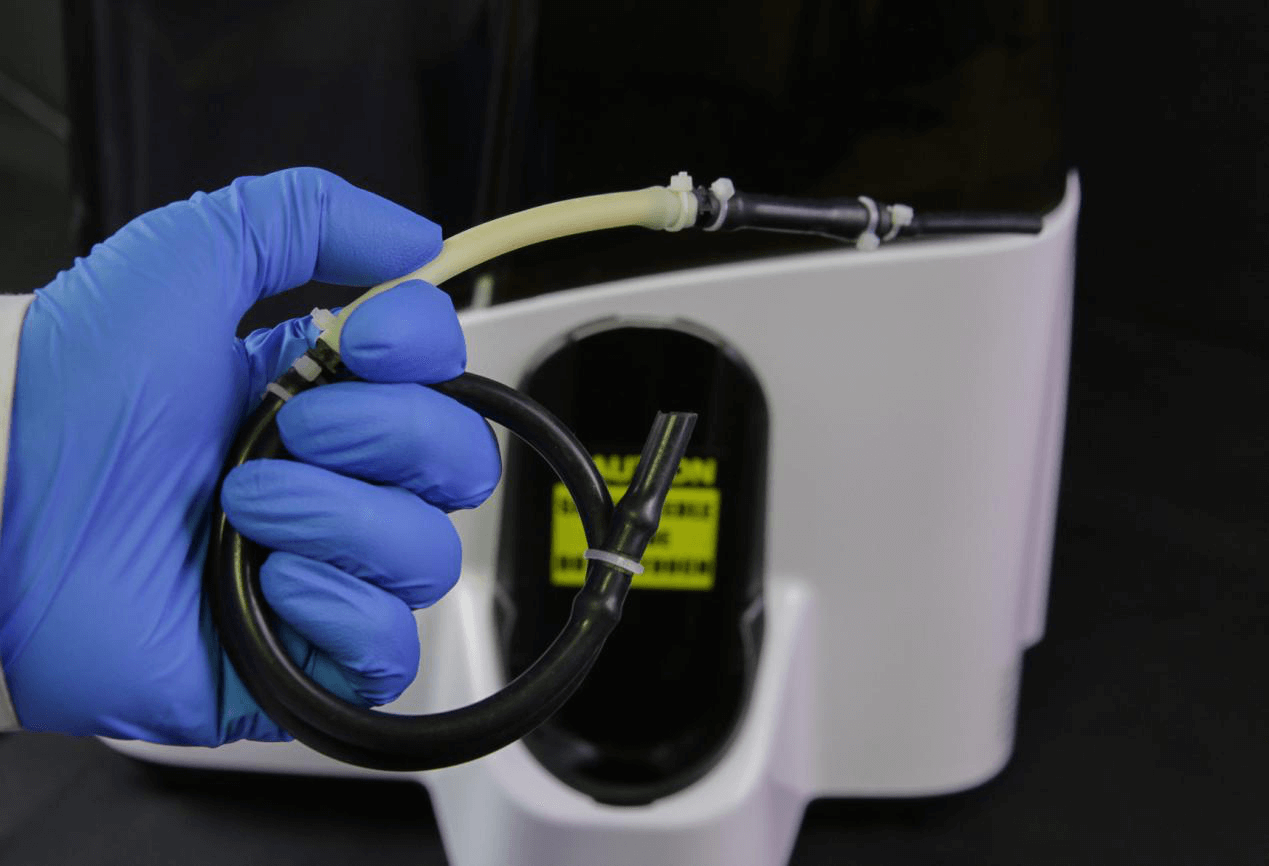
(2)Steps:
①Remove Resin Bottle Rest;
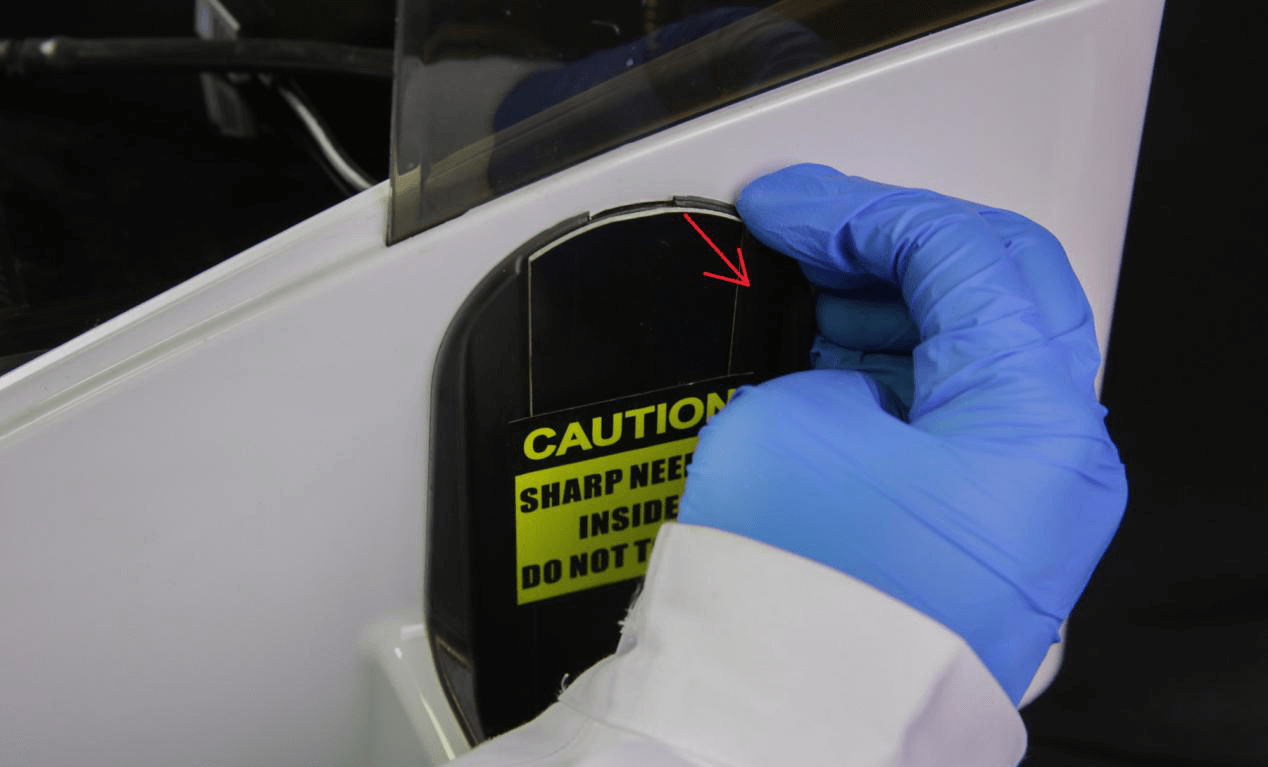
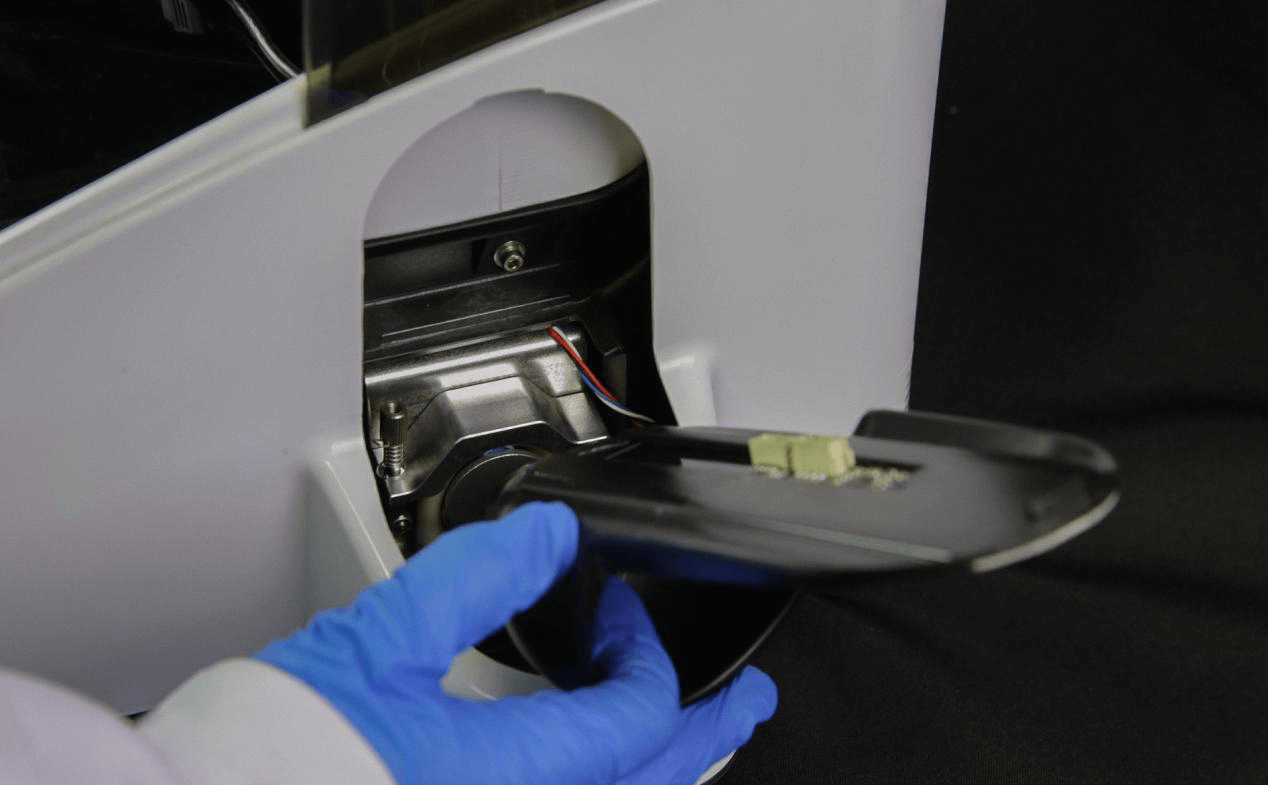
② Beware of the Resin Level Sensor cable, do not break the cable when removing the Bottle Rest;
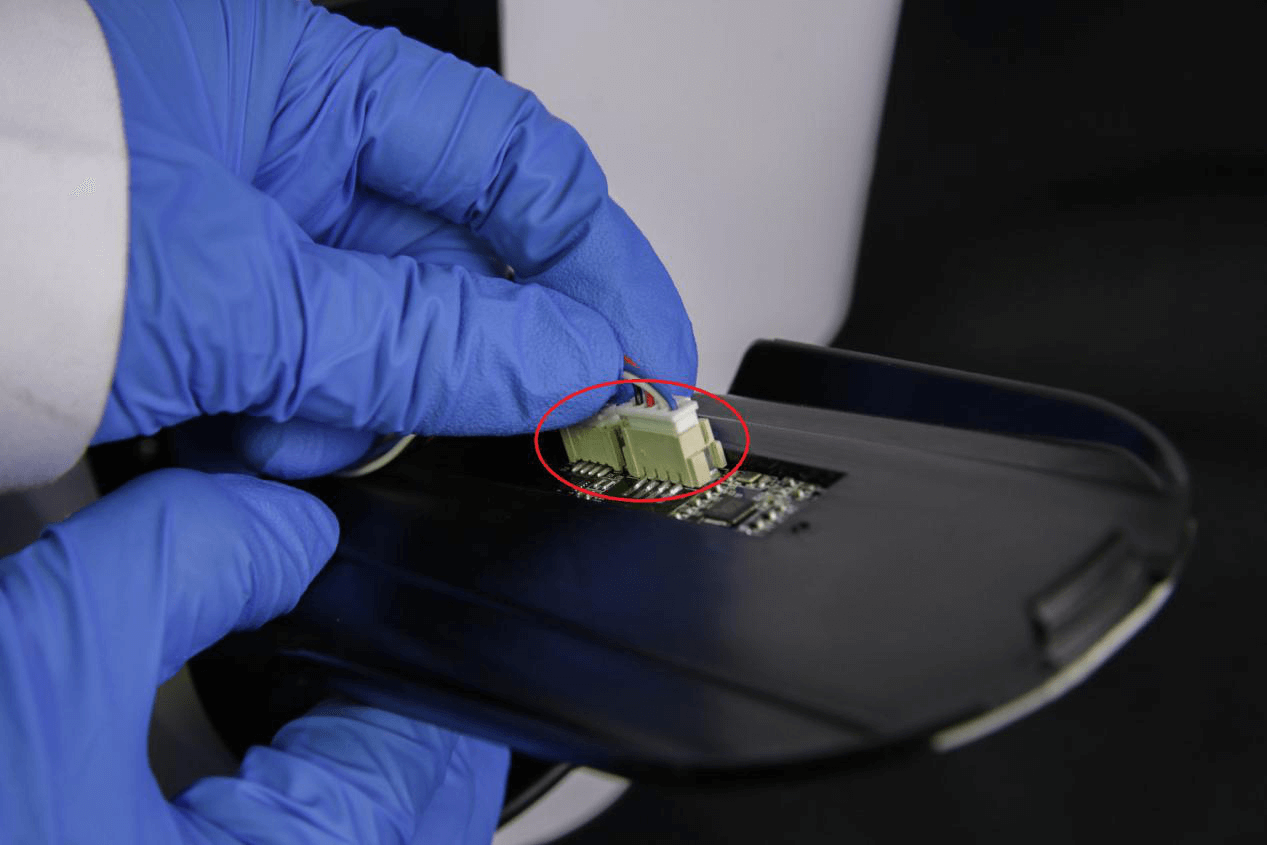
③Pull out the Sensor Cables;
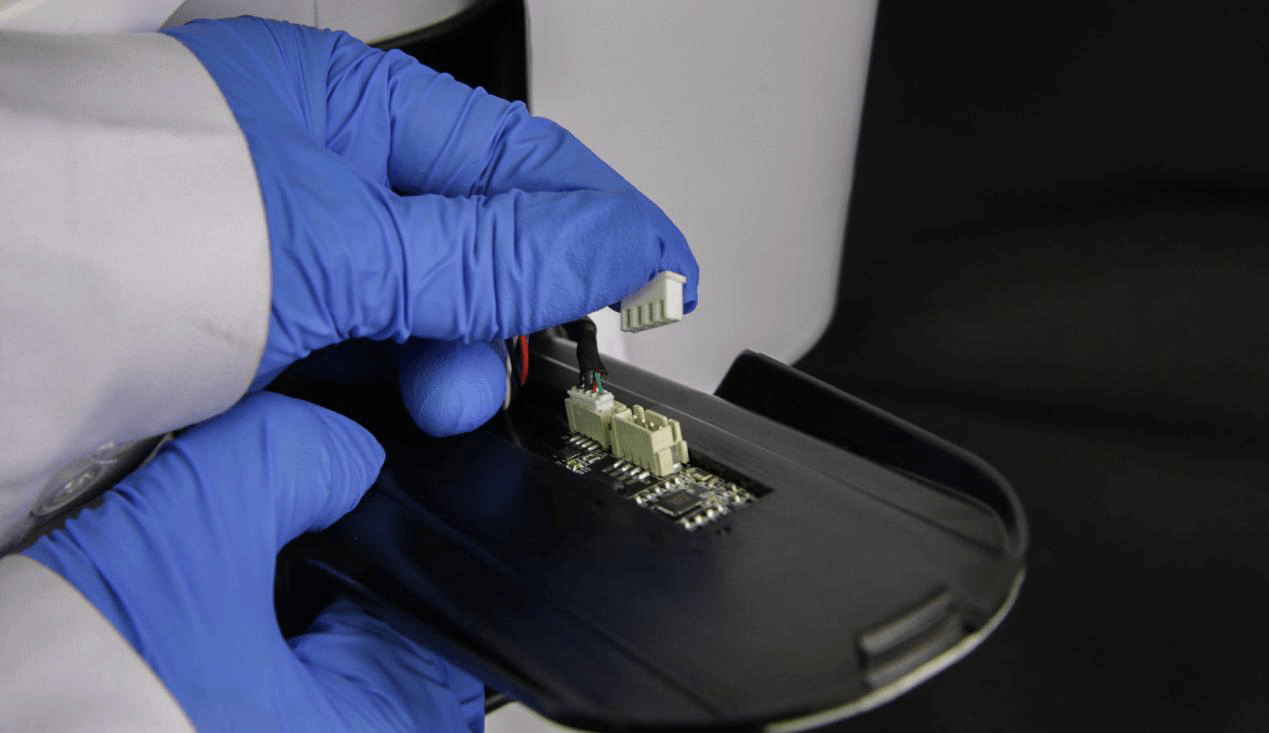
④Loosen the pump nut, and lift off the Tube Holder;
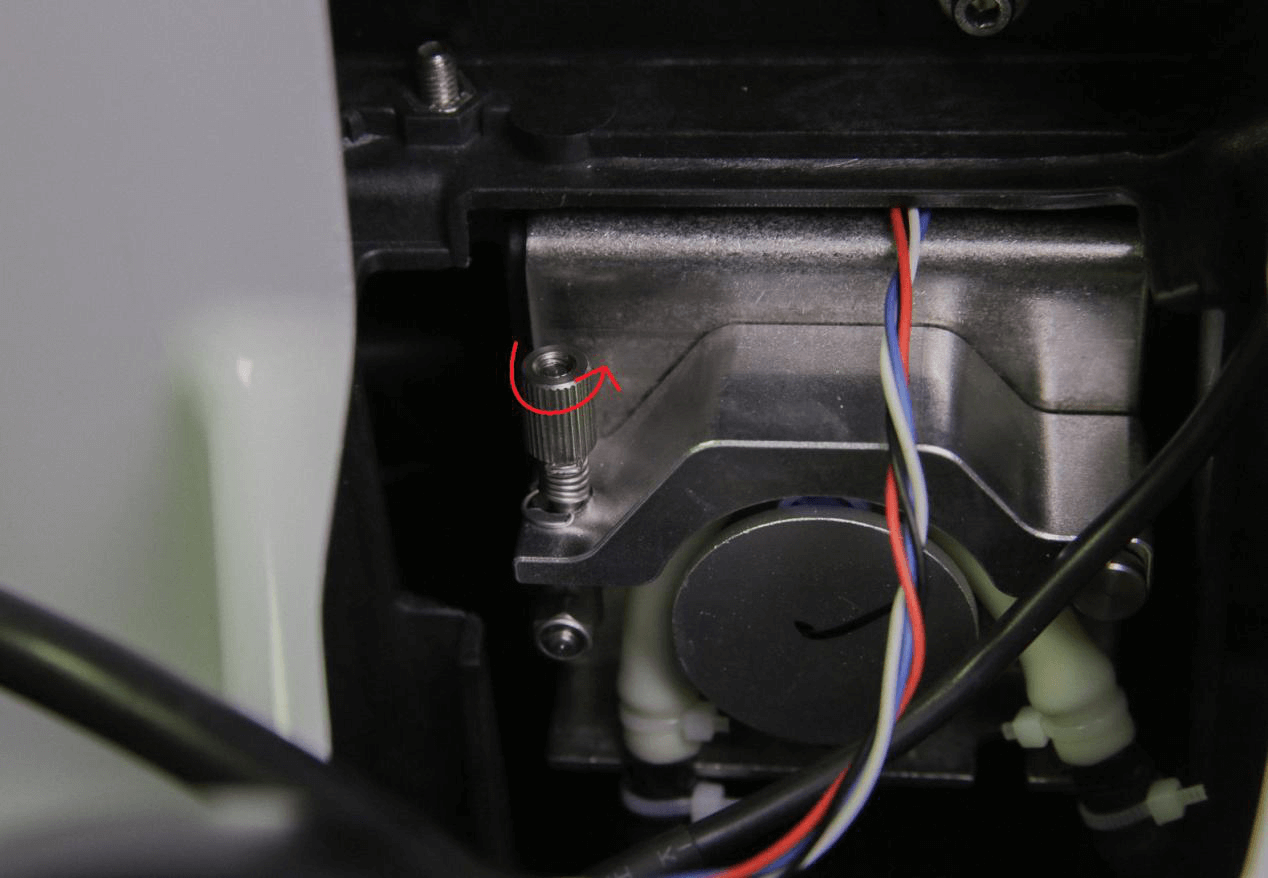
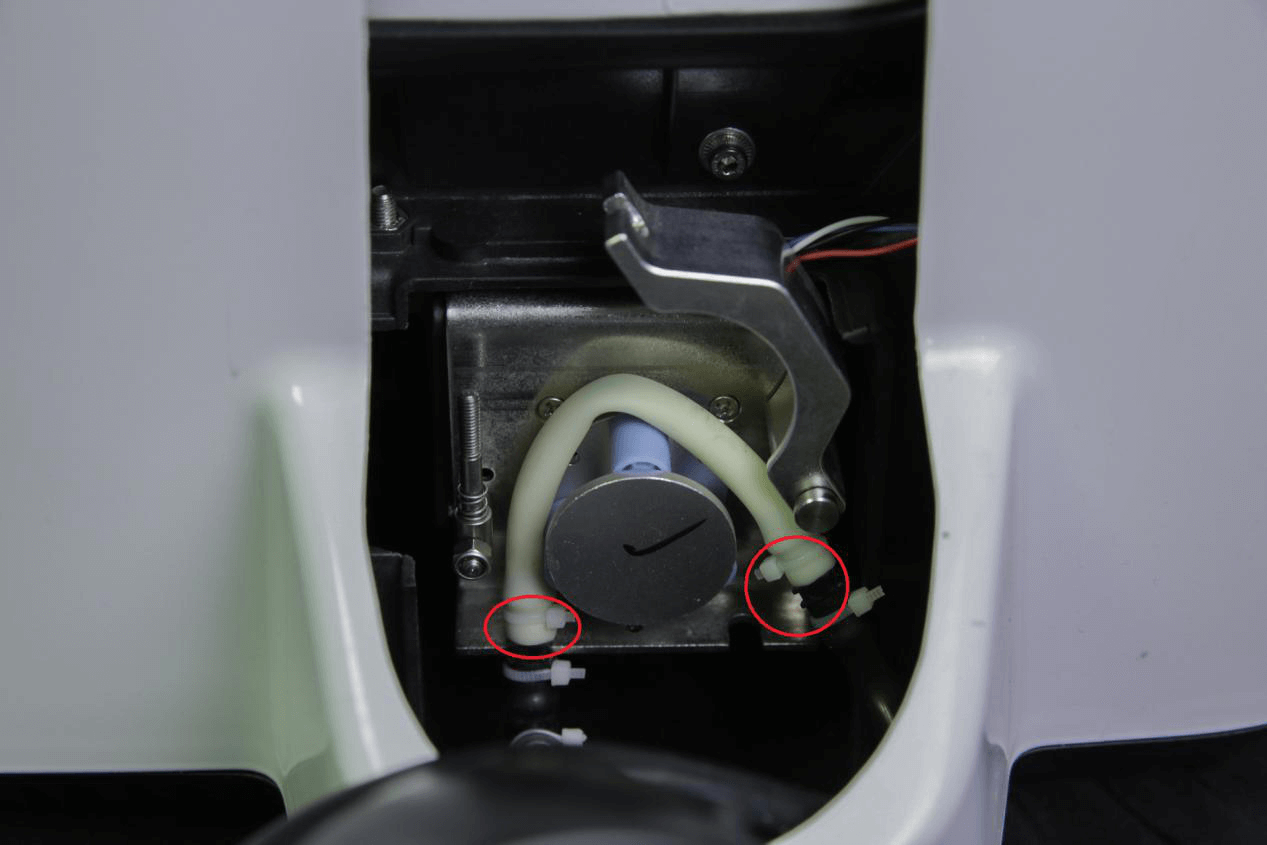
⑤ Remove the Old Pump Tube from the Slots;
⑥Take out the Resin Tube from the Resin Level Sensor and Bottle Rest;
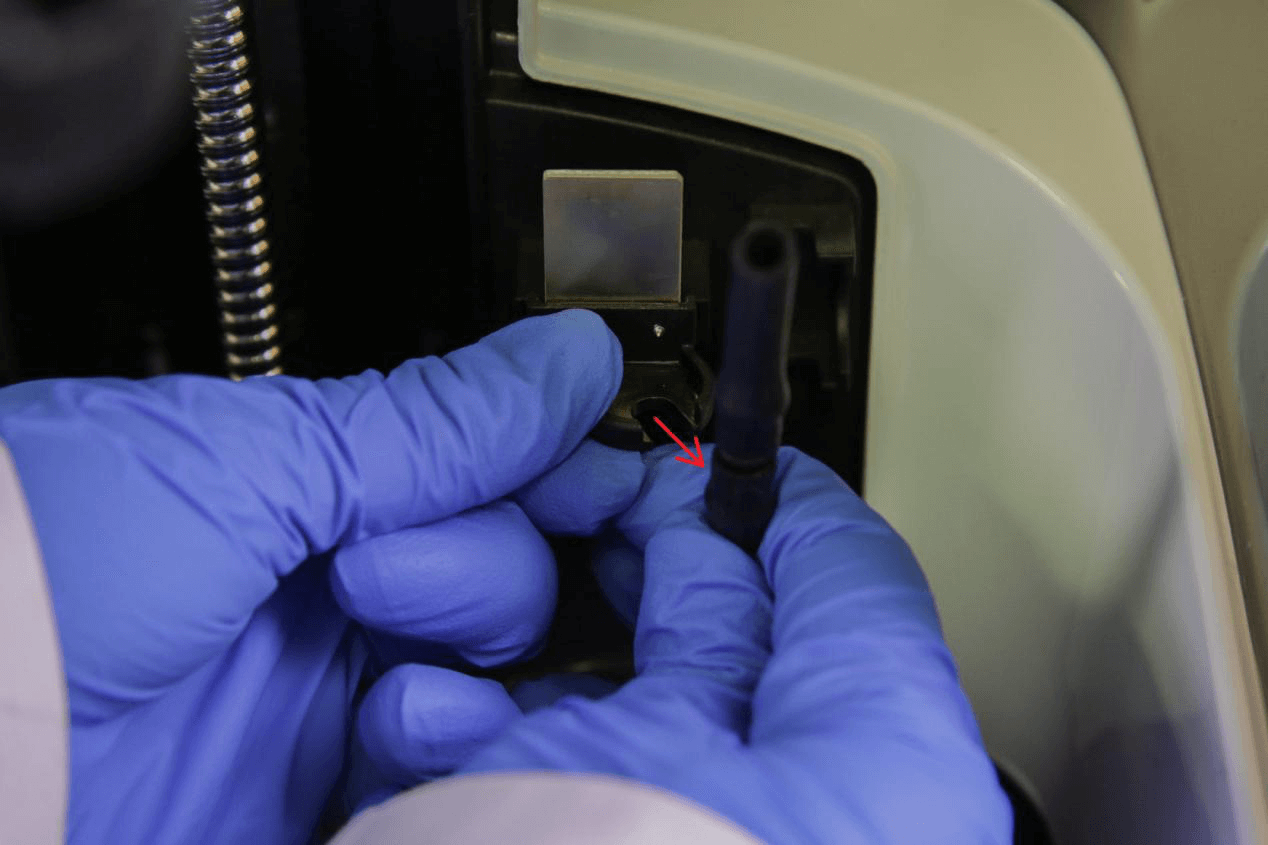
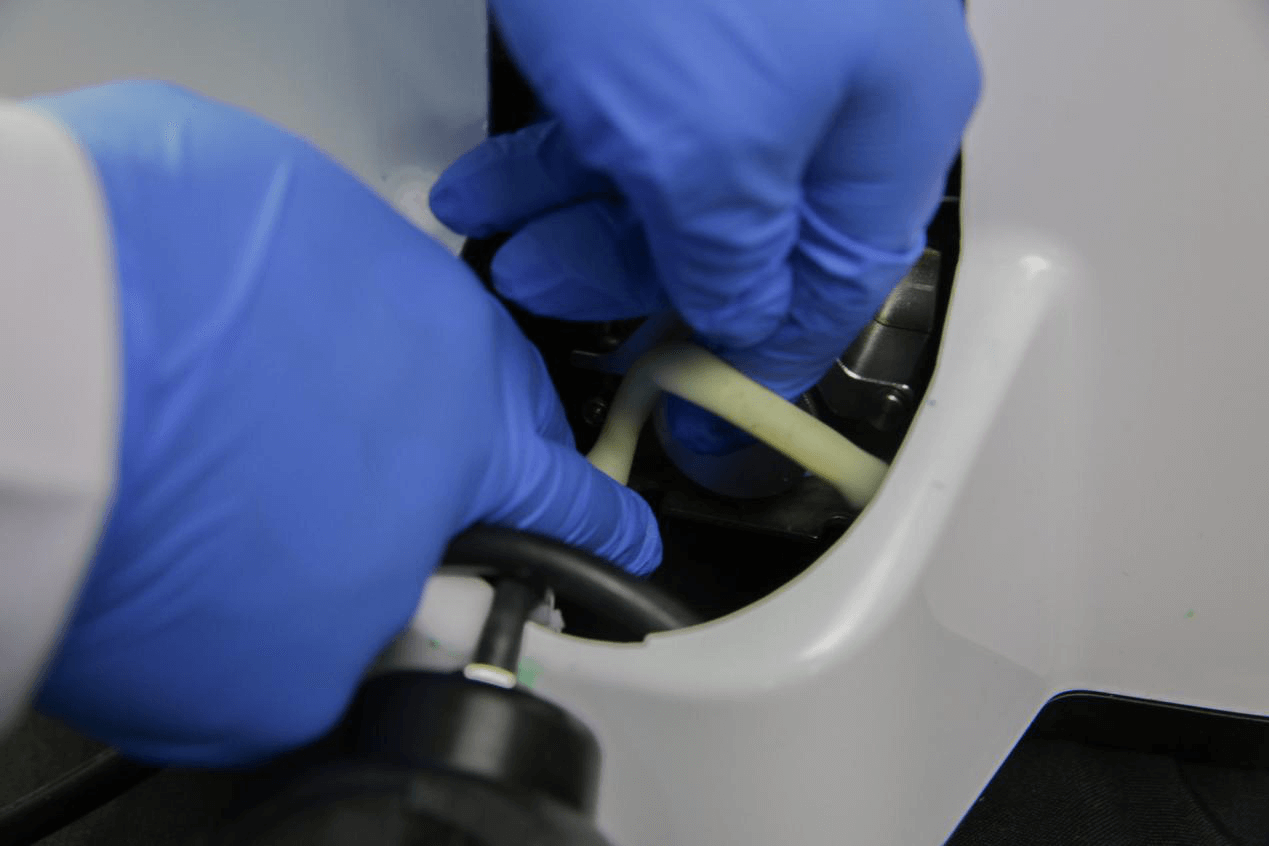
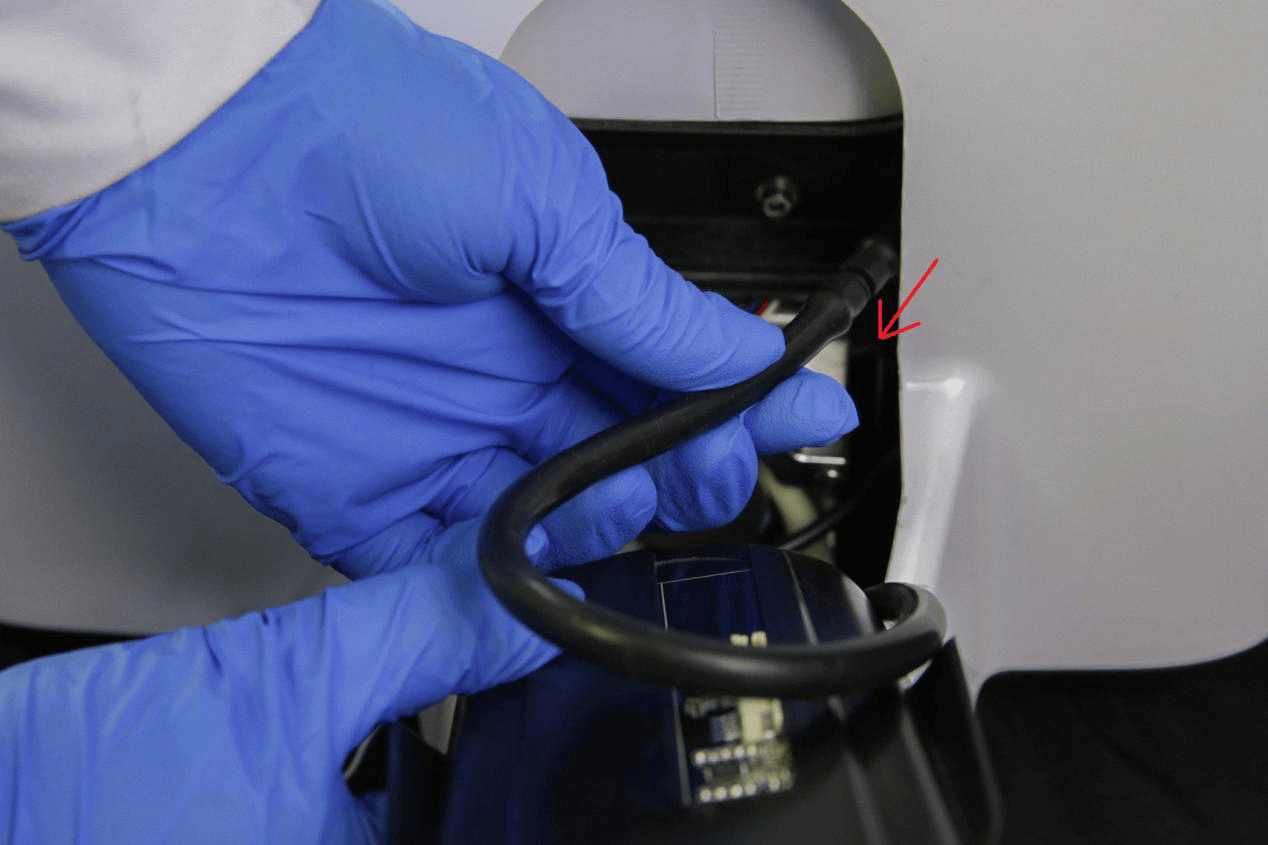
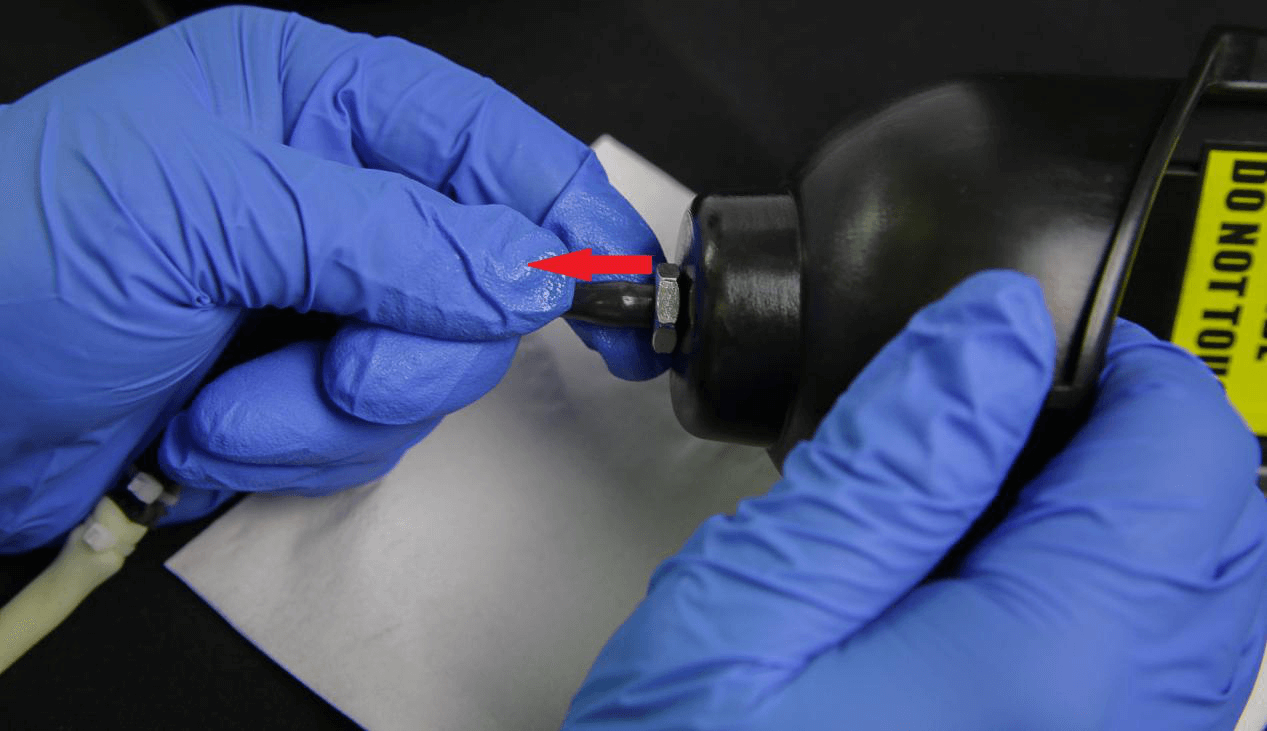
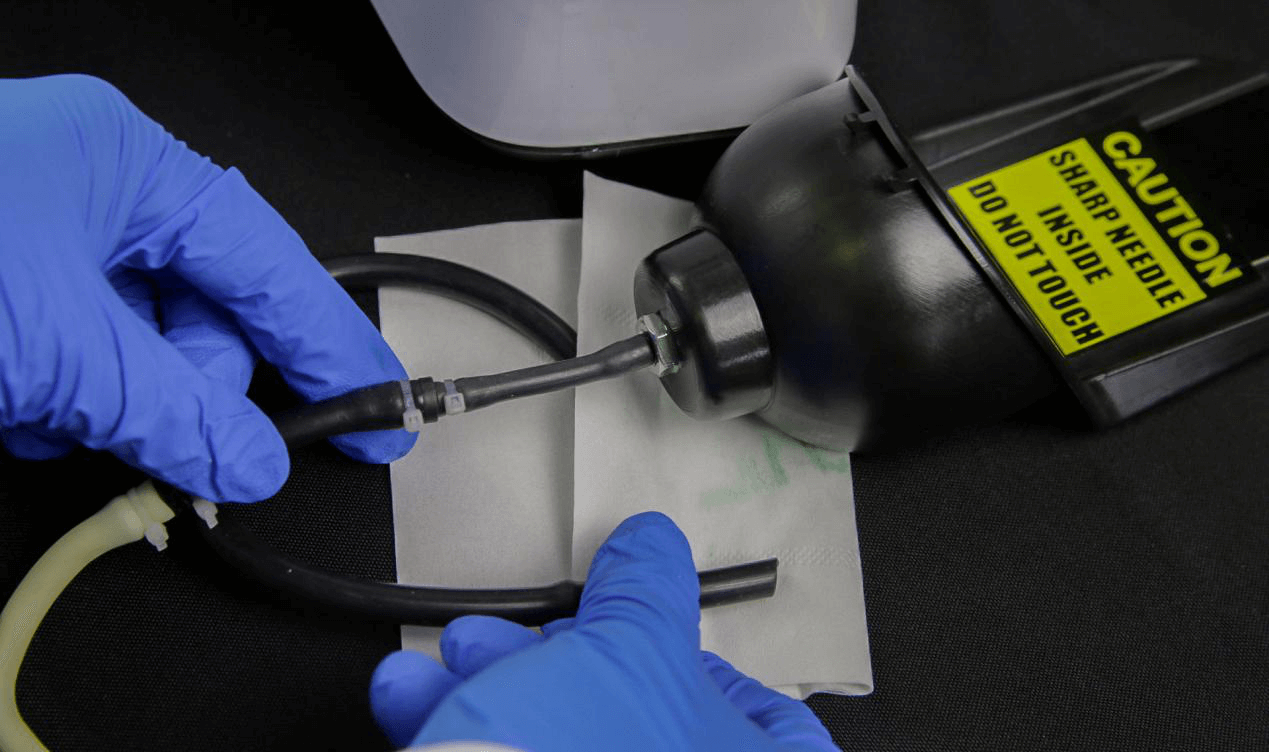
Note: Use napkins to prevent leaks.
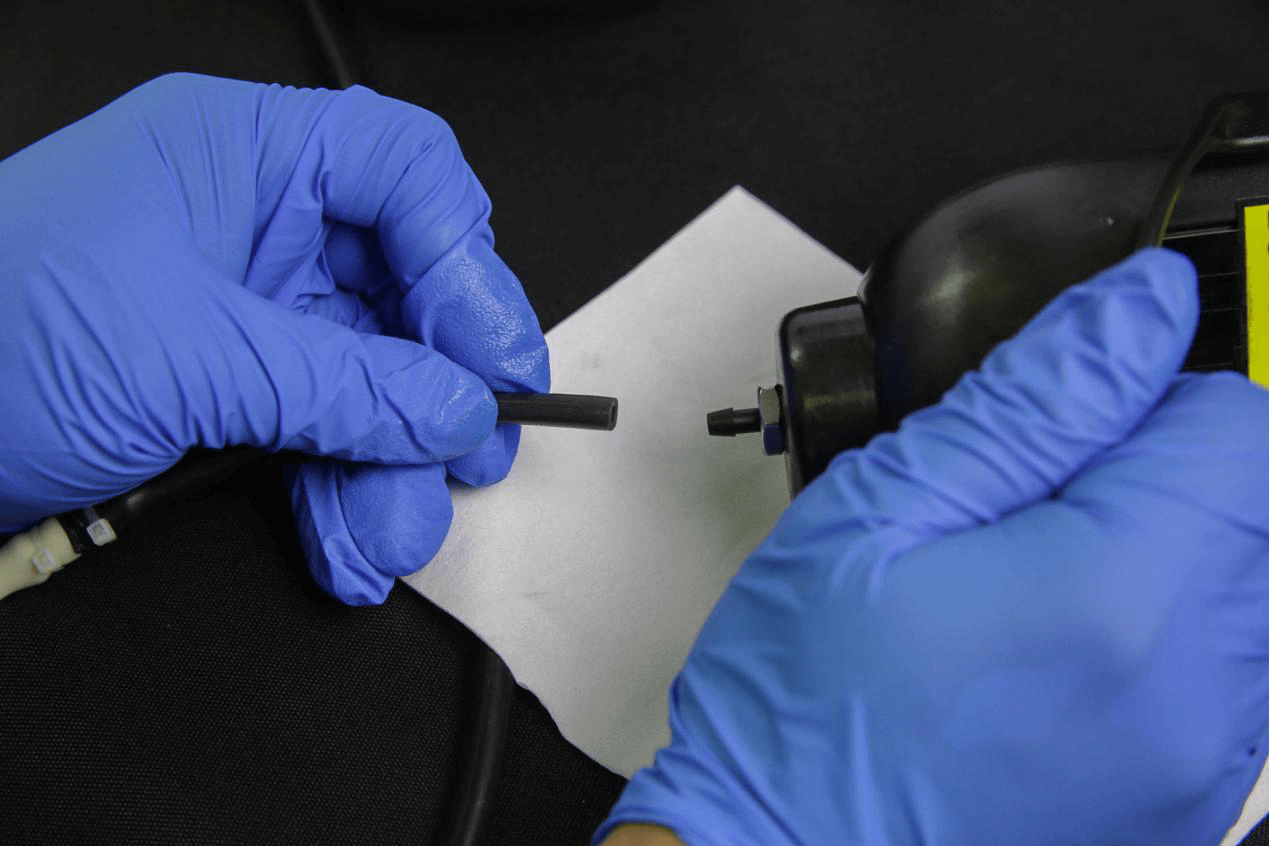
⑦Install the spare pump tube assembly to the Bottle Rest, make sure the connection is firm to prevent leaks;
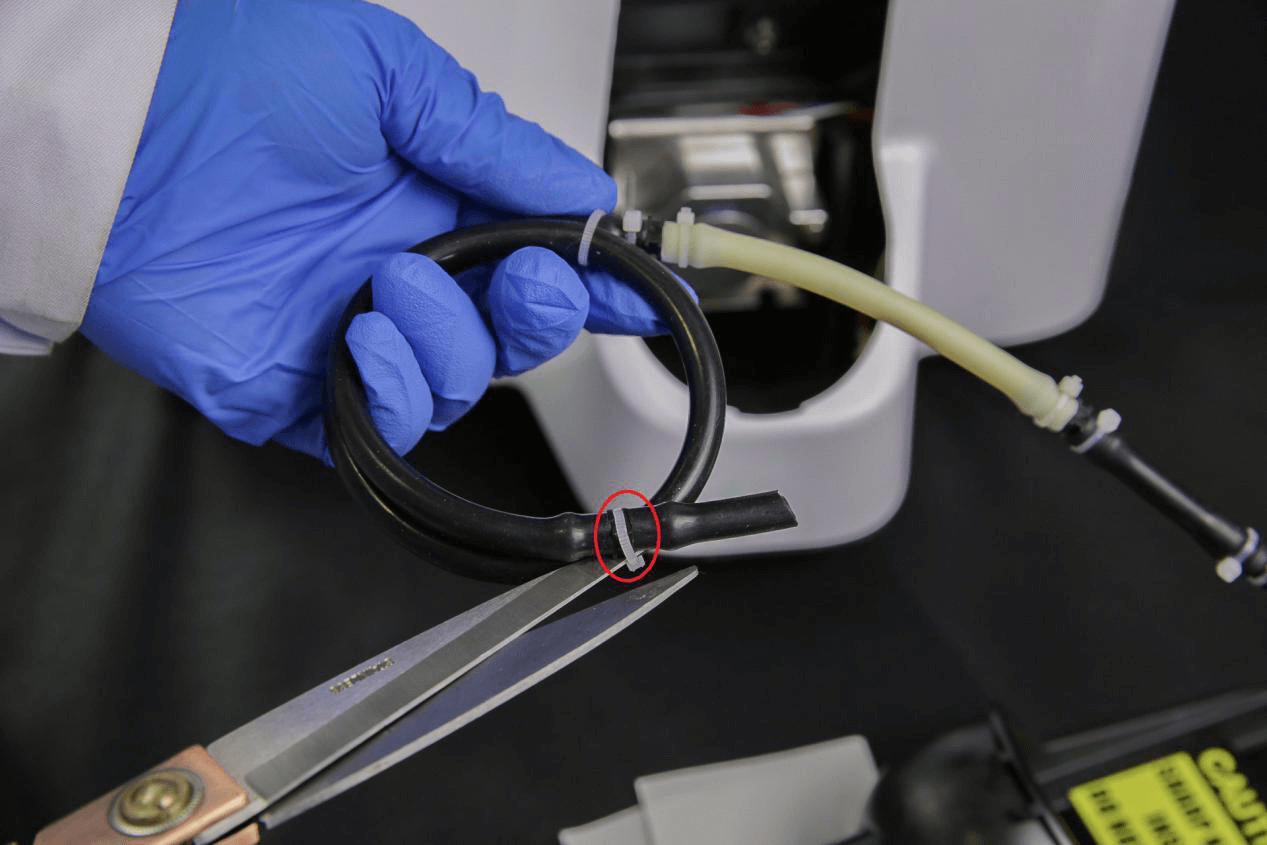
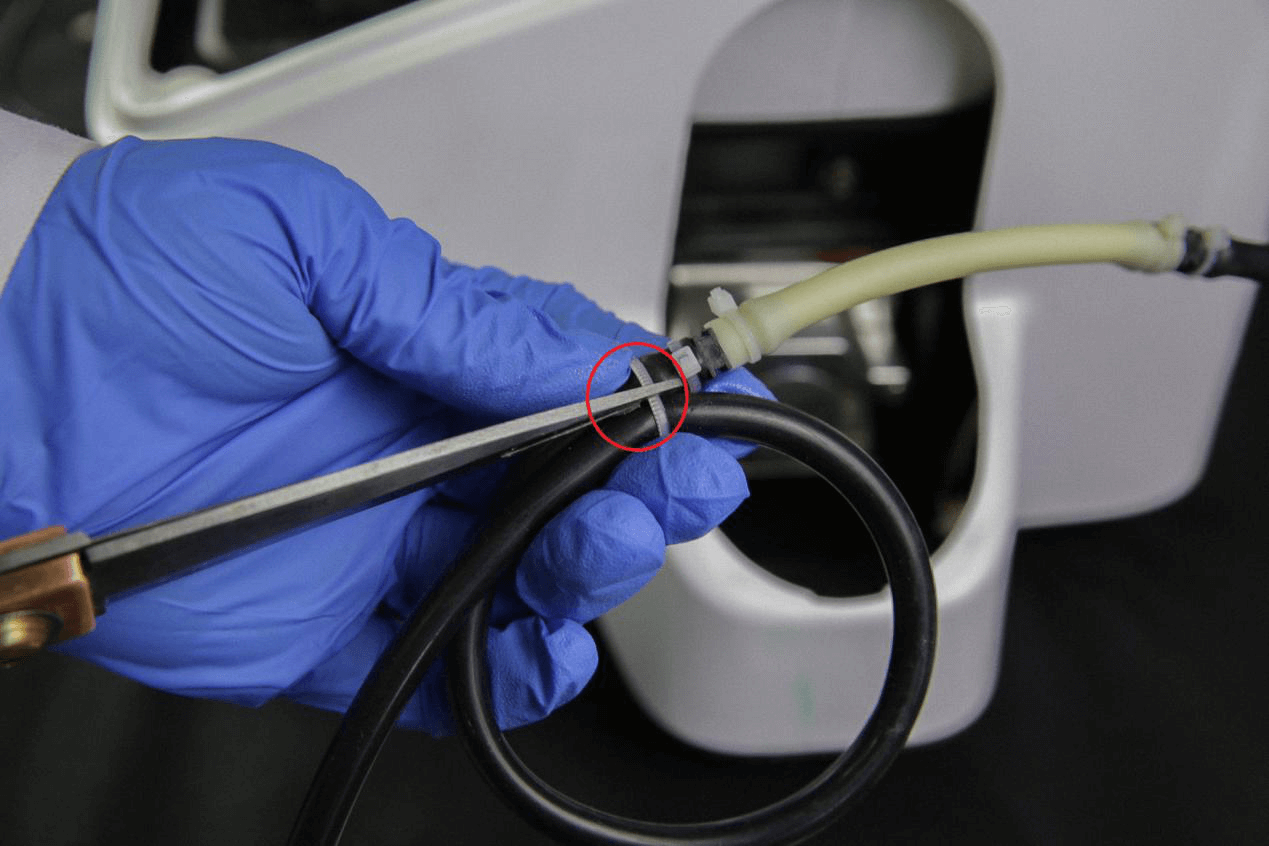
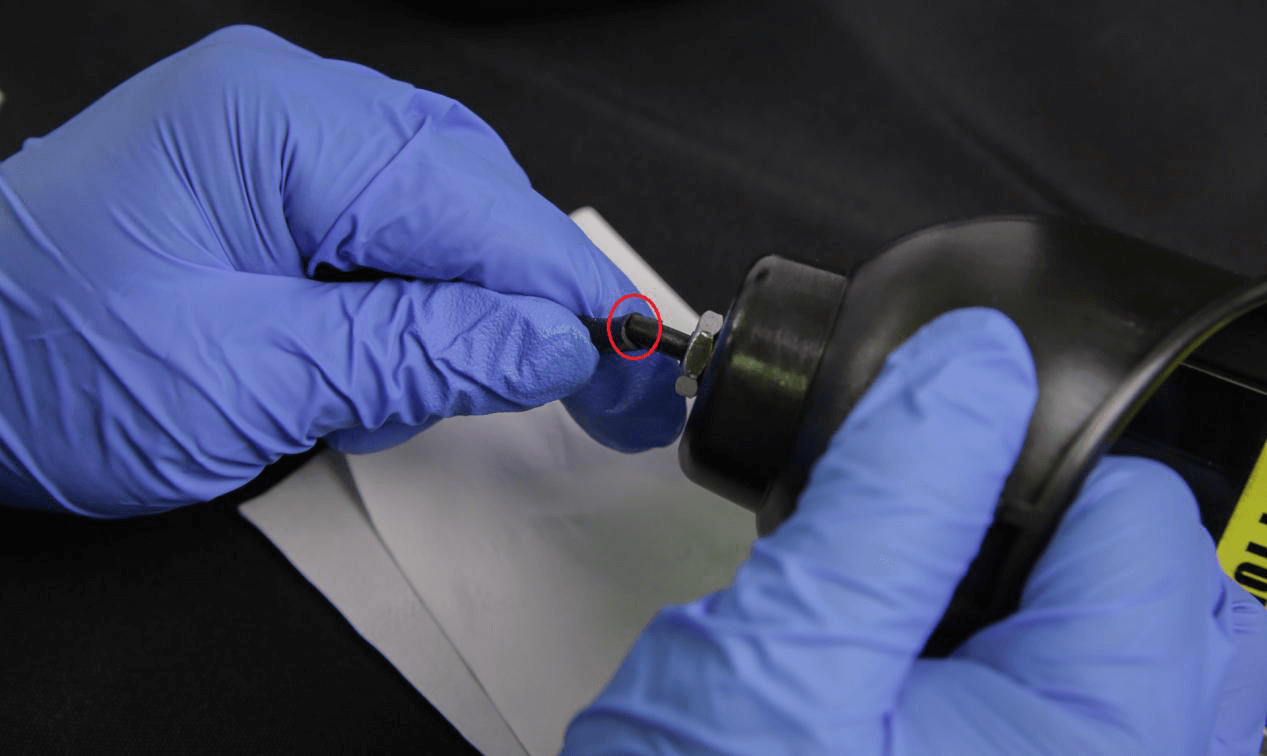
⑧Install the Peristaltic Tube (yellow part) into the pump;
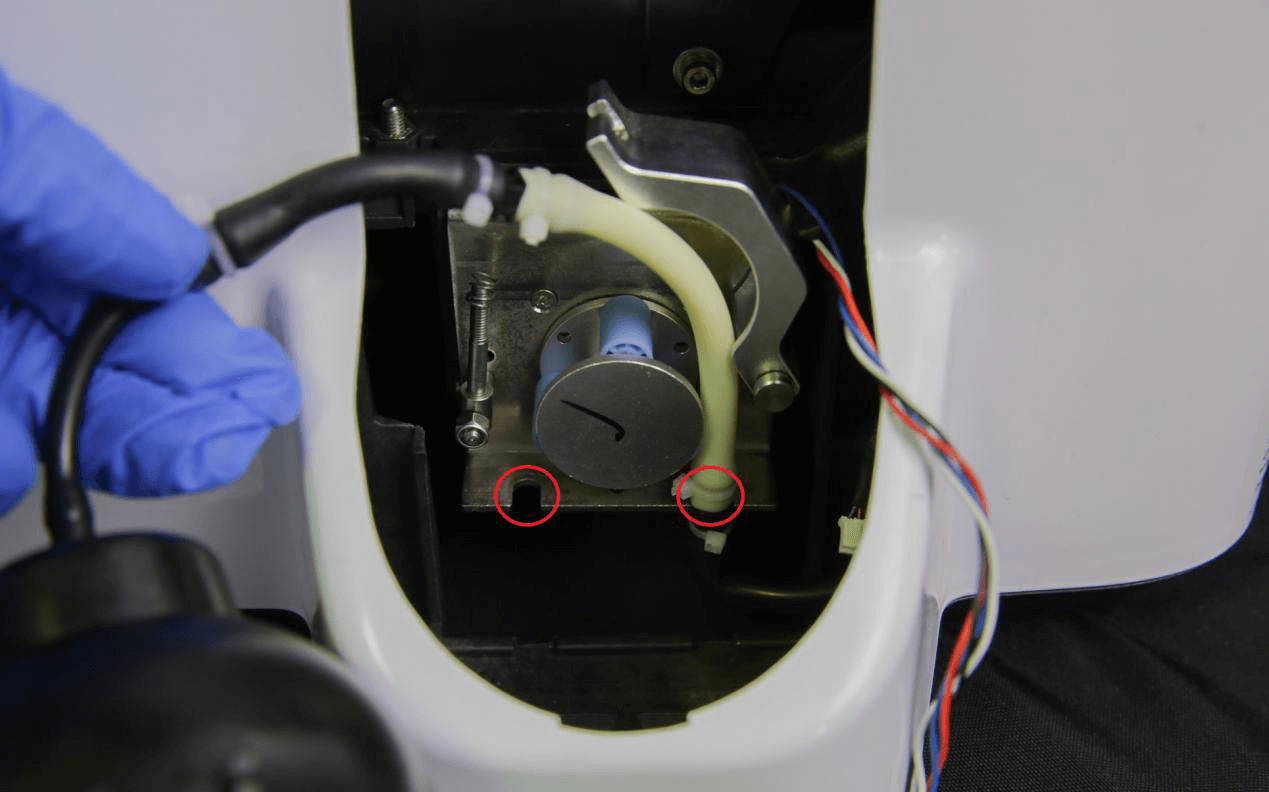
⑨ Close the Tube Holder and fasten the pump nut;
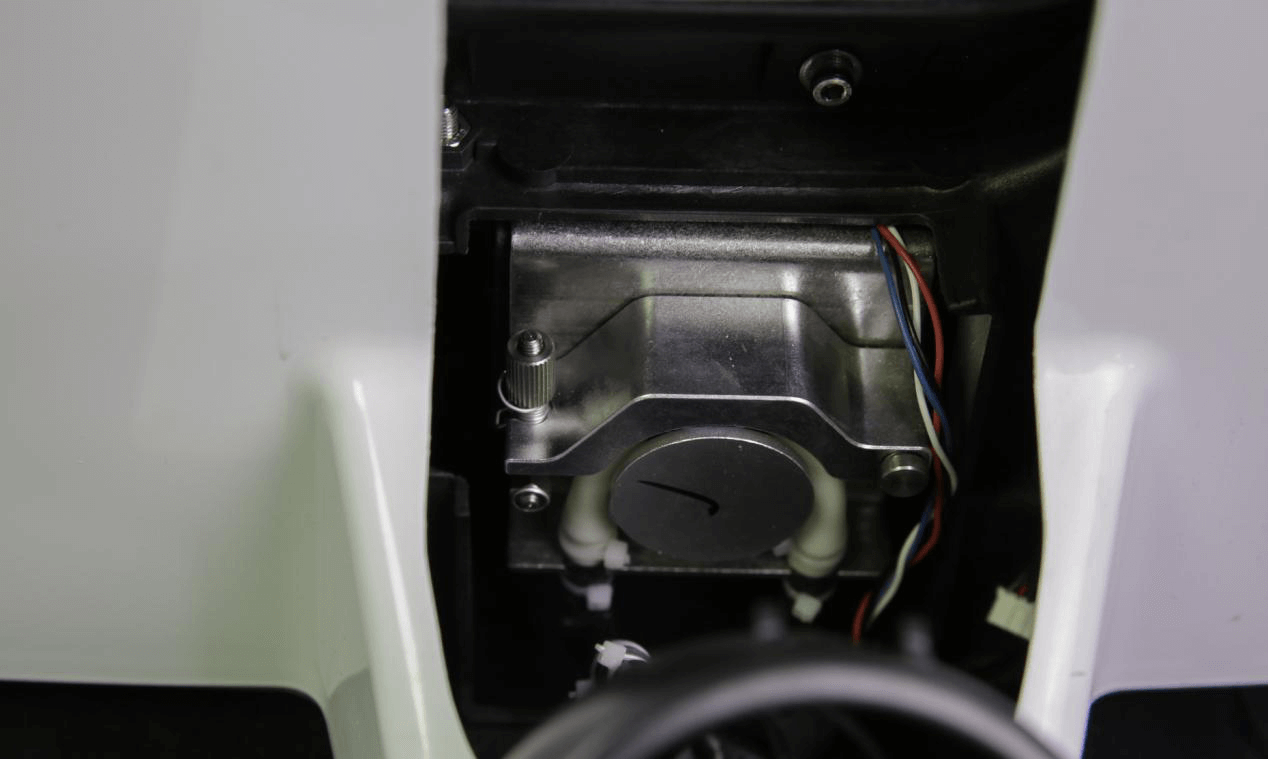
⑩Install the black resin tube back onto the Resin Level Sensor;
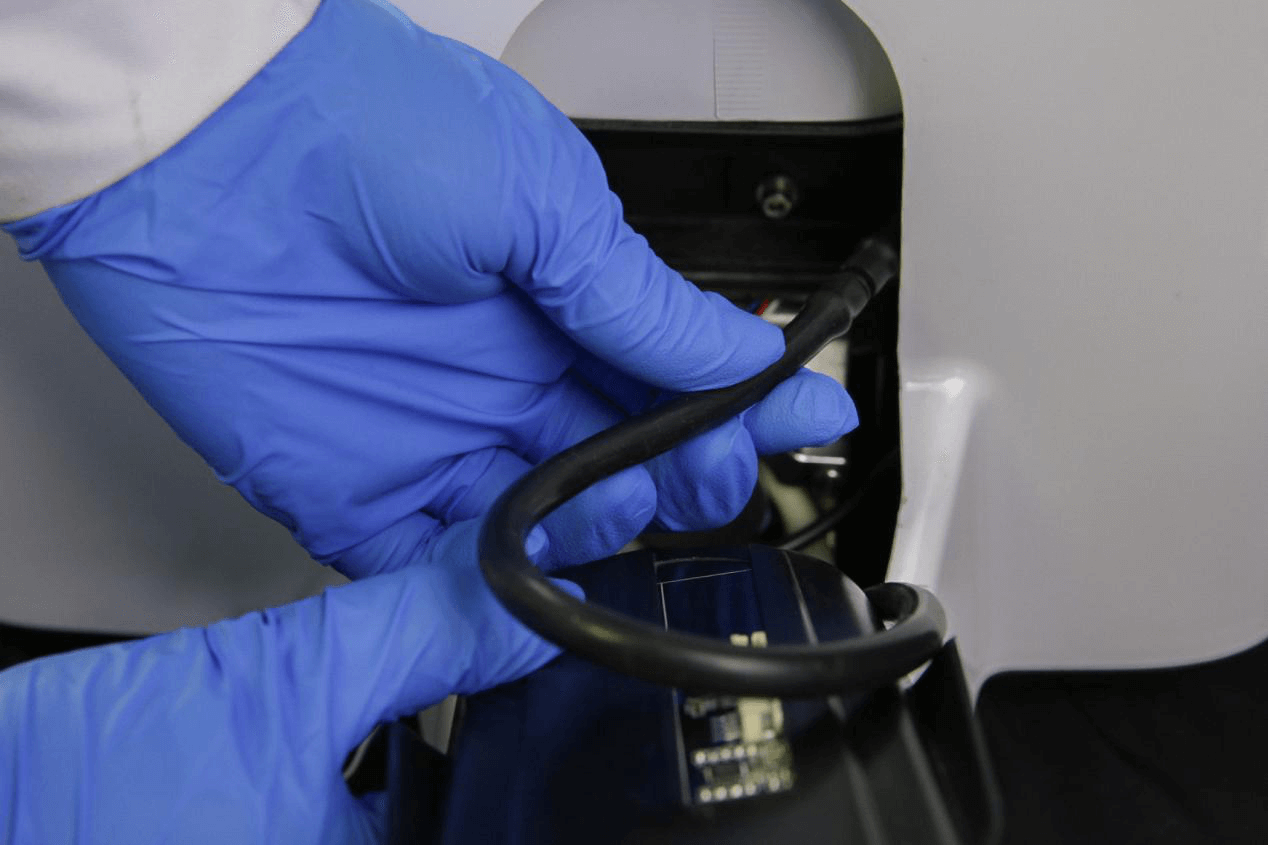
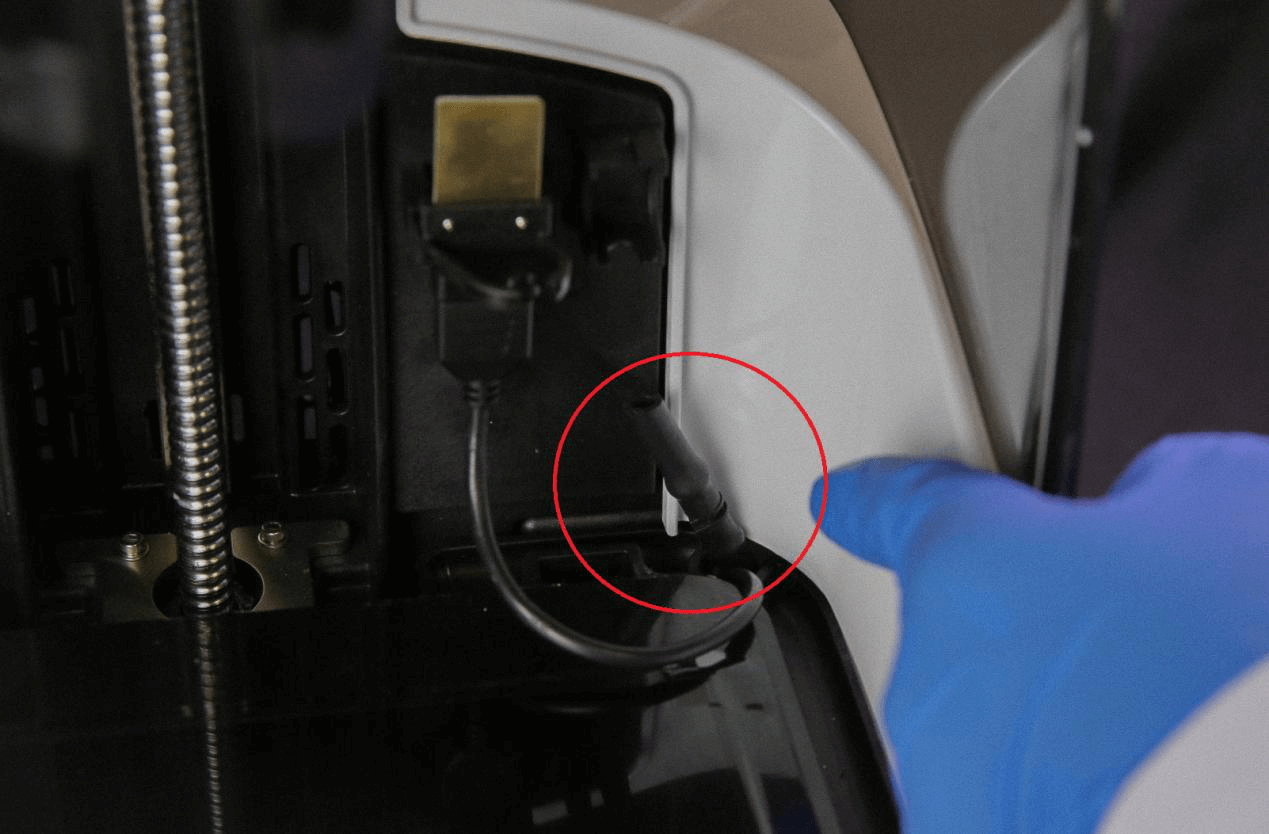
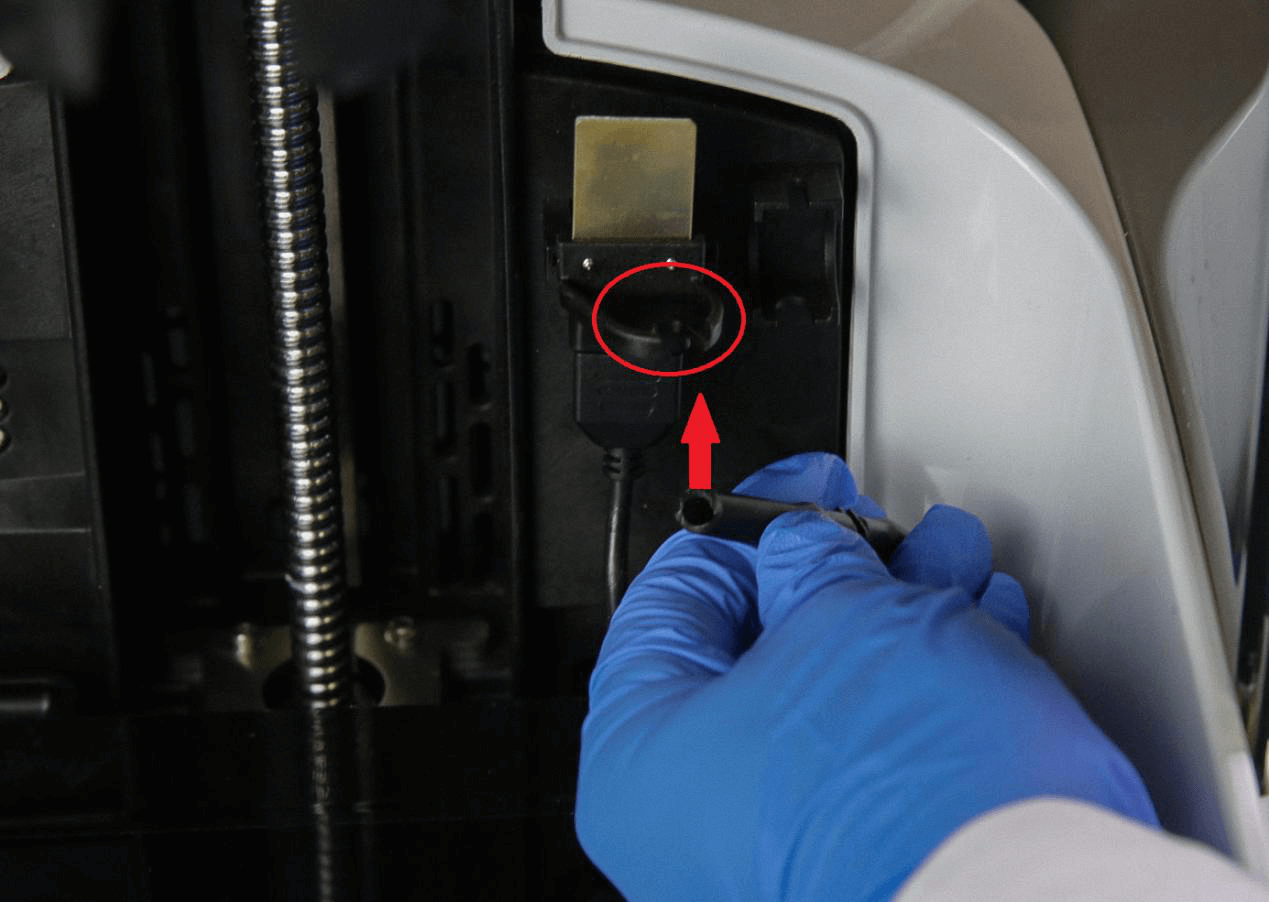
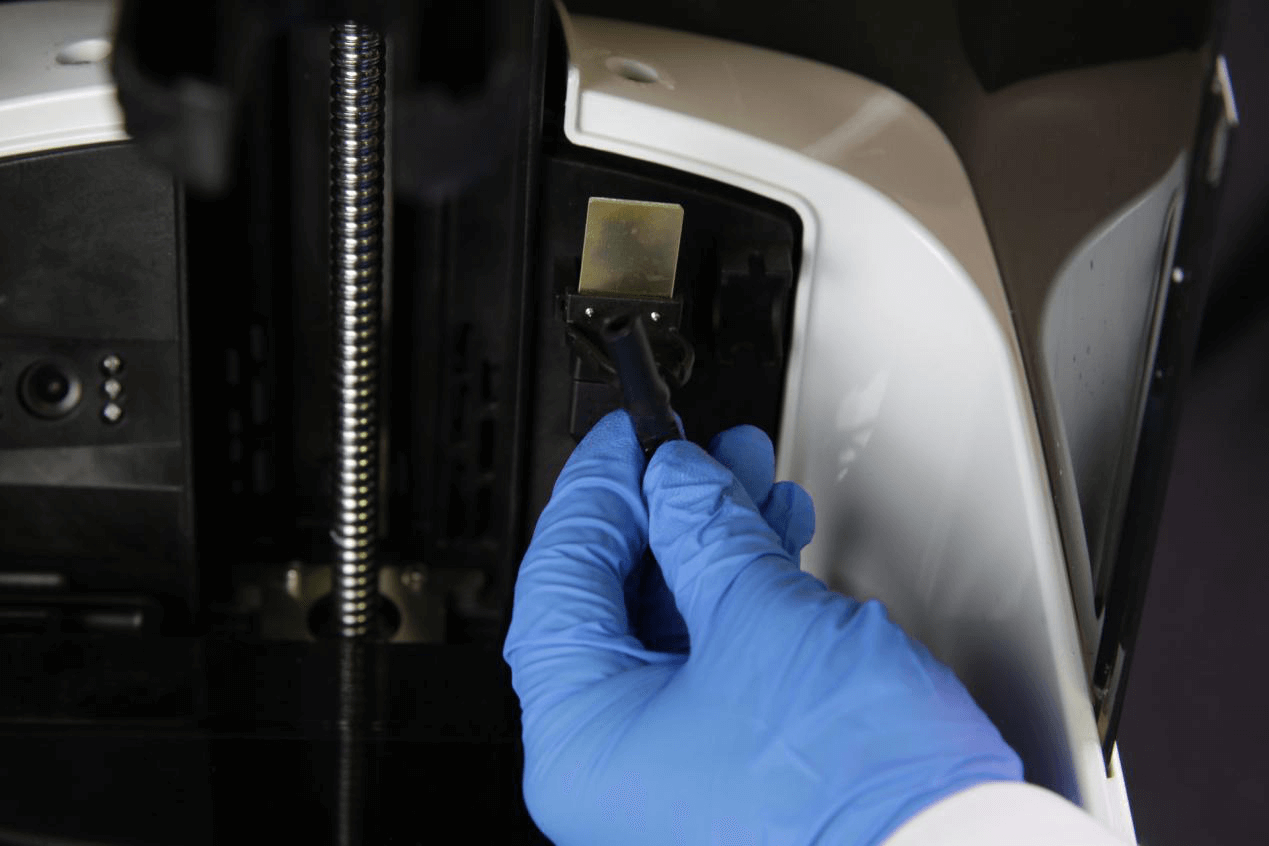
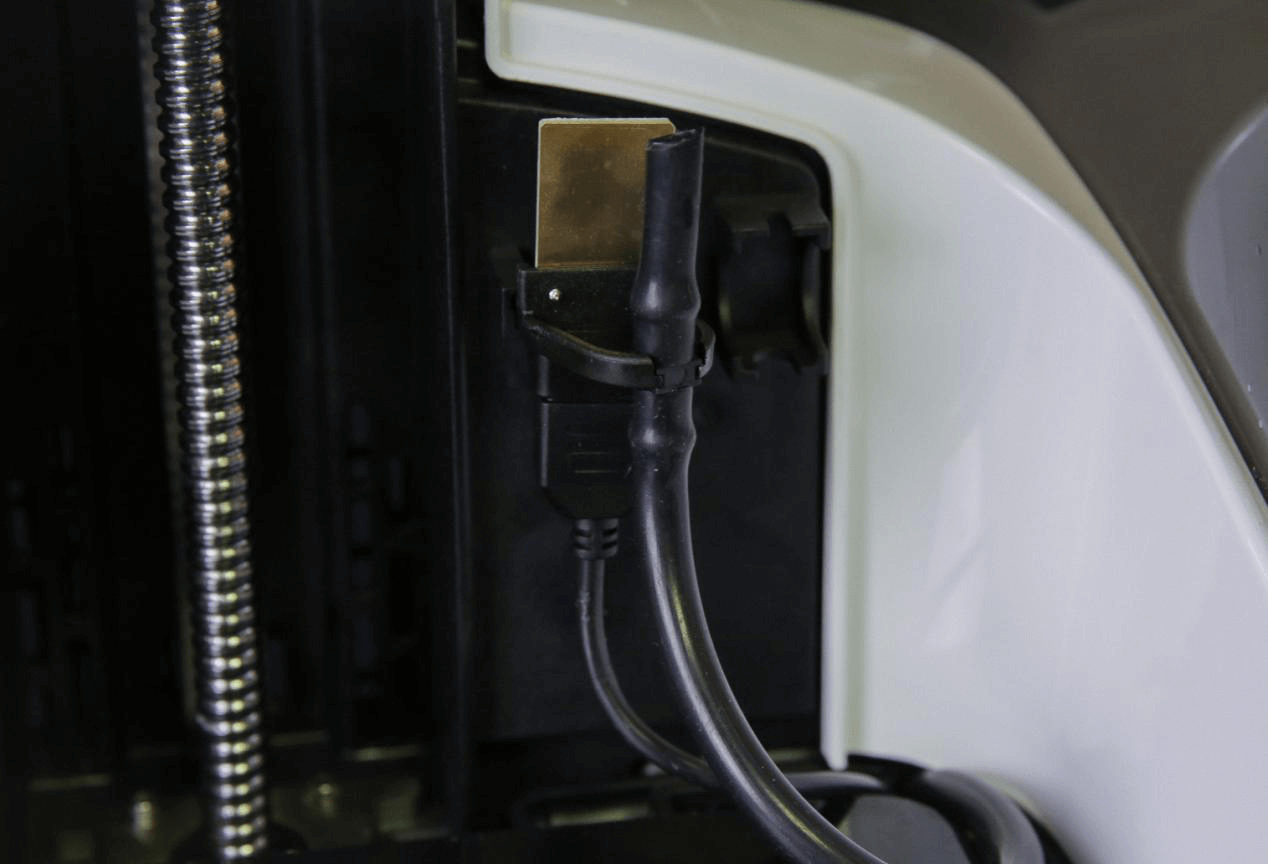
⑪ Insert the Sensor Cables back, and lock the Bottle Rest back in place to complete the process.
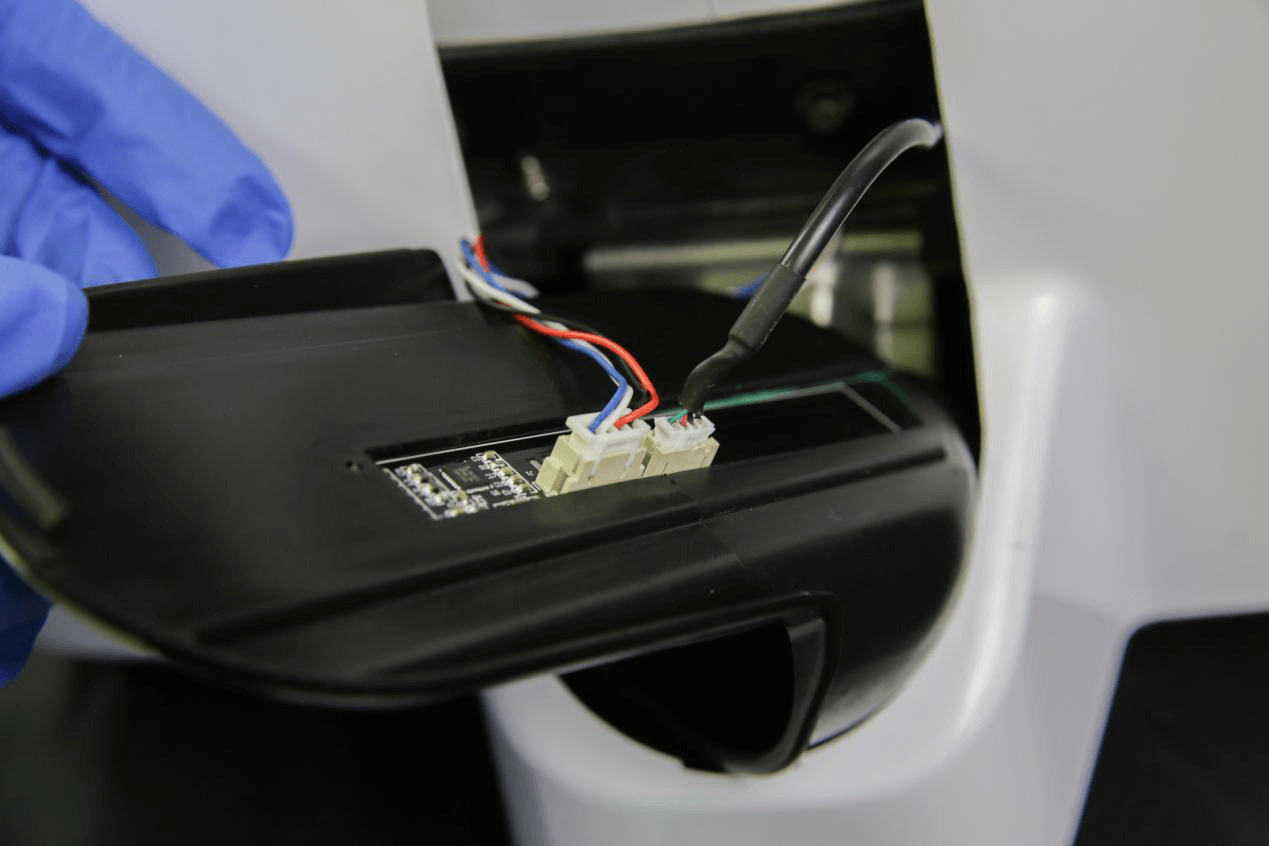
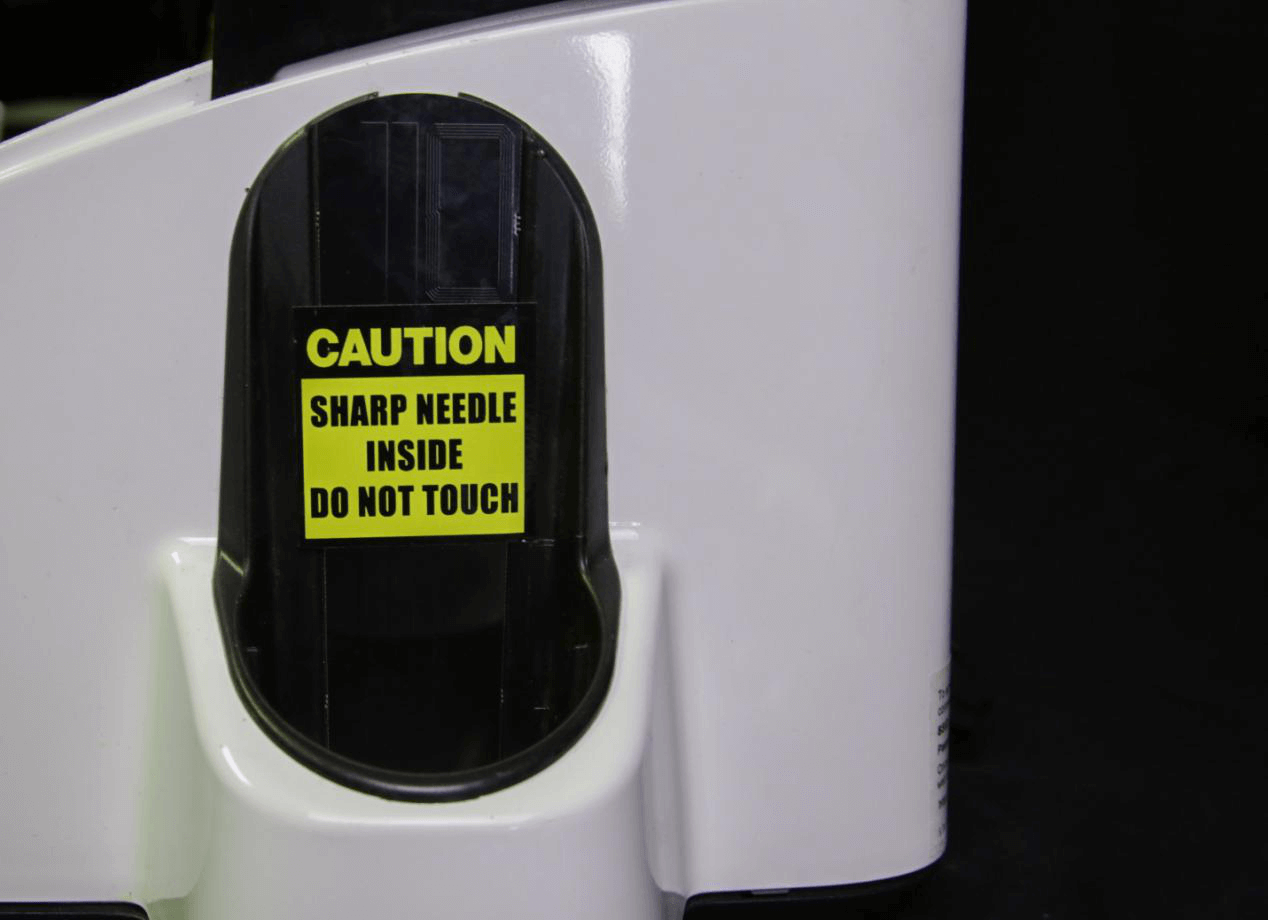
Note: If the pump make strange noises and not pumping well, check the tightness of the Pump Nut.
10. Zero Calibration of Z Axis
All printers are zero calibrated upon leaving the factory, however, the Z axis may need recalibration after rough handling, long period of usage, or Build Platform sanding.
Steps:
(1)Use alcohol to clean the Build Platform;
(2)Take off the Resin Tank, and keep the LCD clean;
(3)Press the Build Platform ALL THE WAY DOWN manually to barely touching the LCD screen, then rotate the motor screw counter-clockwise by hand carefully to let the Platform in complete contact with the LCD screen;
(4)On Desktop software or App, click Z Axis Calibration, and follow the instruction, the Platform will rise back to zero position to complete calibration.
In This Article
- Check up Before Printing

- Cleaning and Maintenance

- Cleaning Build Platform and Resin Tank

- Replacing Resin Tank

- Storage of Resin Tank

- Sanding of Build Platform

- Replacing LCD Screen

- Replacing Resin Pump Tube

- Zero Calibration of Z Axis

The Previous Articles
- Unboxing
- Boxing
- Printer Visual Inspection
- Setting Up Your Printer
- Printer Installation
- Preprint Detection
- Check The Film Of Resin Tank
- Printing and Maintenance
- Exposure Area and Printing Parameters Setting
- Aftercure
- Maintenance Manual
- How to Release Pressure in Screen Cooling System of SLASH
- Trouble Shooting

