SETTING UP YOUR PRINTER
THE SLASH 3D PRINTING SYSTEM
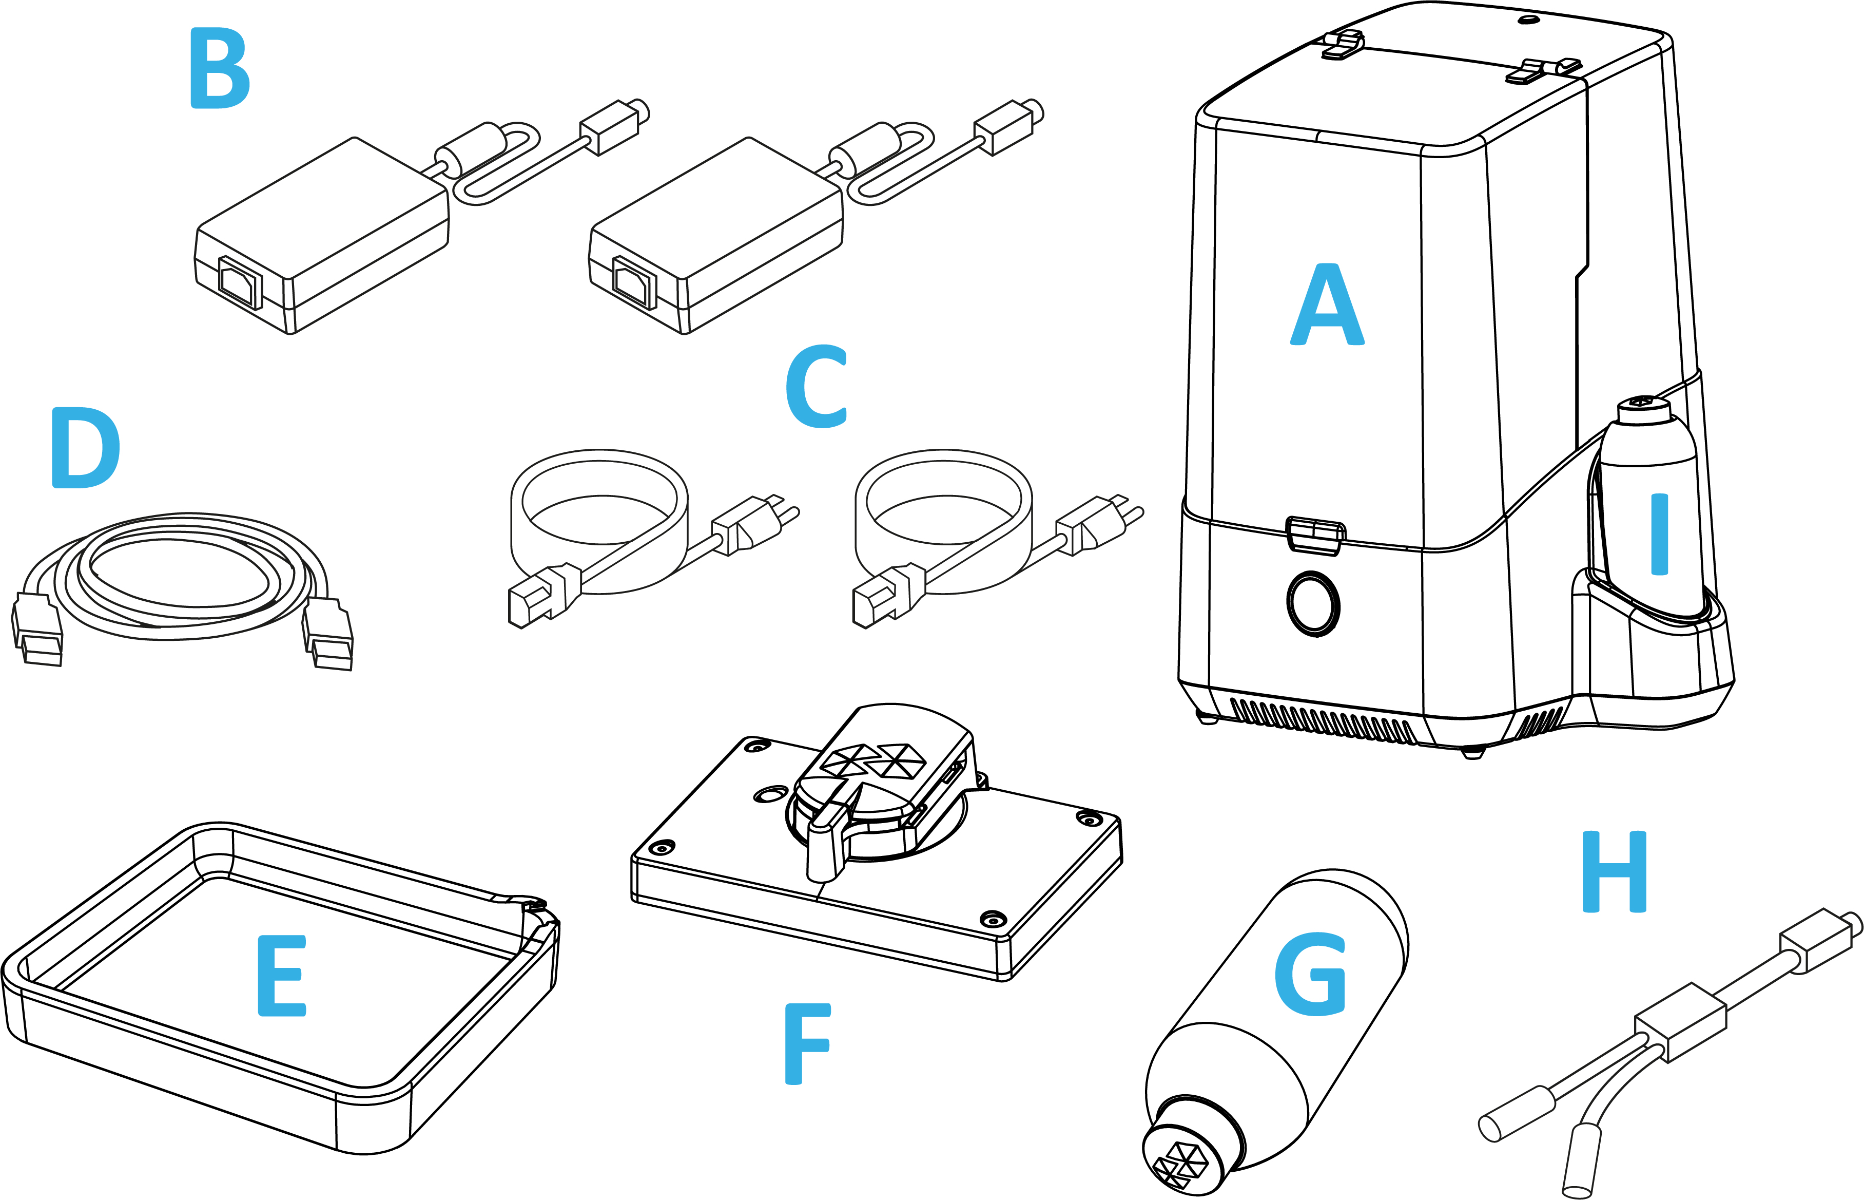
- A UNIZ Desktop 3D Printer
- B Power Adapter
- C Power Cable
- D USB Cable
- E Resin Tank
- F Building Platform
- G Resin Bottle
- H Power Combiner
- I Cleaning Bottle
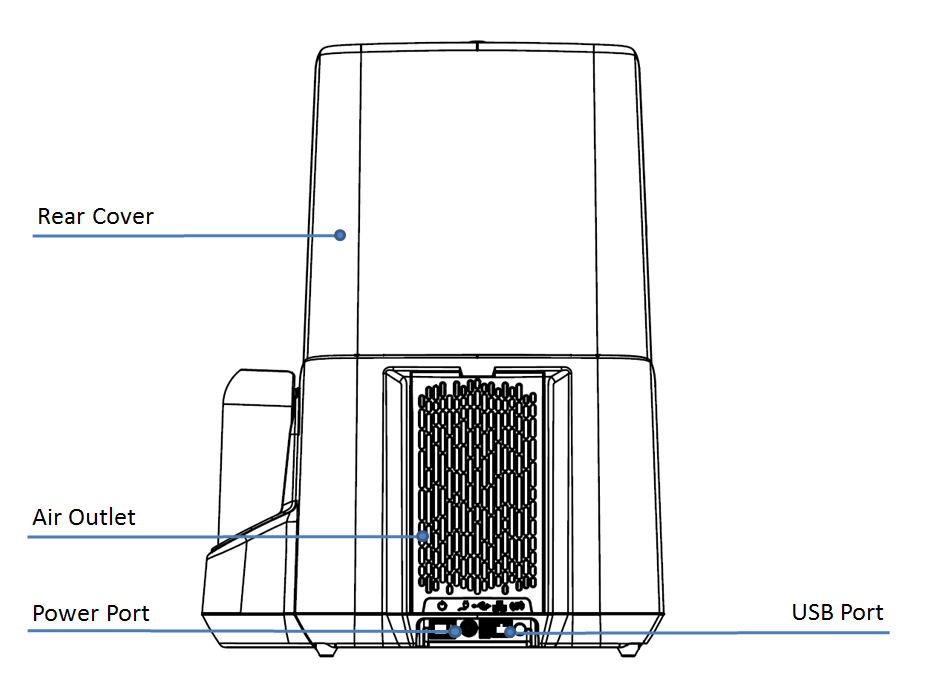
PRODUCT DESCRIPTION

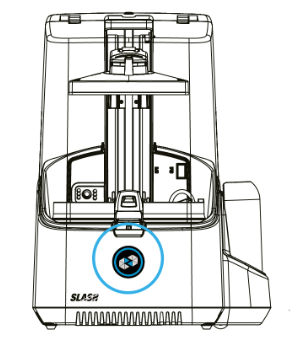
ACTION BUTTON COLOR GUIDE

Printer busy (starting up/paused/z axis moving)

Data transfer in progress

STANDBY-The printer is connected and waits for a command

Data transfered, waiting for touch confirmation

Printing in progress- The lights indicates completed progress

The lid is open. The printer is waiting for you to close the lid
Quick Start Guide
Set-Up Your Printer
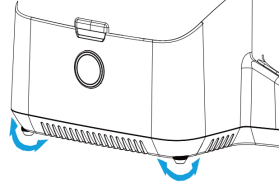
1. Position the printer
- (1) Place the printer on platform.
- (2) Adjust the four adjustable screws under the printer to help make it level if the printer is slightly tilted. There is a leveling bubble situated in the center on build platform, when the air bubble is centered the printer is level.
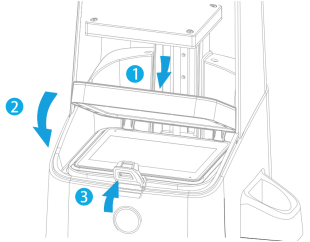
2. Insert Resin Tank
- (1) Tilt the resin tank to 30 degrees, and insert the rear fixed locating lugs into the holes inside the back of the LED panel.
- (2) Push the resin tank downwards toward LCD panel.
- (3) Push the lock catch to fasten the resin tank.
3. Insert the Build Platform
- (1) Keep the metal surface of build platform downward, make sure the locking arm is opened, and push the build platform onto the arm.
- (2) Pull the locking arm clockwise to lock the build platform.
4. Insert Resin Cartridge
- (1) Remove the cleaning bottle.
- (2) Remove rigid cap of resin bottle.
- (3) Insert the resin bottle into the slot and ensure that the needle punctures the rubber cap.
- (4) Pierce open one of the vent holes with the provided piercing tool.
- (5) Clip rigid cap on the bottom of bottle.

WARNING
Be aware of the needle in the opening, do not touch. Keep the vent hole open when pumping resin, otherwise the resin pumping system may burst into the printer. Use the provided small rubber stopper to close the vent hole when stocking or changing resin bottle.
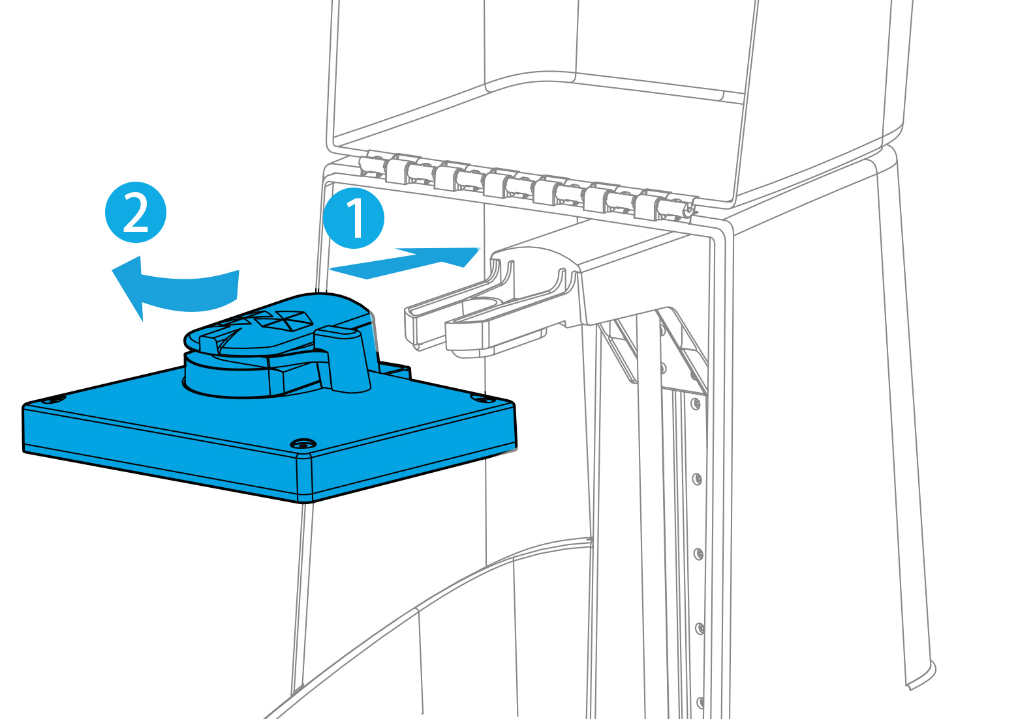
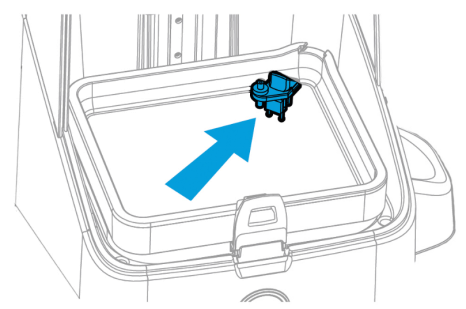
5. Install Liquid Level Sensor
Prepare The Software
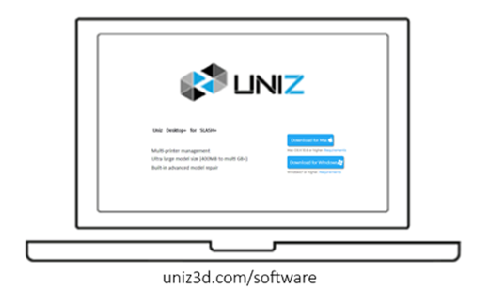
Download the Uniz software
Using a web browser, visit uniz.com/software to download the Uniz software.
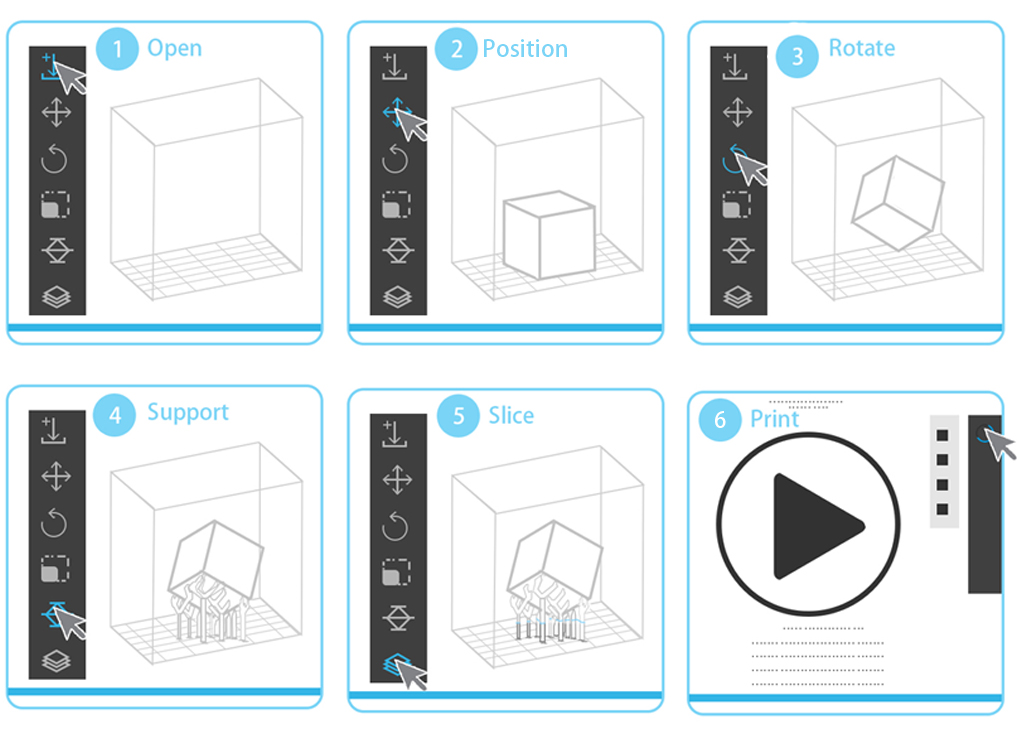
1.Prepare Slice for Print
- (1) Load 3D model.
- (2) Adjust the position of the model.
- (3) Adjust the angle of the model properly.
- (4) Add supports.
- (5) Set up the slicing parameters and begin slicing.
- (6) Select printer to upload slices and start to print.
2.Printing Confirmation
The main button located on the front of the printer will light up in various colors to indicate the printer’s status. A blue light means that the printer is currently receiving data. A red light means the printer is busy and a blinking green light means that the printer is waiting for user confirmation to proceed. Place a finger on the button to begin the print.
TIP
Ensure that the resin tank and build platform are clean before you proceed.
After Print
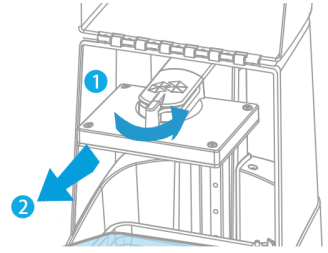
1. Remove the Build Platform
After printing, put on latex or nitrile protective gloves, rotate the locking arm counterclockwise to unlock the build platform, pull out towards you and remove it.
TIP
After removing the build platform, remember to close the top cover to prevent the remaining resin being cured by external light.
2. Wash Your Print
Use clean tissue or paper towel to wipe off the remaining resin, rinse the model on the build platform with alcohol, and pay particular attention to gaps and holes and rinse uncured resin from these areas. If possible, use ultrasonic cleaner for a few minutes to clean resin from printed part.
3. Finish Your Print
-
(1) Remove the printed parts.
Use a scraper to remove the printed parts from build platform.
-
(2) Cut off supports.
Use clippers or scissors to cut off the supports.
-
(3) Post-processing.
Use sandpaper or rotary tool to polish the supports’ contact points, smooth the any rough surfaces, and place the printed parts under UV light or sunlight to fully cure the part.

