USAGE AND MAINTENANCE
In order to have a smoothly working IBEE printer, it is important to maintain it correctly. In this chapter the most important tips are described. It is recommended to read them carefully in order to achieve the best results with your printer.
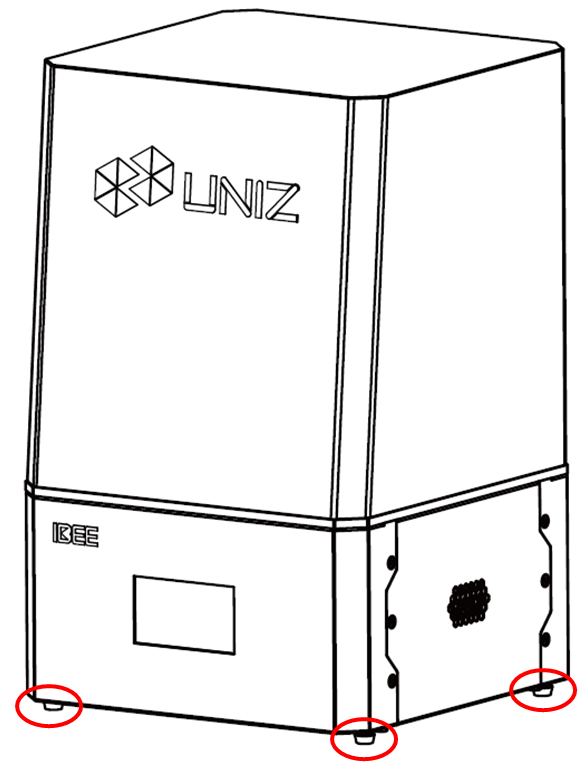
PRINTER PLACEMENT AND LEVELING
1. Put the printer on a stable desktop to keep the printer steady during printing to effectively guarantee the model quality.
2. The level of the printer is maintained by four leveling screws underneath. Adjust the four screws to restore the levelness of the printer if necessary.
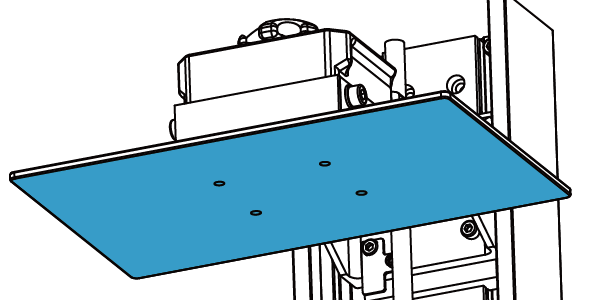
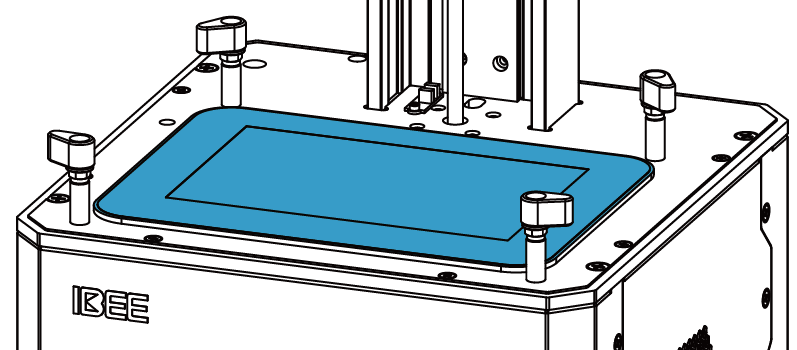
BUILD PLATFORM
The Build Platform is the platform where the first layer of the model burns-in to, its levelness and roughness are crucial to successful prints.
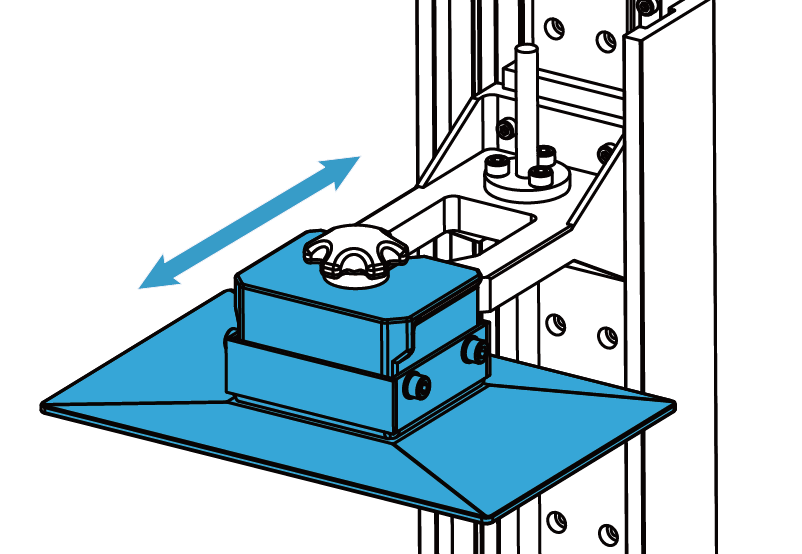
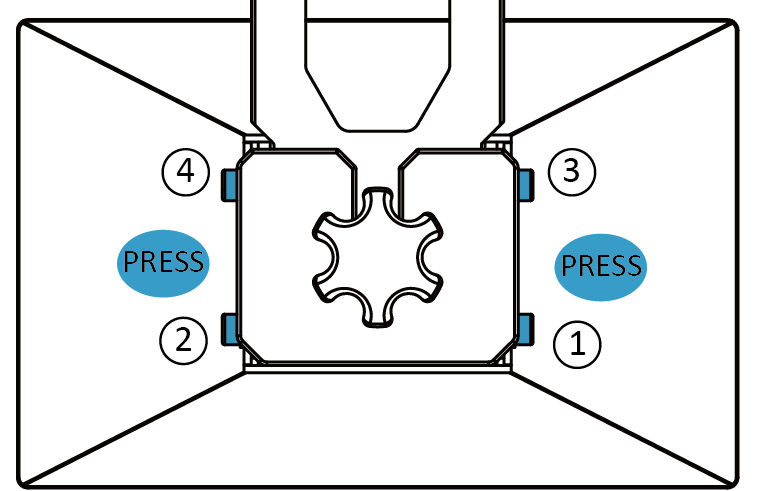
INSTALLATION AND REMOVAL OF BUILD PLATFORM
1. Turn the platform locking screw clockwise to lock (Turn the platform locking screw counter-clockwise to unlock).
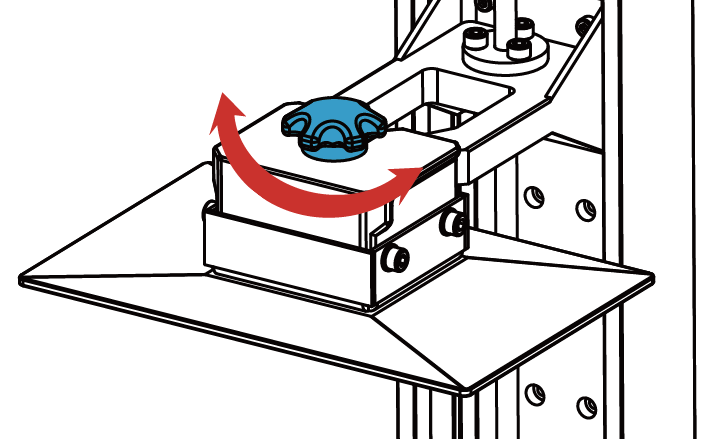
2. Install or remove the platform.
SANDING BUILD PLATFORM
After the platform has been used for a long time, its surface will become smooth which leads to poor model adhesion and increases the printing failure rate. To deal with this problem, users need to sand the platform.
1. Clean the platform surface with alcohol.
2. Grind the surface into a grid shape with the sand sandpaper delivered with the machine.

3. Clean the platform with alcohol again to make sure there is no residue left.
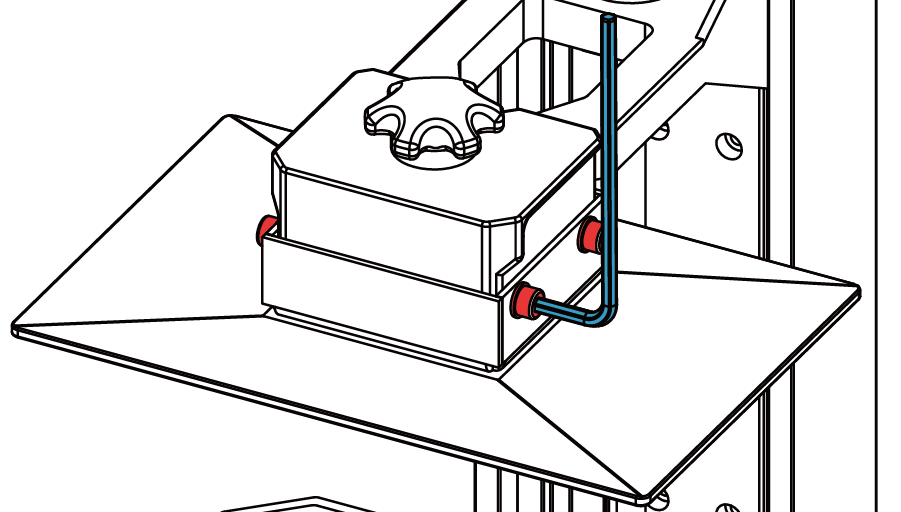
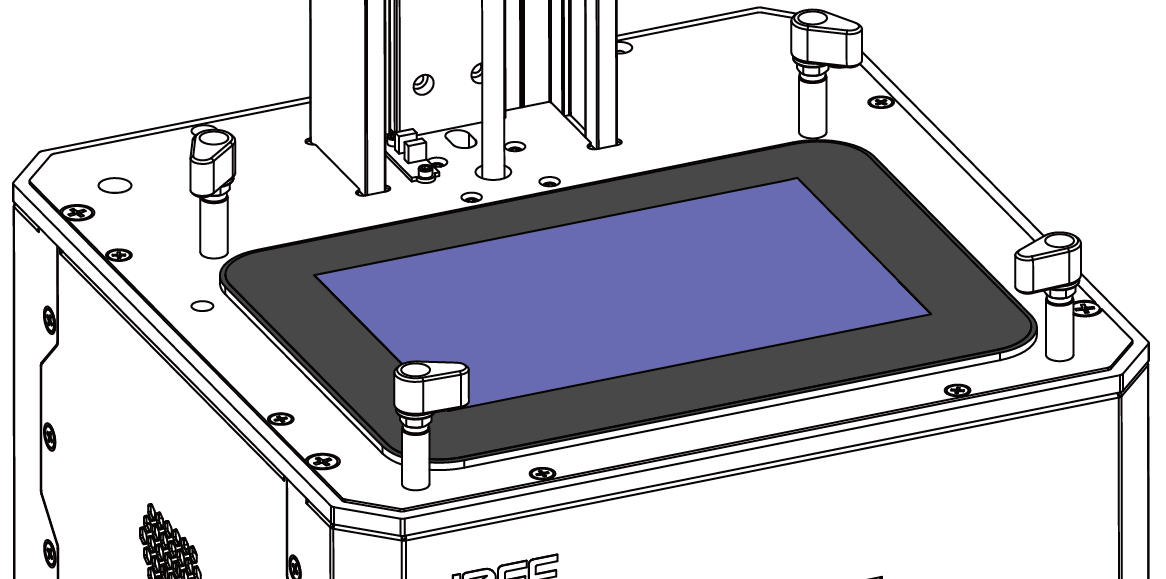
RESET Z-axis ZERO POSITION AND LEVELING BUILD PLATFORM
1. Prepare one A4 paper and the Hexagon Wrench in the accessory box sent with printer.
2. Make sure the bottom of Platform is clean and dry.
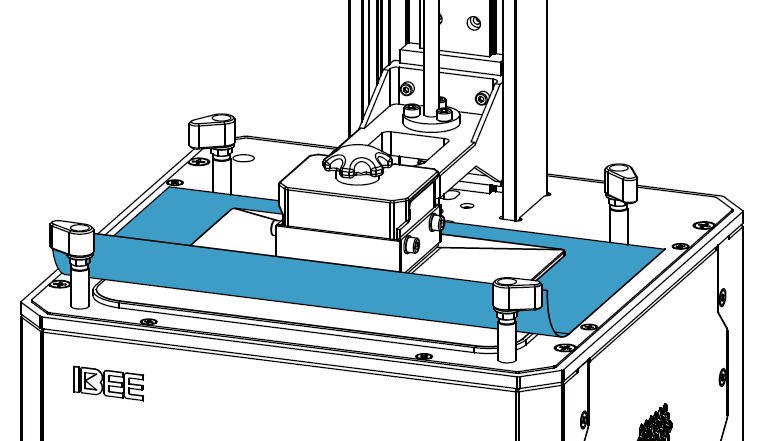
3. Turn the four lock blocks and take Resin Tank off.
4. Loosen the four screws with Hexagon Wrench by turning counter-clockwise.
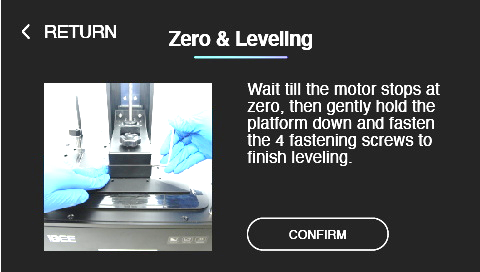
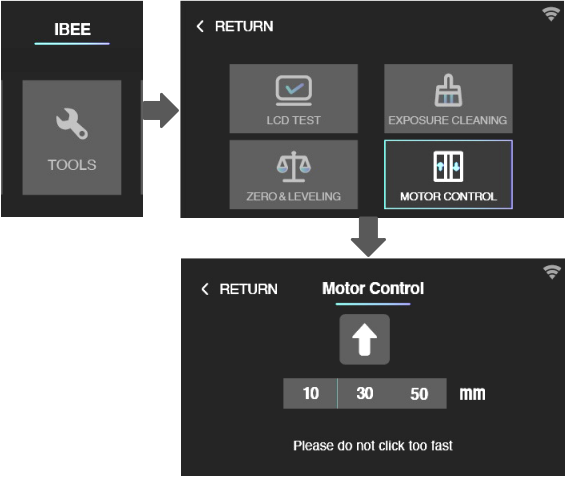
5. Click TOOLS/ZERO&LEVELING, then read the introduction and click CONFIRM twice to start.
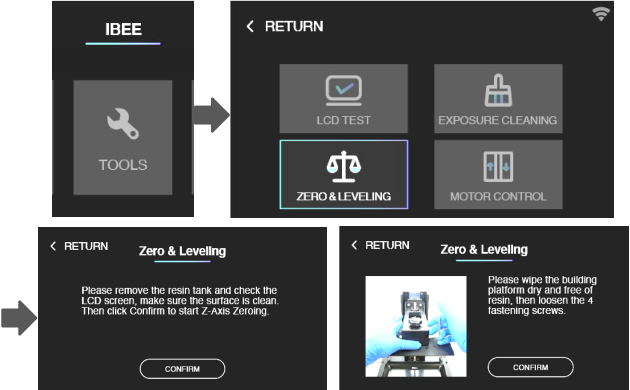
6. After Build Platform moves to the lowest position and stops, press the plate and tighten the four screws with Hexagon Wrench by turning clockwise-as the picture shows.

7. Click CONFIRM to finish.
8. Click TOOLS/MOTOR CONTROL, and then choose the 10mm option and click the arrow. Build Platform will move upwards.
9. Wait until the Platform stops, put a piece of A4 paper under the Platform and repeat step 5.
10. Try to pull out A4 paper from any directions. If you can feel the frictional force between Platform and A4 paper, that means it is zeroed and leveled successfully.
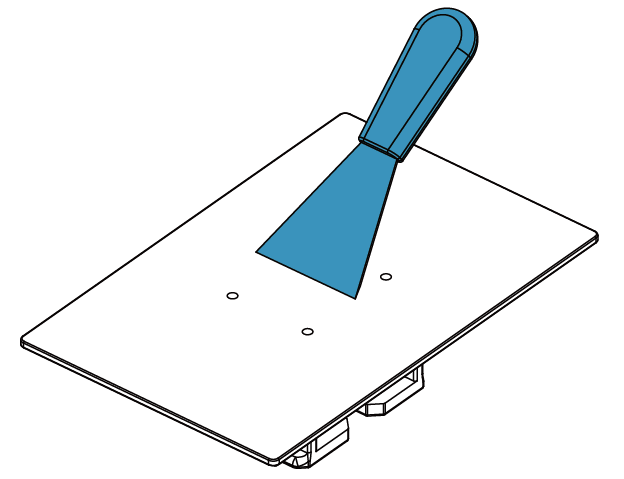
CLEAN BUILD PLATFORM
When printing fails, there may be residues on the platform which needs to be cleaned in time to avoid damage to the screen.
Please use the Shovel delivered with the printer to remove the residues (please dispose of solidified materials and waste resin properly).
Notes
1. After removal of model, please clean Build Platform thoroughly, any leftover bits may damage the Resin Tank or LCD.
2. Please be careful and do not hurt yourself.
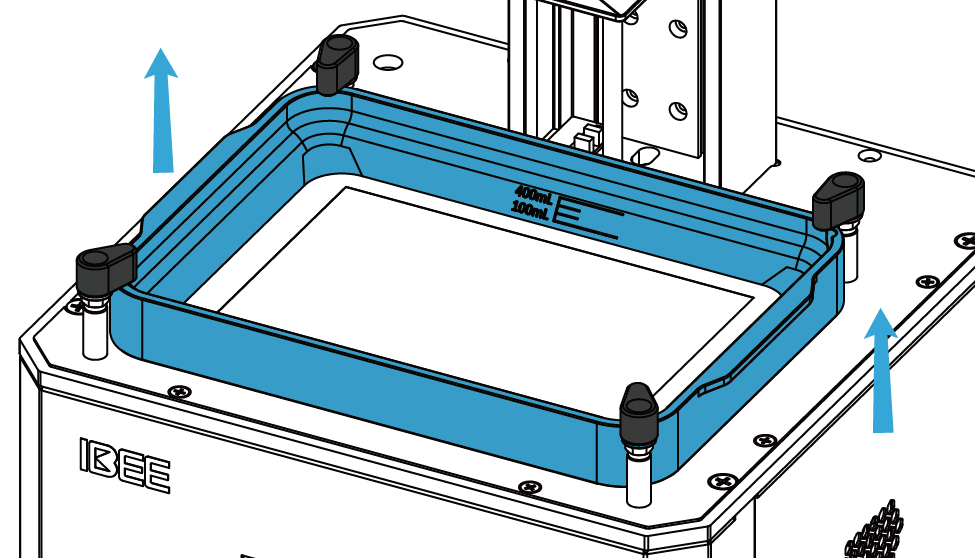
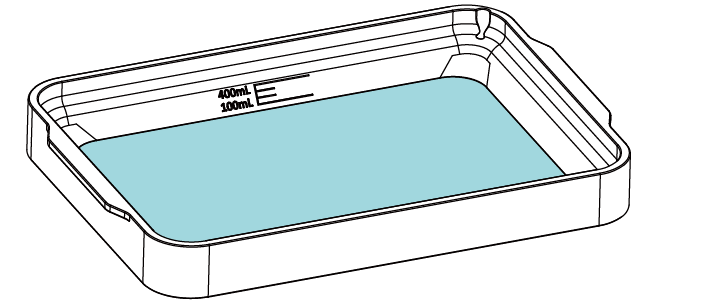
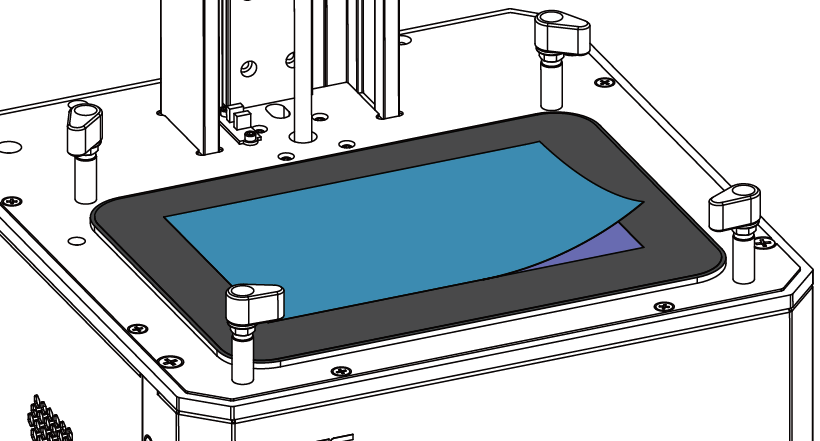
RESIN TANK
The Resin Tank is a crucial part for a successful print job, and requires constant maintenance and regular replacement.
INSTALLATION
1. Make sure the LCD is clean and dry.
2. Put Resin Tank onto the LCD screen.
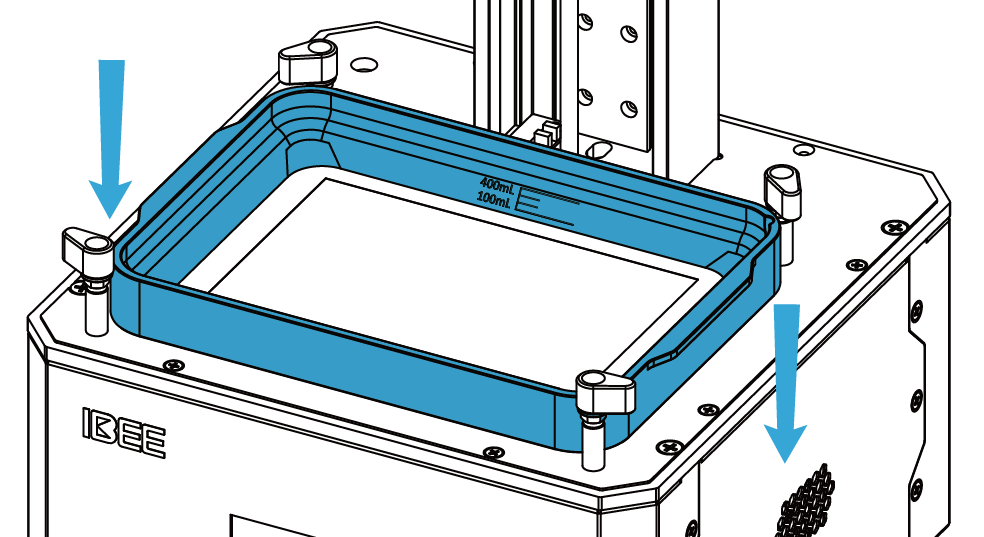
3. Turn the four lock blocks to lock the Resin Tank.
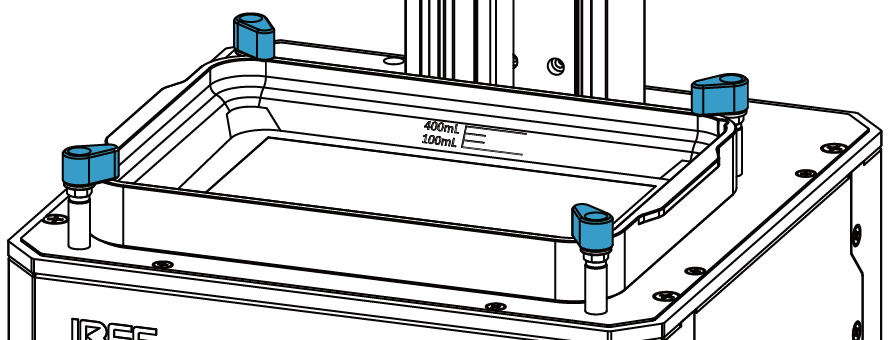
4. Make sure the Resin Tank is stably locked and repeat the above steps if it shakes.
CLEAN RESIN TANK
When printing fails, there may be residues in the Resin Tank which needs to be cleaned in time to avoid damage to the screen.
When residues are small in number and big in volume, use the cards delivered with the machine to clean; when residues are big in number and small in volume, it is recommended to use the Full Screen Clean function as following.
1. Click TOOLS/EXPOSURE CLEANING, repeat if necessary.
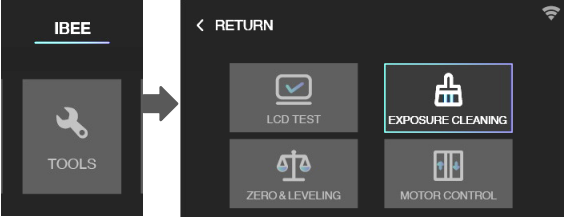
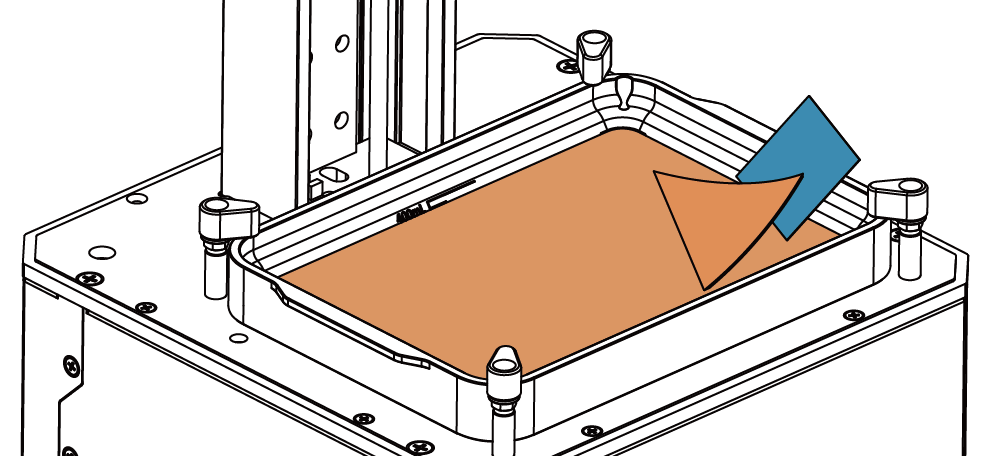
2. After the exposure is done, gently scrape off the whole piece of cured resin from Tank with a paper card. DO NOT use the scrapper, since this may damage the film and cause a severe leak.
Change the Resin Tank Film
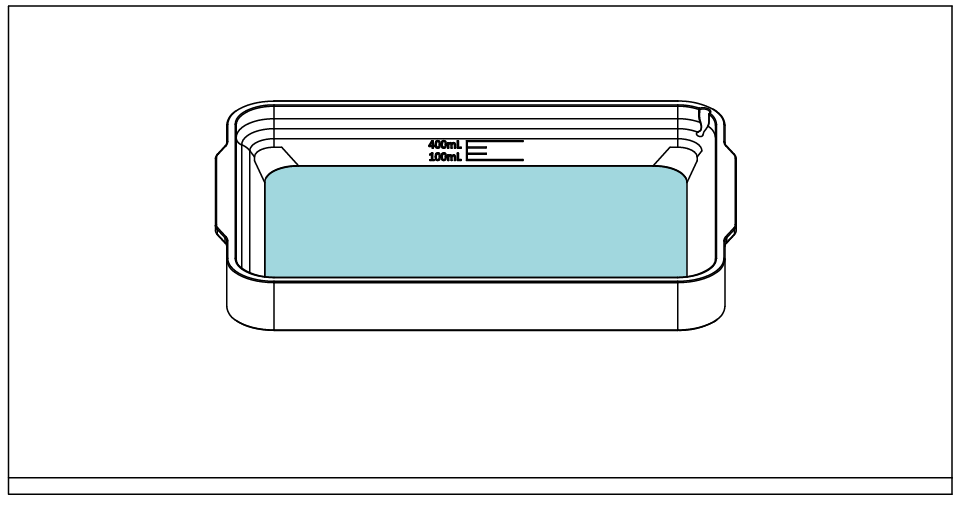
1. Make sure the Resin Tank is wiped clean inside and out, and put it on a clean table.
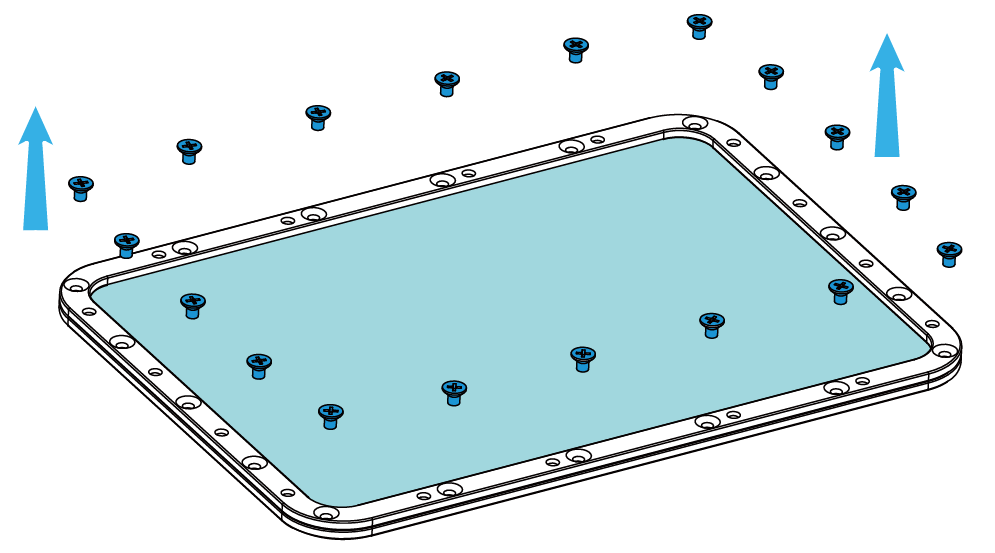
2. Flip the Resin Tank and remove the outer 16 down-side screws with a screwdriver.
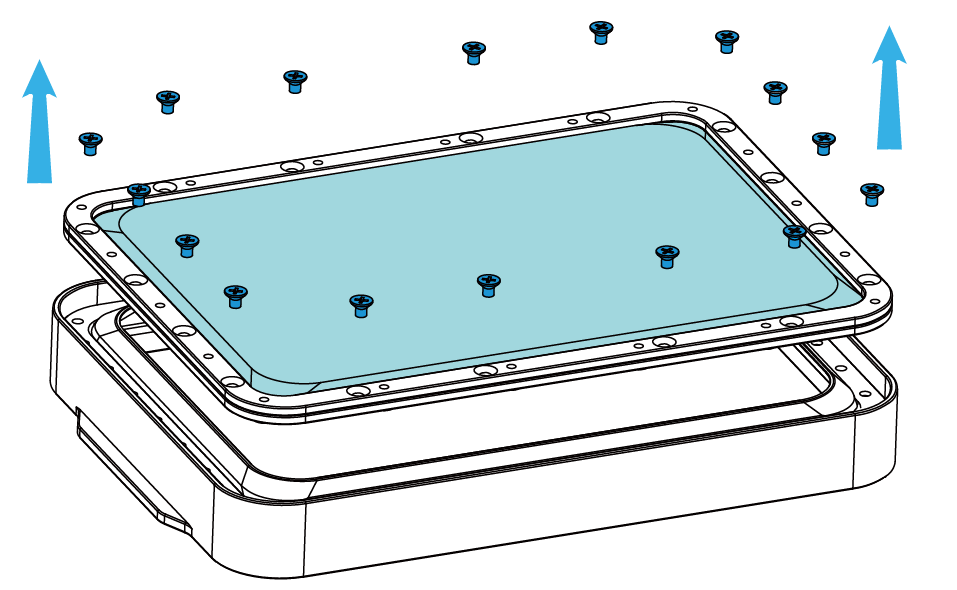
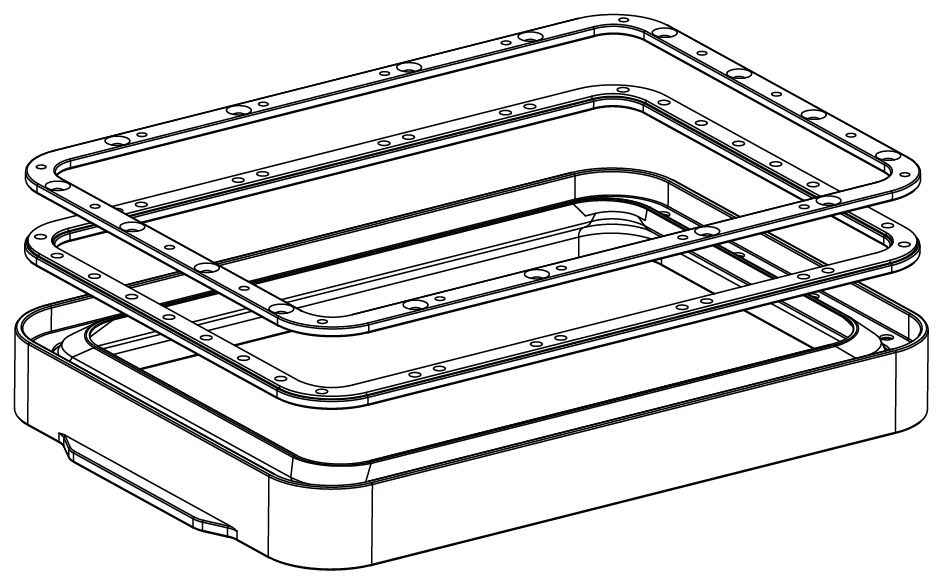
3. Take out the Film Frame, and put it on the table then remove the remaining 18 up-side screws.
4. Wipe clean the Resin Tank and Film Frame. Be careful don’t damage the film sealer.
5. Lay the Frame flat, sandwich a new film between the Frames, then press the film with the Acrylic Plate and Build Platform. Keep the concave surface of film upwards.
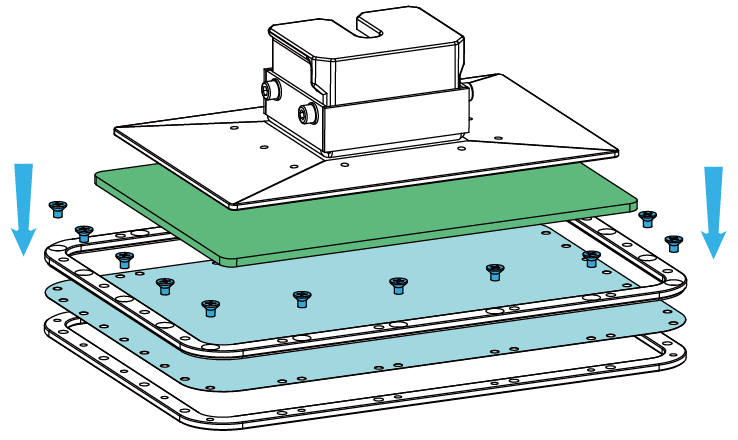
6. Tighten the 18 up-side screws while holding the Film Frame down.
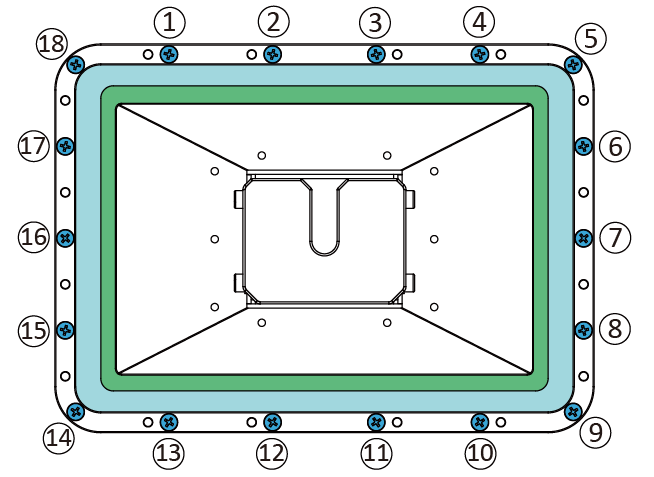
7. Put the Frame back into Resin Tank’s slot, then slowly tighten 16 down-side screws.
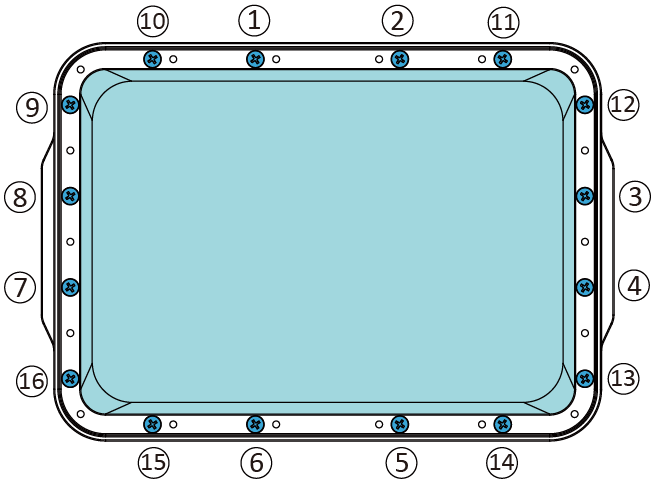
8. Changing the Resin Tank film is finished.
CHANGE LCD PROTECTIVE FILM
There is a protective film on the LCD of IBEE. If the film is scratched or dirty with cured resin, you should change for a new one.
1. Peel off the old film.
2. Clean the surface of LCD and make sure there is no dust and residue left.
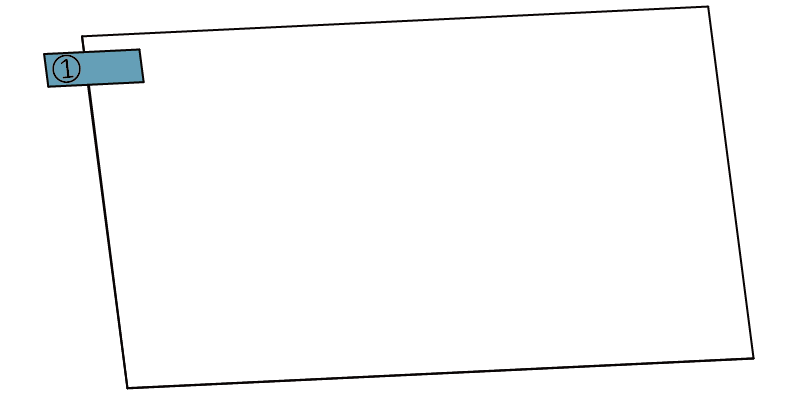
3. Take out a new film and peel off the cover film marked ‘①’.
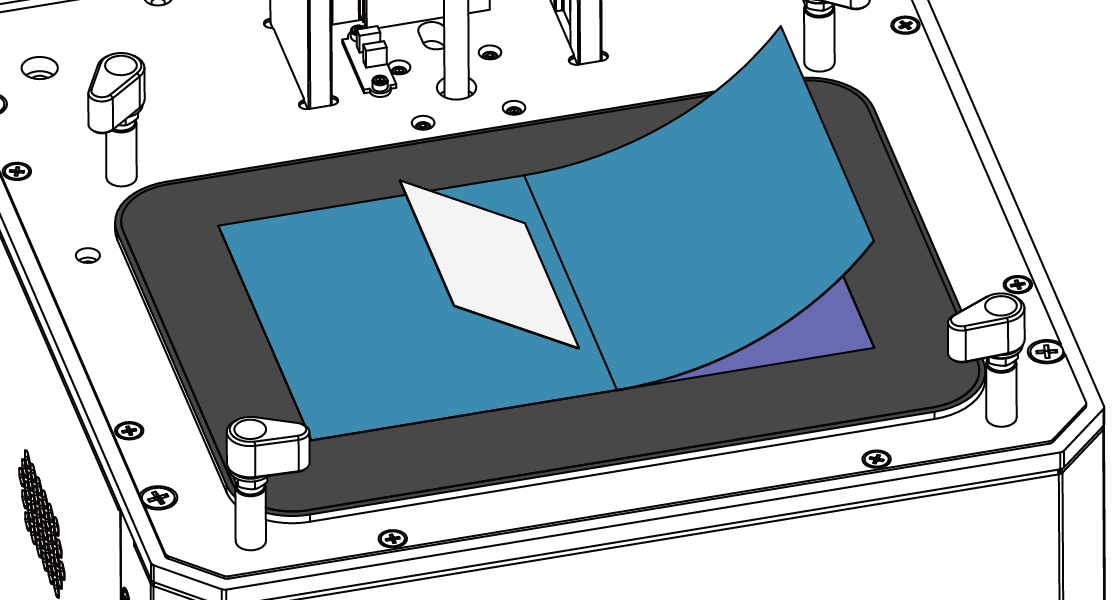
4. Using a card and cloth to paste the film onto the surface of LCD.
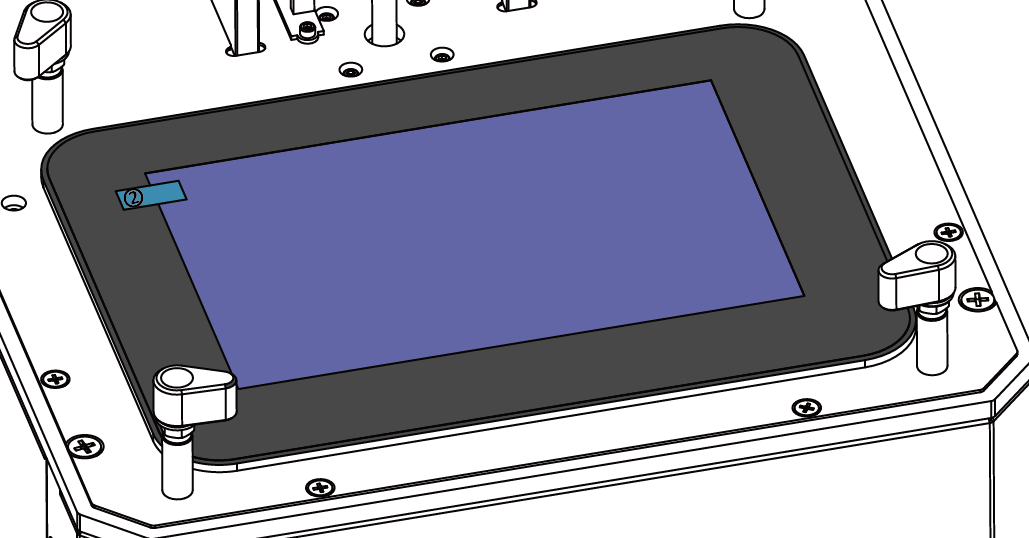
5. Peel off the cover film marked ‘②’.
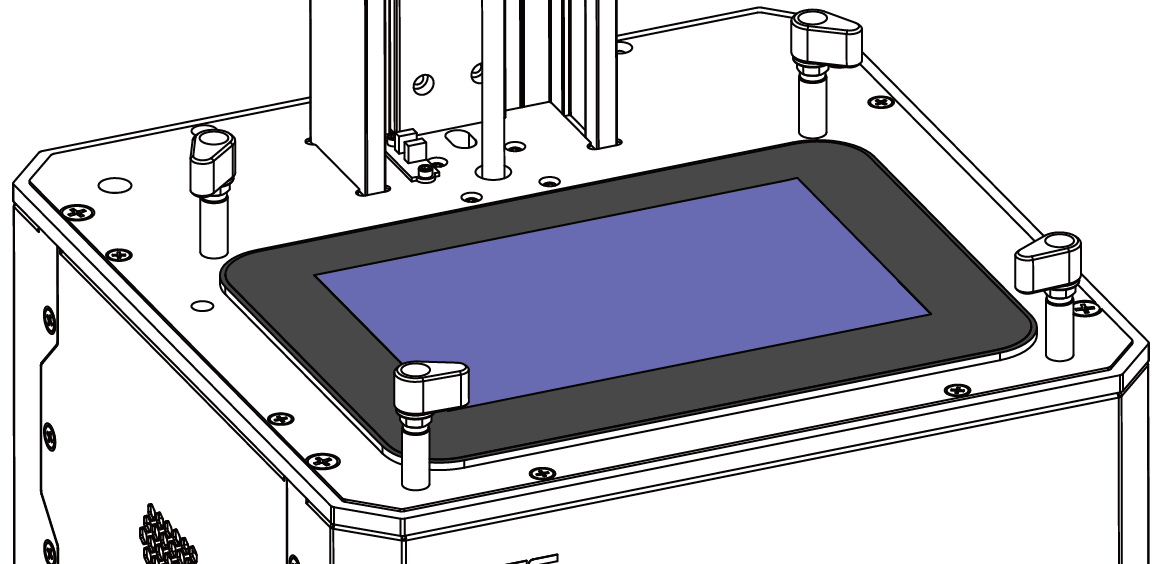
6. All done. The air bubble between film and LCD will disappear automatically in a period of time.
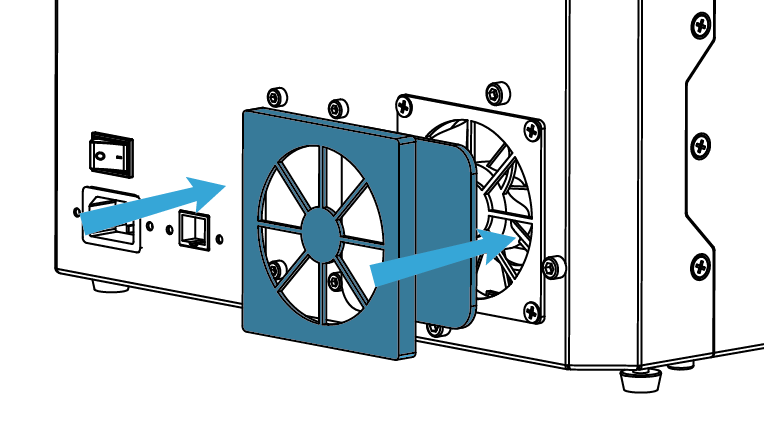
CLEAN AIR FILTER
1. Pry and take off the cover of air filter at the behind of printer.
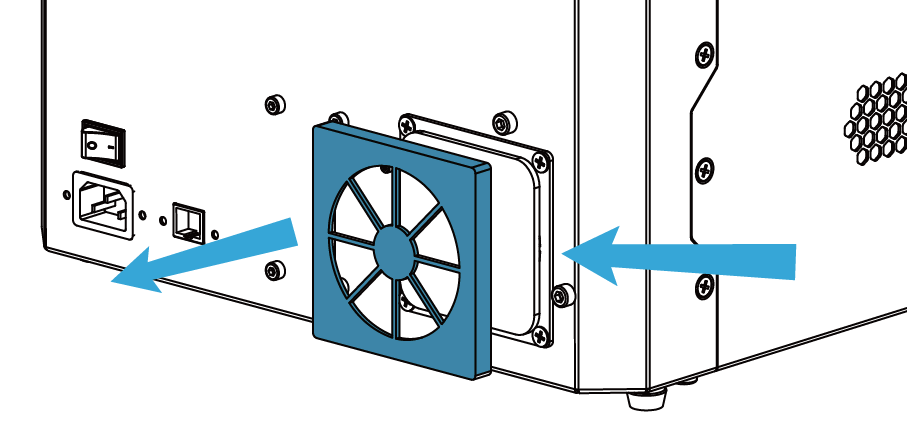
2. Take off the filter and use water or alcohol to clean it.
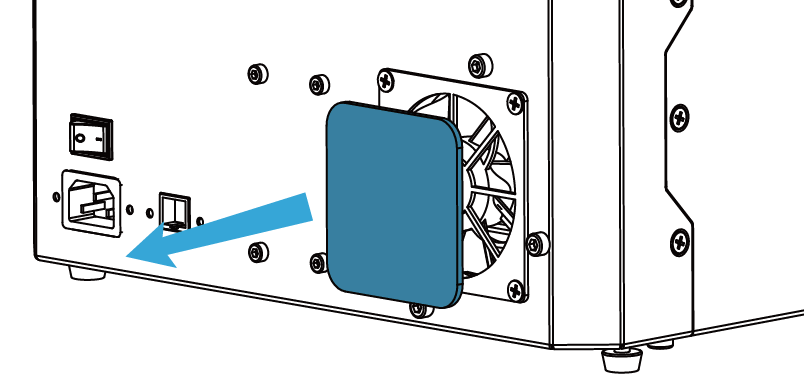
3. Push the filter and cover back.