INTERFACE INFORMATION
You may check device information, control the printer, and start printing projects using the touch screen on the front of NBEE.
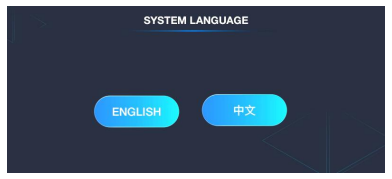
First of all, please choose the language you used.
MAIN INTERFACE
There are four main functions: Standby/Print, File List, Tools, Settings.

There is an indicator light on the Standby/Print interface.
 Solid green means the printer is ready for printing.
 Blinking green means the print is in progress.
 Blinking red means the print program is stopping and the platform is moving upwards.
Note
Some functions have 1~3 pages to introduce the details. Please read carefully and follow the instructions.
PRINT WITH FLASH DISK
NBEE 3D supports flash drive printing, you may use UNIZ Dental to slice the model on your PC then save it to your flash drive to print. Plug the flash drive to the USB port on the left of the printer, then choose the slice you want to print and click Start button  , The printer will step into normal printing program.
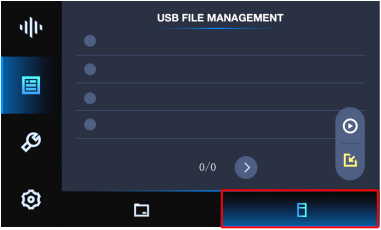
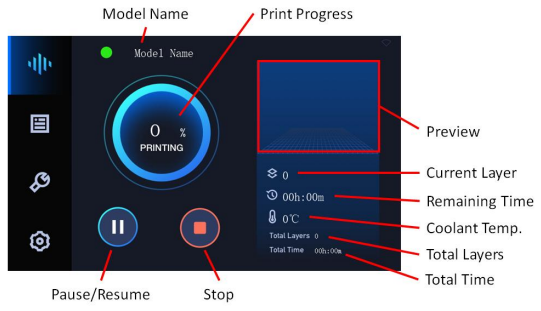
In this interface, you may check the preview and printing parameters of the print. Also you may pause/resume or stop the printing program by click the buttons on bottom.
You may also select a slice file and use the COPY function to copy the file to the printer.

PRINT LOCAL FILES
The files printed on the printer will be shown in this interface. You may choose and print a model second time very expediently with this function.
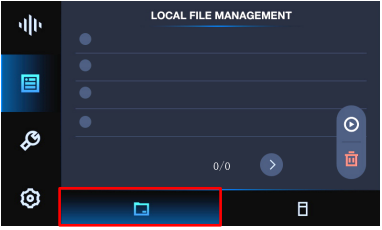
You may also select a slice file and use DELETE to delete it

To make sure the printer works properly under low temperature conditions, the system will ask you whether to enable the preheating feature. Note that preheating takes extra time, and it is recommended to use the printer in temperature controlled environment.
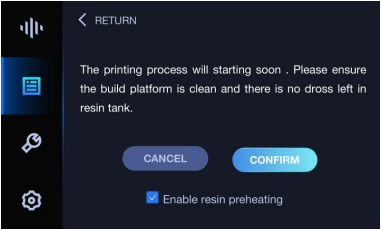
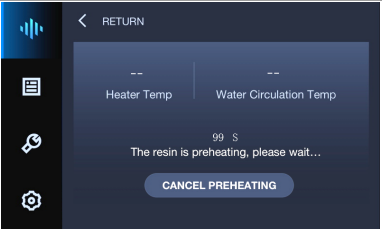
The printer will measure environment temperature, if it is below 18°C, then the system will start preheating until 30°C and hold for 100s or until you click CANCEL PREHEATING, and will start printing. If environment temperature is greater than 18°C then printing will start promptly.
TOOLS
LCD TEST
This function is used to help users to confirm the LCD works normally.
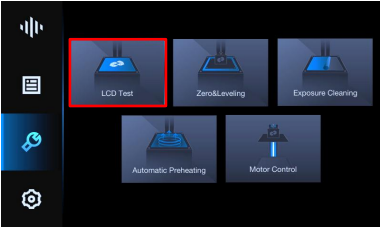
Click LCD TEST you will see the UNIZ Logo appears on the LCD screen.

RESET Z-AXIS ZERO POSITION AND LEVELING BUILD PLATFORM
If you change for a new Build Platform or the printing model may not stick onto the Platform, please reset z-axis zero position and leveling the Build Platform. You will use a regular printer paper and the Hexagon Wrench in the accessory box sent with your printer.
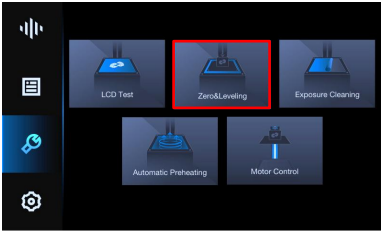
After leveling, please put the paper under Build Platform and reset again. It finishes if you may feel the frictional force between Platform and paper.
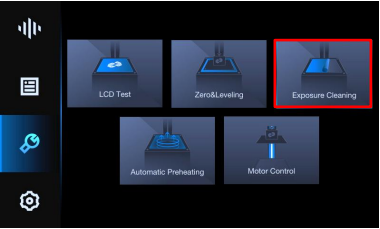
EXPOSURE CLEANING
When a failed print occurs and there are some residues left in the bottom of Resin Tank, you need to exposure to clean it. After that, please wear nitrile gloves and take the solidified piece out.
Automatic Preheating
To keep the printer be able to print at any time, you may enable the auto preheating feature and keep the resin at 25°
1. Auto preheating is by default disabled, and its status will depend on your last use. (heating upper limit 30°C)
2. If environment temperature is below 18°C, the resin will be kept at 30°C by heater via LCD liquid circulation system.
3. Once enabled, the printer will automatically heat up on next start up, saving preparation time.
4. Ambient Temp and LED Light Board Temp are for your reference only, preheating functions do not involve these parameters.

Note: only enable this when there is resin in the resin tank.
MOTOR CONTROL
SET LAN
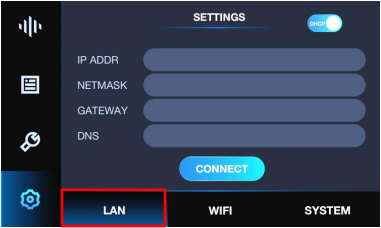
You could connect the printer with your router via Ethernet cable. Go the SETTINGS menu. Click LAN button. Set to AUTO mode on. The printer will get IP address automatically. Click CONNECT.
If you set AUTO mode off, you need to type IP address, Netmask, Gateway, DNS manually. Then click CONNECT. When you could see the Ethernet icon at right top of interface, it means the printer in connected with network.

SETTINGS
SET LAN
You could connect the printer with your router via Ethernet cable. Go the SETTINGS menu. Click LAN button. Set to AUTO mode on. The printer will get IP address automatically. Click CONNECT
If you set AUTO mode off, you need to type IP address, Netmask, Gateway, DNS manually. Then click CONNECT. When you could see the Ethernet icon at right top of interface, it means the printer in connected with network.
SET WIFI
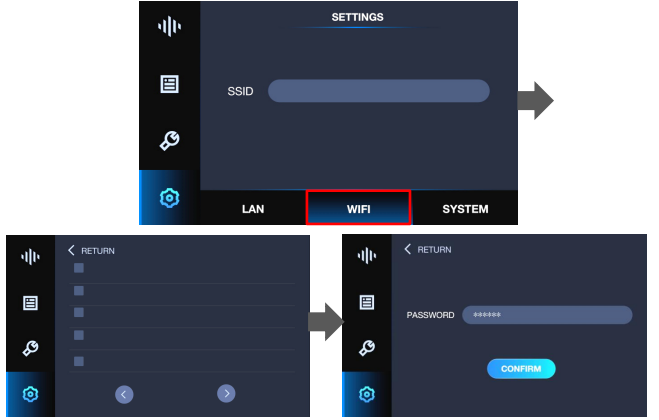
Please insert the USB-WiFi sent with the printer into the USB port on the left side of printer.
You could connect the printer with your router via Wi-Fi. Go the SETTINGS menu. Click WIFI/SSID, there will be a list of available Wi-Fi. Choose the Wi-Fi network and enter password. Click CONFIRM. When you see the IP address is shown, it means the printer is connected well with WiFi network. There should be a Wi-Fi icon appearing at right top of this interface.
SYSTEM
Enter SETTINGS menu and click SYSTEM.
1. If you need to get the SN number, you may use a QR code scanner.
2. You can also set the printer alias and system language in this interface.
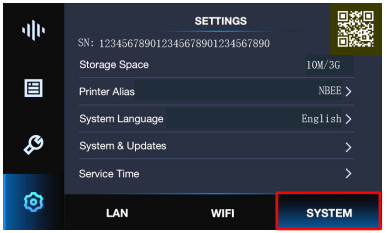
3. If you need to check the current firmware version, upgrade firmware, or perform Factory Reset, please click System&Updates.
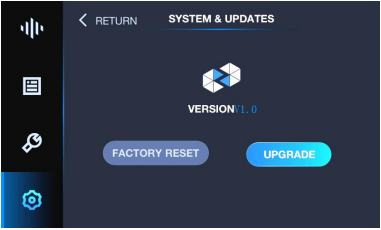
Note: Factory Reset only resets LAN and alias, but will not modify light calibration or firmware version, LCD, LED, and coolant pump time.
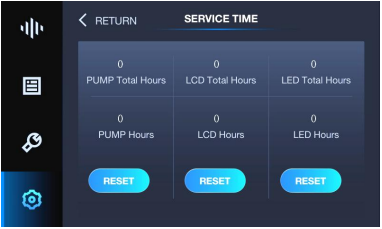
4. Click Service Time to access the work time record, here you may check the total work time of three main component of the printer: LCD, LED, and coolant pump
The first line shows the total accumulated work time, including all previously replaced parts.
The second line shows the current part work time, and you should reset the second line timer once you replaced any component.
PRINT RECALL
The last file printed on the printer will be shown in the MOST RECENT interface. You may print a model second time very expediently with this function.
