USAGE AND MAINTENANCE
In order to have a smoothly working SLASH 2 PLUS printer, it is important to maintain it correctly. In this chapter the most important maintenance tips are described. It is recommended to read them carefully in order to achieve the best results with your printer.
PRINTER PLACEMENT AND LEVELING
1. Put the printer on a stable desktop to keep the printer steady during printing to effectively guarantee the model quality.
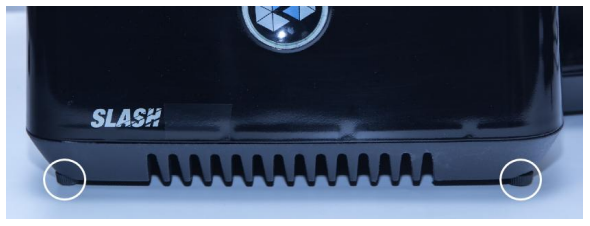
2. The level of printer is maintained by four level screws underneath. After placing the printer on a flat surface, adjust the four screws to restore the levelness of the printer.
BUILD PLATFORM
The Build Platform is the platform where the first layer of the model burns-in to, its levelness and roughness are crucial to successful prints.
INSTALLATION AND REMOVAL OF BUILD PLATFORM
1. Turn the platform locking arm clockwise to lock.
2. Turn the platform locking arm anti-clockwise to unlock.
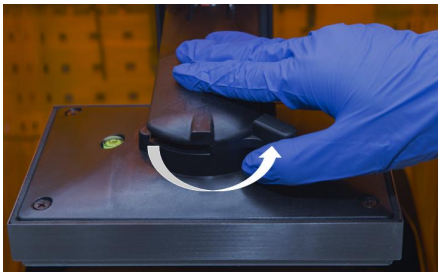
3. Pull back to take off the platform.
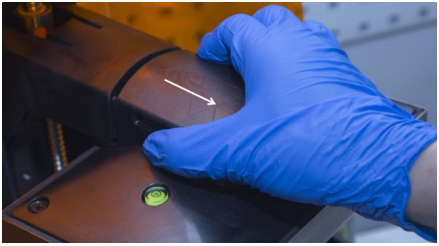
4. Push forward to put on the platform when it is in unlocked status.
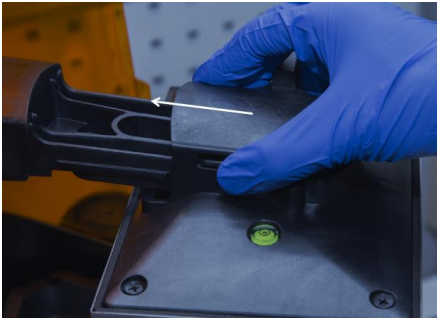
5. Turn the arm clockwise to lock.
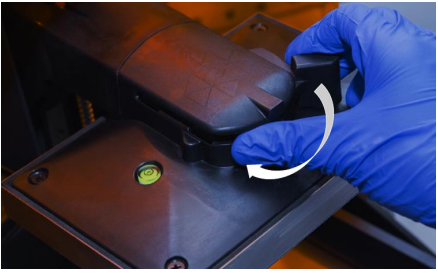
6. Installation is completed.
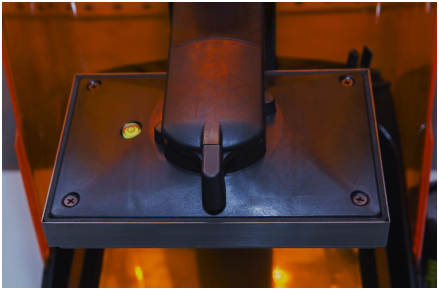
Notes: If it is tight to take off the platform, shake the platform left and right when pull it back.
SANDING BUILD PLATFORM
After the platform has been used for a long time, its surface will become smooth which leads to poor model adhesion and increases the printing failure rate. To deal with this problem, users need to sand the platform.
1. Clean the platform surface with alcohol.
2. Grind the surface into a grid shape with the sand sandpaper delivered with the machine.
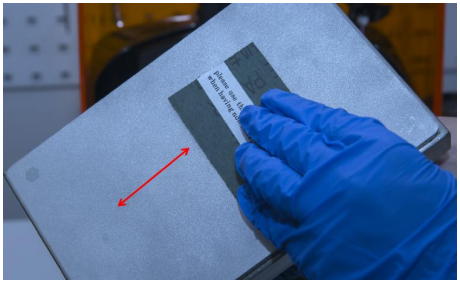
3. Clean the platform with alcohol again to make sure there is no residue left.
4. Calibrate the Z-axis zero position.
RESET Z-AXIS ZERO POSITION AND LEVELING BUILD PLATFORM
1. Prepare four pieces of paper and a cross screwdriver.
2. Tighten four screws with cross screwdriver by turning clockwise.
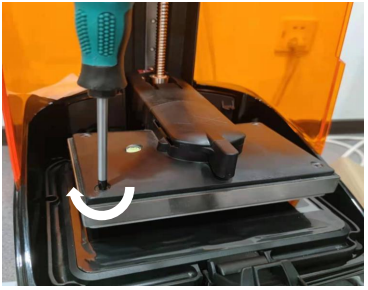
3. Push the Build Platform down until it comes into contact with the LCD.
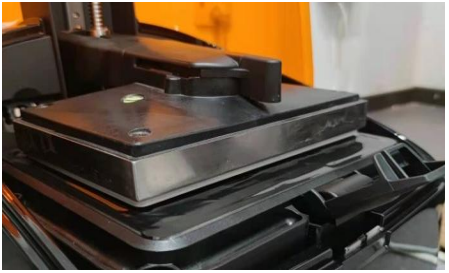
4. Place four pieces of paper under four corners of Build Platform then push down Build Platform to touch LCD screen. At this time, there is at least one pieces of paper is pressed between Build Platform and LCD screen (which means this corner is in good position).
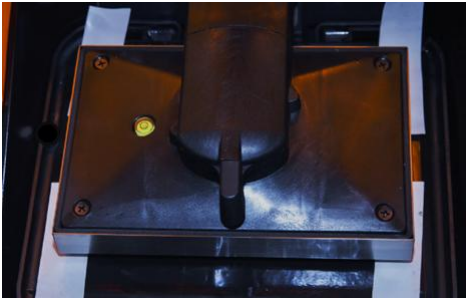
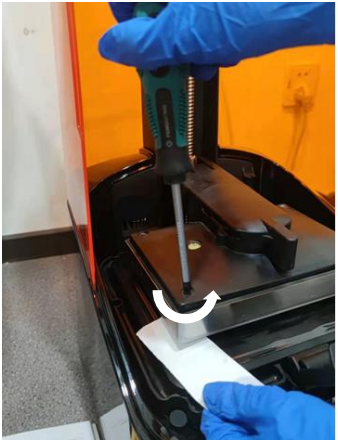
5. Select a corner where the paper is loose. Use screwdriver to loosen screw by turning anticlockwise and pull and push paper. When the paper cannot be pulled, it means this corner touch the screen closely and in good position. Use the same method to adjust other corners and ensure all corners are pressed firmly.
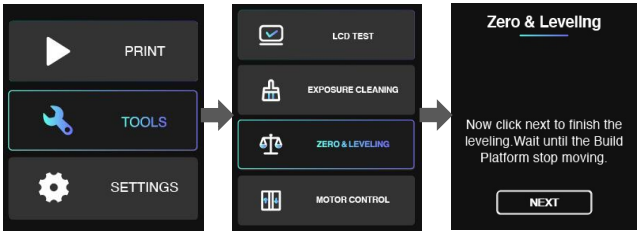
6. Click NEXT to calibrate the Z-axis zero position.
RESIN TANK
The Resin Tank is a crucial part for a successful print job, and requires constant maintenance and regular replacement.
INSTALLATION
1. Find the two fitting slots.
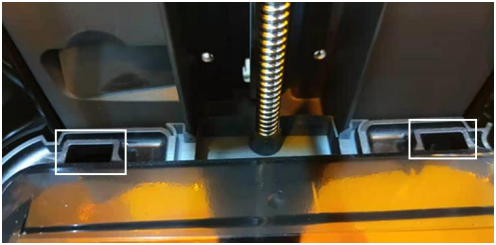
2. Insert the Resin Tank to the slots by 10 degrees and put the tank down onto the screen.
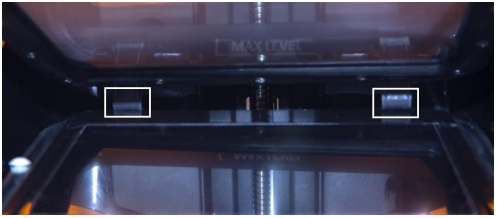
3. Put inward the hatch to lock the Resin Tank.
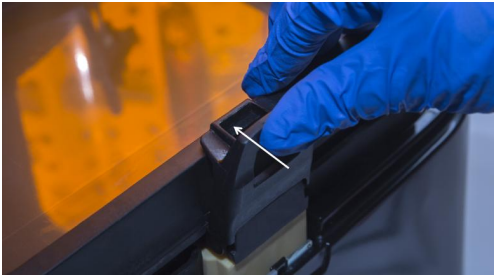
4. Make sure the Resin Tank is stably locked and repeat the above steps if the tank shakes.
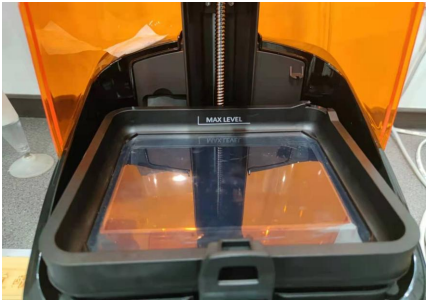
Notes: If there is some resin in the Tank, please be carefully while install it
CLEAN RESIN TANK
When printing fails, there may be residues on the platform and in the Resin Tank which needs to be cleaned in time to avoid damage to the screen.
When residues are small in number and big in volume, use the cards delivered with the machine to clean; when residues are big in number and small in volume, it is recommended to use the EXPOSURE CLEANING function in the software: remove the platform and click on the button. After the exposure is over, gently scrape off the whole piece of cured resin from corner.
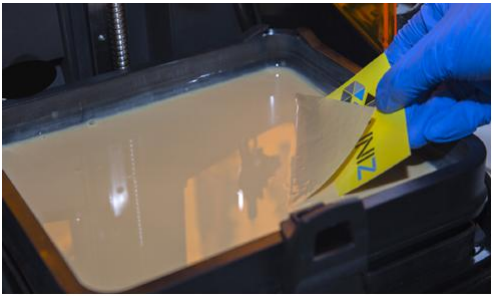
Notes: 1. Don’t use metal scraper to clean solidified piece. It will harm resin tank film.
2. Refer to Page 9 of this manual for operation steps
CHANGE LCD PROTECTIVE FILM
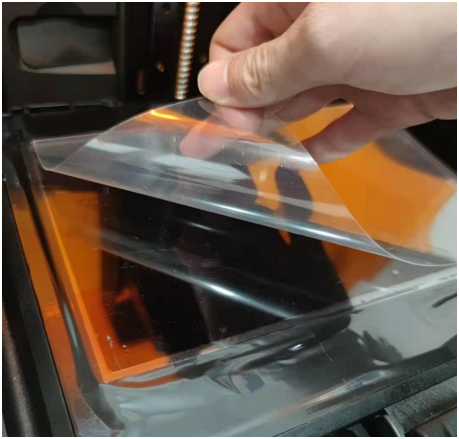
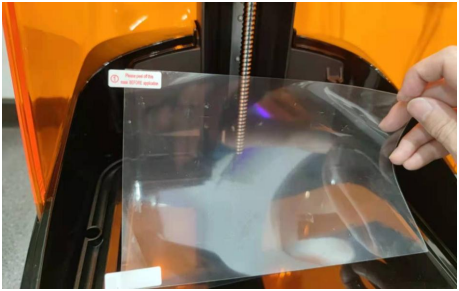
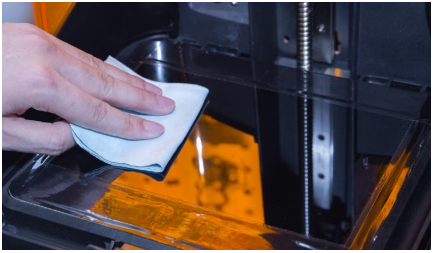
There is a protective film on the LCD of SLASH 2 PLUS. If the film is scratched or dirty with cured resin, you should change for a new one.
1. Peel off the old film.
2. Take out a new one.
3. Clean the surface of LCD and make sure there is no dust and residue left.
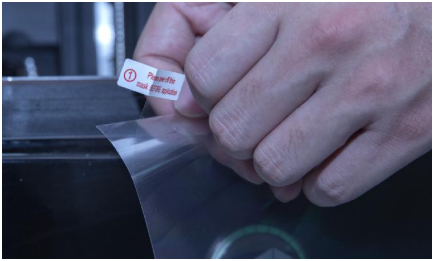
4. Peel off the cover film marked ‘①’.
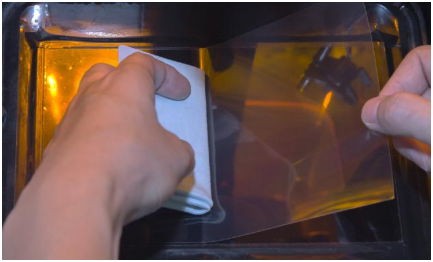
5. Using a card and cloth to paste the film onto the surface of LCD.
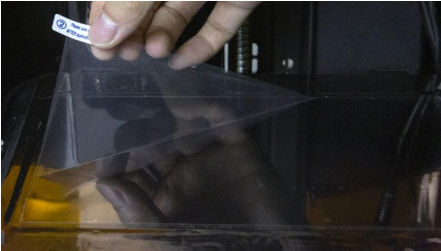
6. Peel off the cover film marked ‘②’.
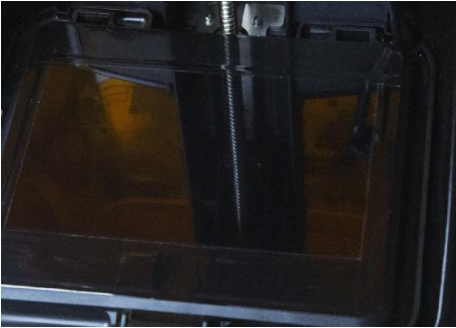
7. All done. The bubble between film and LCD will get out automatically in a period of time.
RESIN STORAGE
1. For long-term storage, it is recommended to redraw resin back to the Resin Bottle to avoid curing
2. For short-term storage, it is recommended to cover Resin Tank with Resin Tank cover which matches the tank to avoid resin curing by contacting light.
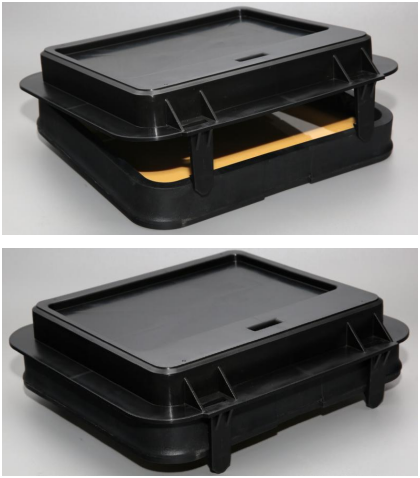
Resin Tank Cover as shown in the photo and press tightly and store away from light.
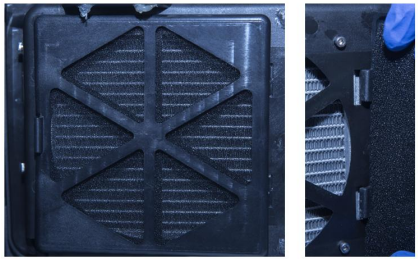
CHANGE BOTTOM FILTER
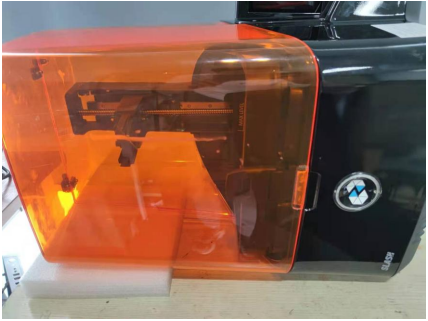
1. Put printer sideways like the picture shows. Lay protections to prevent possible damage to the printer cover.
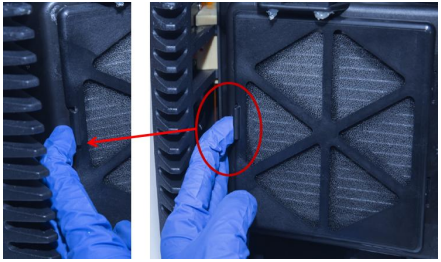
2. Take off the bottom filter holder.
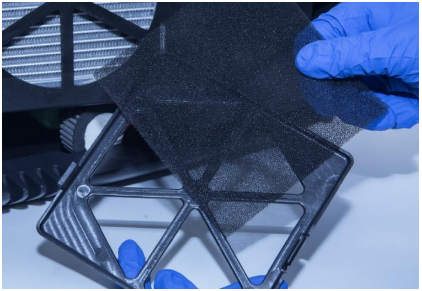
3. Change for a new filter.
4. Lock the holder back.
CLEAN THE LEAKED RESIN
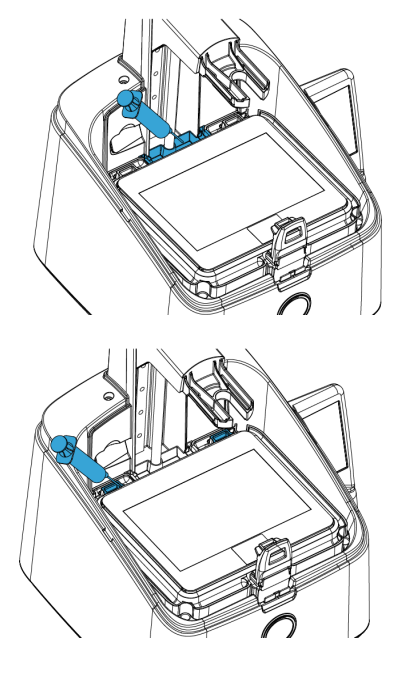
Compared with previous types, SLASH 2 PLUS series products have added some new parts between the Base Column and the Tank Platform. These parts are used to contain the overflowed or leaked resin from the Resin Tank and prevent the resin from entering the printer and causing damage.
If resin overflow or leak does occur, please use the injector with flat-headed needle in accessory of printer to draw out the resin near the Column and the buckle hole of the Resin Tank in time and avoid the resin entering the printer.
SUGGESTION
After taking off resin tank, please place it on a clean table to avoid scratch.
2. When you slice a file by UNIZ Dental software, we recommend saving the sliced file to a solid state drive (SSD) for faster storage speed.
3. Check whether there is dross left on Build Platform or at bottom of resin tank before each printing. If there is dross left on Build Platform, clean it with a scraper. If there is dross left in resin tank, you could use Exposure Cleaning function to cure and clean.
4. Well mix the resin in resin tank by stirring with a hard cardboard like business card before each printing.
5. Place the printer on a smooth desk, adjust 4 leveling screws to keep the printer stable to avoid disturbing while printing.
6. Keep the Cover in position while printing.
7. Check and clean the Build Platform and Resin Tank after each print.
8. Clean resin dropped incidentally on LCD screen, cover immediately.
9. Drill a hole at the side of the bottom of a model if it is a closed hollowed model.
10. Keep the printer and resin tank in a ventilated place, avoiding straight sunlight.
11. Use 80~200 mesh filter to filter the resin when put it back to bottle for storage.
12. Do NOT move printer when there is resin left in resin tank to avoid spilling.
13. Do Not let child close or operate the printer to avoid harm to child or damage to printer.
14. Do NOT gaze LCD screen when doing test print without Resin Tank and Build Platform.
15. Do NOT leave resin in resin tank for more than 24 hours if not print.


