Anti-aliasing and Image Blur
The principle of LCD-based stereolithographic technology is to display sliced images on the LCD screen, and use an UV light source to irradiate the LCD screen vertically. The photosensitive resin will be cured and solided under the irradiation of ultraviolet light transmitted through the LCD screen, and then cured layer by layer to complete the printing of the 3D model.
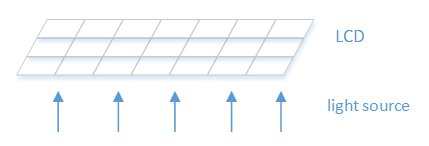
Schematic diagram of LCD-SLA light source
The display of the LCD screen is realized by controlling the light transmittance of the liquid crystal array, so the displayed image is a discrete grid. Generally, the area where the model sliced is white, and the non-sliced area is black. Therefore, it is easy to print the slices with vertical or horizontal lines, because when the pixels are placed side by side, they will be perfectly aligned and the cured model is also a straight line. However, when displaying arcs and diagonal lines, the edge situation is the intersection of black and white pixels. The edges of the solidified slices are interlaced voxels, and the surface of the model shows layered patterns
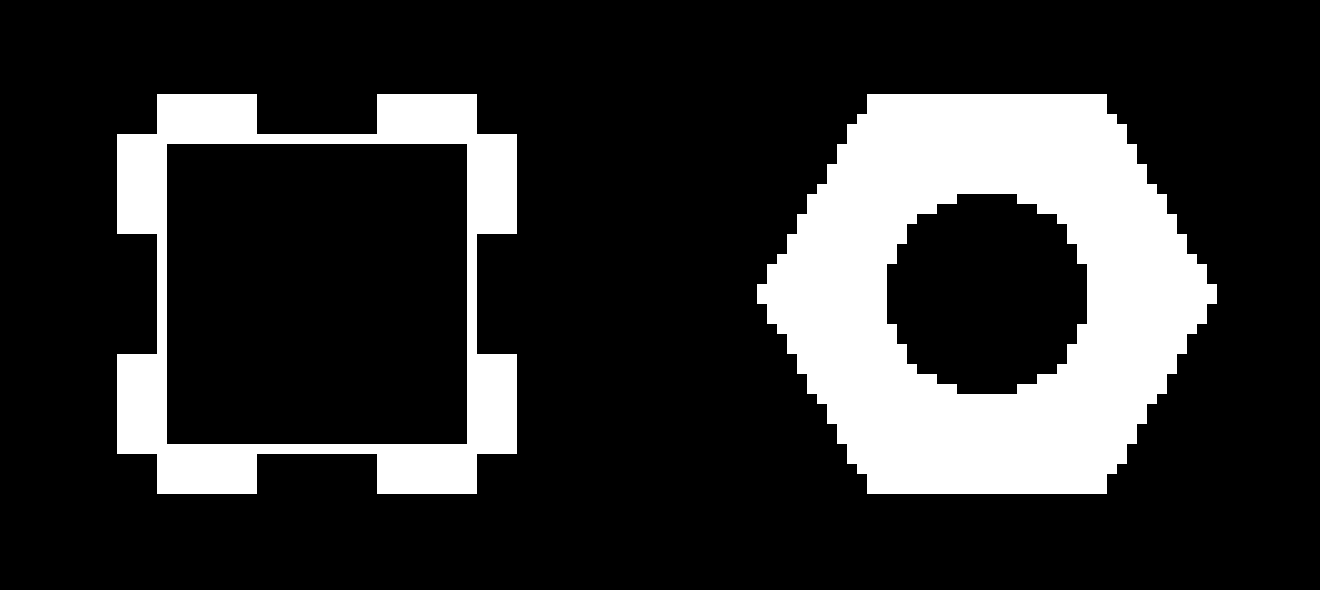
Slice view of models
From the left picture above, we could find that the edges of the model are smooth and non-jaggy when sliced horizontally and vertically. The diagonal and arc lines of the slice on the right have obvious jagged edges.
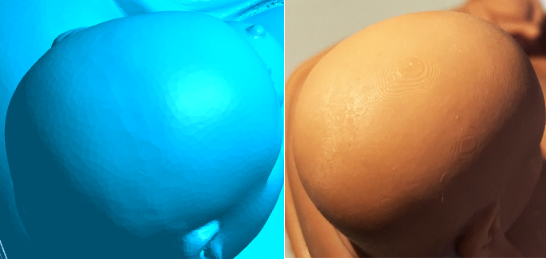
Rendering model(left) and real photo(right)
The picture above is a complex model file. The head of the model is an oval. But after the slice file is represented by pixels, the edges appear irregular jagged. From the real photo of the model, we could see that the surface of the model is not smooth, with obvious jagged and layered patterns.
Studies have shown that by controlling the brightness of each pixel, the size of the solidified voxel at the corresponding position can be controlled, and the half-voxel solidified at the corresponding position of a gray pixel will merge into adjacent voxels. Therefore, we have studied anti-aliasing and image blurring algorithms to achieve the transition of the gray value of the slice edge and improve the surface accuracy of the printed model.
Anti-aliasing (AA)
Anti-aliasing refers to softening the edge pixels of the image, reducing or increasing the gray value of the edge, so that the edge of the image is smoother, and the edge is closer to the actual shape after curing.
Different photosensitive resins require different light intensities for curing. In order to facilitate user adjustment and operation, the software provides nine anti-aliasing gray levels: 0~8, and the gray values of edge pixels corresponding to different gray levels will be the difference: the higher the level, the greater the gray value.
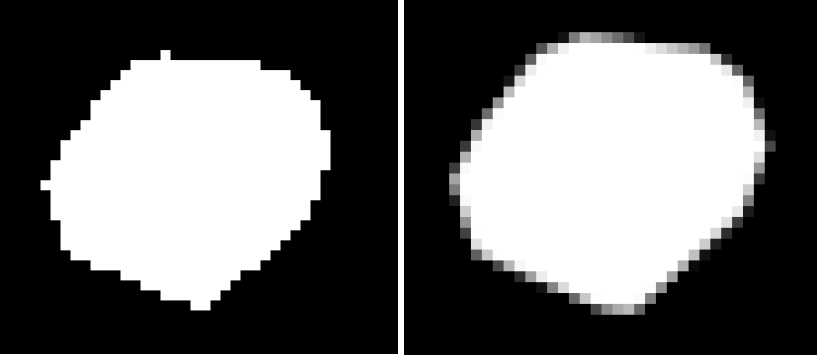
No AA
AA with Gray level 0
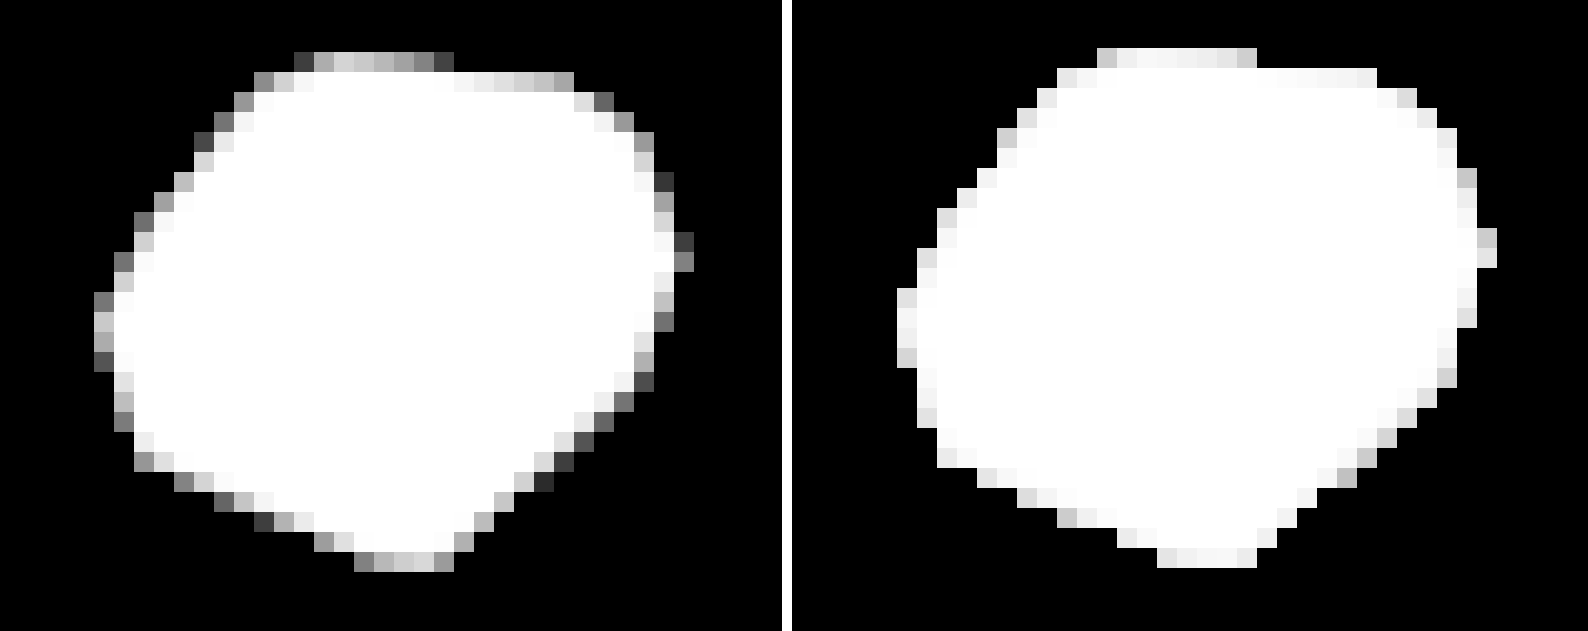
AA with Gray level 4
AA with Gray level 8
From the above four pictures, we can see that the gray value of the edge pixels of the model slice shows obvious differences at different gray levels. The higher the level value, the greater the gray value of the edge pixels.
Image Blur
Image Blur is another effective method to improve the surface accuracy. Convolution kernels of different sizes can be selected according to the smoothing requirements, and the fuzzy algorithm is used to perform fuzzy calculation on the slice image. In simple terms, it can be understood that each pixel after calculation is calculated based on the value of surrounding pixels, the convolution kernel determines the surrounding range, and the algorithm determines the contribution of each surrounding pixel to this pixel. The disadvantage of this method is that it may affect the print size and the performance of small details.
The software provides two convolution kernels: 3*3 and 5*5. The different size of the convolution kernel will generate different degree and range of edge blur.
3*3 convolution kernel:
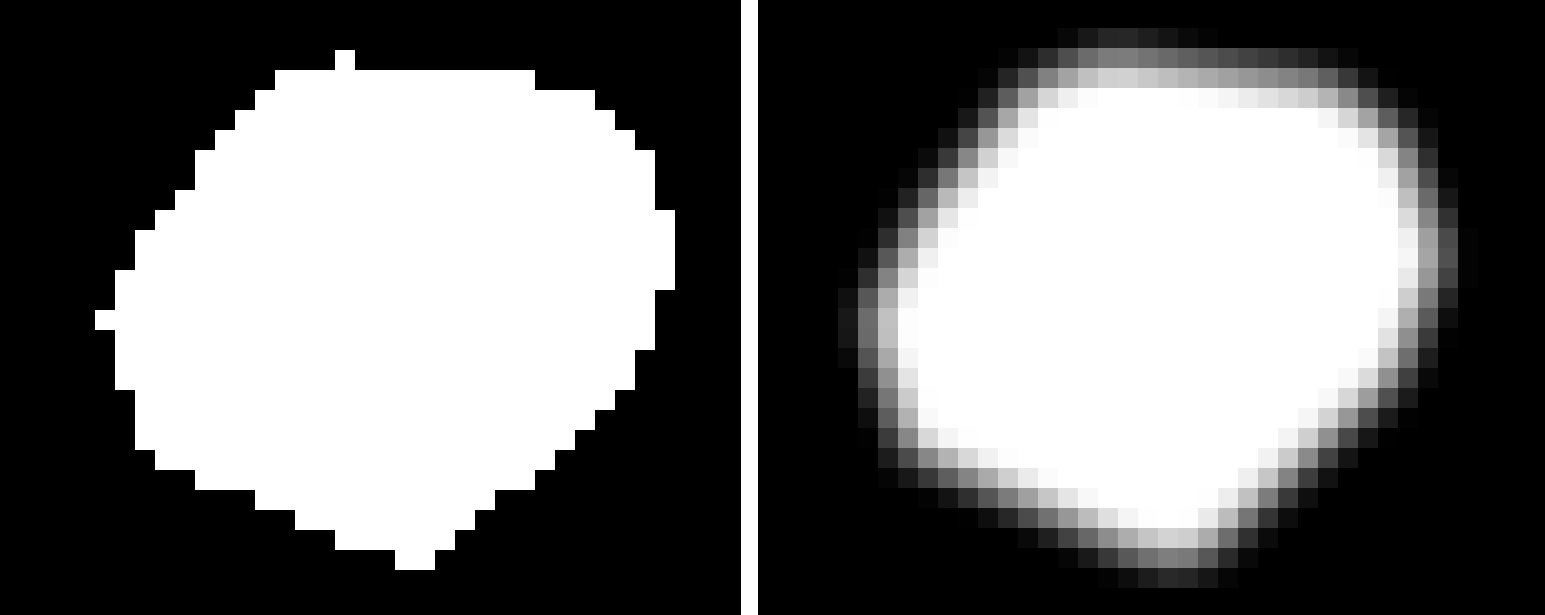
No Image Blur
Convolution Kernel 3
The above picture is a comparison of the slice before using the image blur function and after using image blur with 3*3 convolution kernel. We can see that the gray value of the pixels at the edge of the model changes. The gray value of the pixel on the outer side is smaller, and the gray value of pixel on the inner side is bigger.
5*5 convolution kernel:
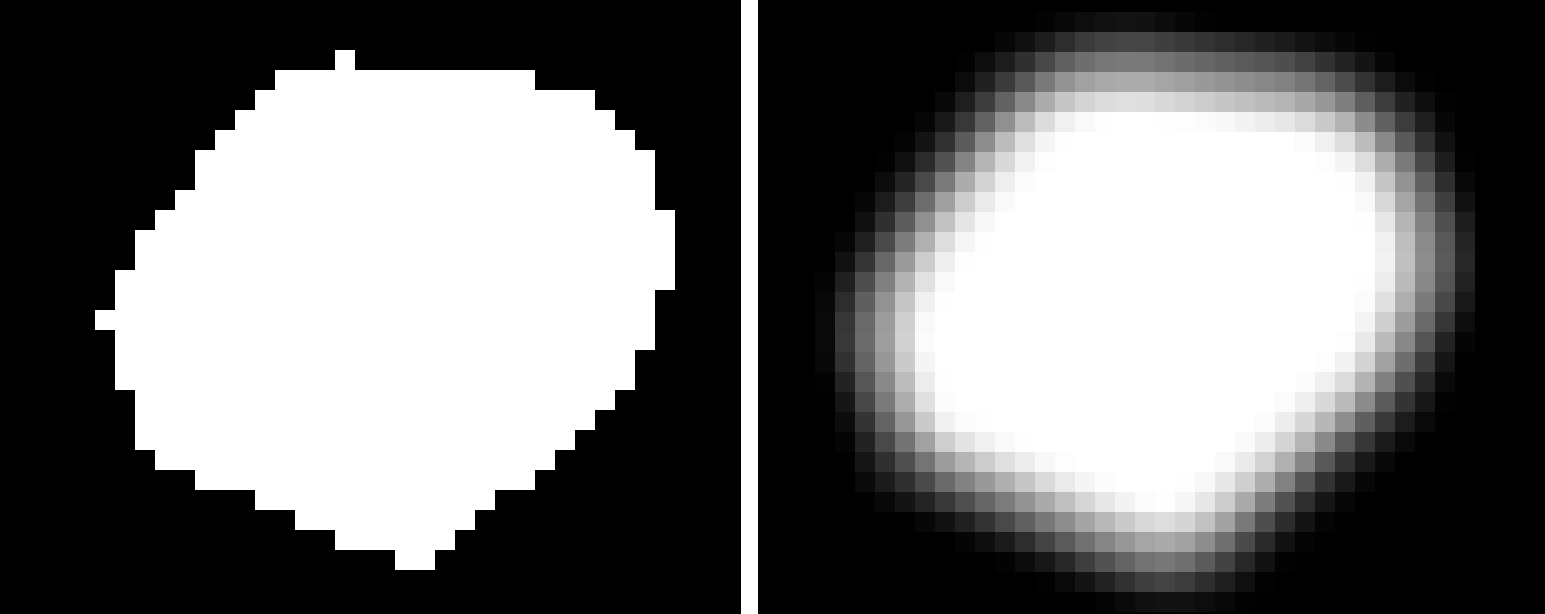
No Image Blur
Convolution Kernel 5
The picture above is a comparison of the slice before using the image blur function and after using image blur with 5*5 convolution kernel. We can see that the range of pixels affected by the slice edge is larger than when using image blur with 3*3 convolution kernel, and the transition of gray value of the pixel is smoother.


