Exposure Area and Printing Parameters Setting
LCD-SLA 3D printing is a computer controlled photo polymerization process. It is the gold standard of additive manufacturing in printing quality and speed. Its principal is that 3D modelling data is turned into slicing data via software. These slices can be viewed in the software. A planar LED light source and a LCD screen mask are controlled by the computer to expose a thin layer of photopolymer resin and turn it from liquid into solid selectively to produce a cured layer, which corresponds to one layer of the slicing data. The next layer will be produced in the same way, and be built on the previous layer. This process will start from the bottom of the model, one layer at a time, and layer by layer until the model is completed.
The photopolymer curing process is an exothermal process, a lot of heat will be released during the curing reaction. The amount of heat depends on the area of exposure, namely, the larger area of the model, the more heat produced. Printing and slicing parameter need to be adjusted according to the exposure area of each slice, and is model dependent. The rule of thumb is to avoid heat build-up on the LCD screen and separation film, lower vacuum forces, and allow resin reflow as much as possible. This is to ensure that the printing process can proceed smoothly and effectively, and also to extend the service life of the printer. In general, larger exposure area meaning more heat generated, larger vacuum force to peel, and slower reflow of resin. So to build larger solid objects correctly, a longer cool down time, lower motor speed (to increase torque), and a higher motor lift height (allow better resin reflow) are required. The rule of thumb is, heat is the worst enemy for any LCD-SLA process, it can damage the LCD screen and separation film, and cause deteriorated or failed prints. Longer cool down time is always welcome to prolong the overall life time of the printer. With the patented LCD liquid cooling system, UNIZ is capable of delivering up to 50x longer LCD lifetime and much faster printing speed compared to other LCD-SLA solutions with careful slice and exposure settings.
There are four types of printing modes: UDP, High speed, Medium speed and Low speed. These printing modes will be elaborated below:
1.UDP printing mode
1.1 Mode introduction
UDP printing mode is originally created by UNIZ which adopts Uni-Directional Peeling technology and greatly shortens printing time. The printing speed can reach up to 1262mm/hr for now.
1.2 Applicable models
| Printing Area A |
Solid |
Closed |
Wall thickness |
Necessary to insert holes |
| 1%≤A<30% |
NO |
YES |
≤3mm |
YES |
| NO |
≤3mm |
NO |
1.3 Parameters setting
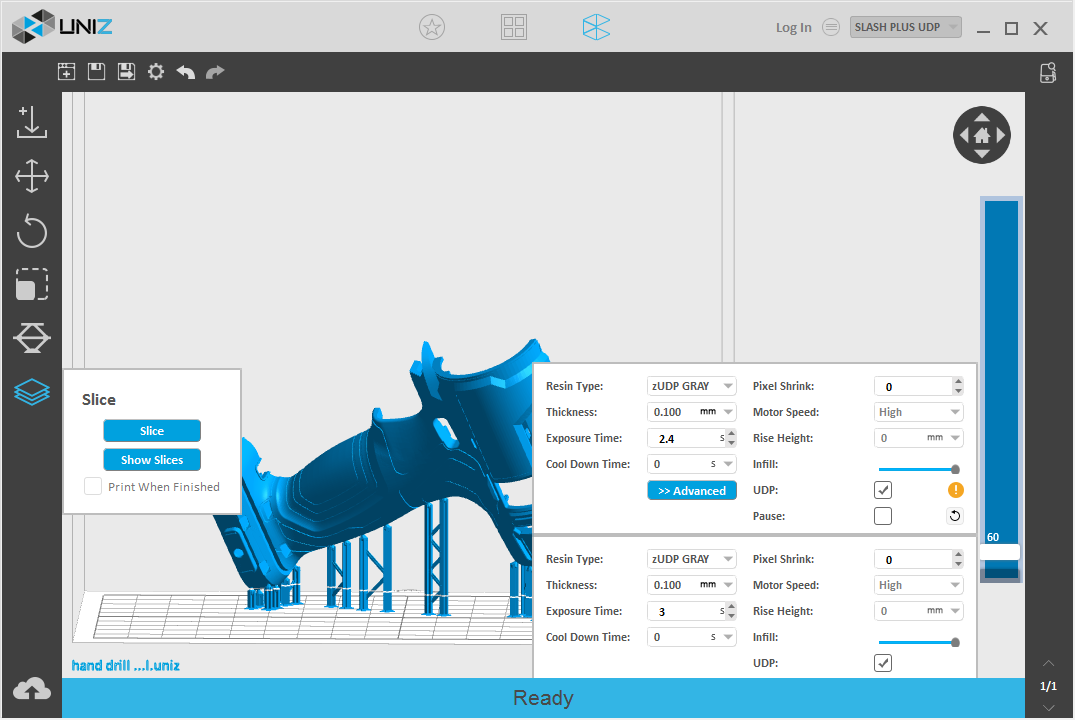
To use UDP mode, users need to first select the UDP printer type and UDP resin, and tick the UDP function, as shown in the figure. Please refer to the following table for UDP printing settings. The data in the table is taking UDP Grey as an example.
| Rise height |
Motor speed |
Cool down time |
Exposure time |
| 0 |
High |
0 |
The first three layers |
8 |
| Layer 4-20 |
3 |
| After the 20th layer |
2.4 |
2. High speed printing mode
2.1 Mode introduction
By decreasing cool down time and rise height, together with increasing motor speed, users can shorten printing time and aslo keep printing quality for models that are with small printing exposure area but not suitable for UDP printing.
2.2 Applicable models
| Printing Area A |
Solid |
Closed |
Wall thickness |
Necessary to insert holes |
| 1%≤A<30% |
YES |
- |
- |
NO |
| NO |
YES |
>3mm |
YES |
| ≤3mm |
YES |
| NO |
>3mm |
NO |
| ≤3mm |
NO |
2.3 Parameters setting
| Rise height |
Motor speed |
Cool down time |
Exposure time |
| 3 |
High |
0 |
The first three layers |
10 |
| Layer 4-20 |
3.5 |
| After the 20th layer |
3 |
3. Medium speed printing mode
3.1 Mode introduction
By adjusting related parameters setting, users can shorten printing time and aslo keep printing quality for models that are with medium printing exposure area.
3.2 Applicable models
| Printing Area A |
Solid |
Closed |
Wall thickness |
Necessary to insert holes |
| 30%≤A<50% |
YES |
YES |
≤3mm |
YES |
| NO |
NO |
≤3mm |
NO |
3.3 Parameters setting
| Rise height |
Motor speed |
Cool down time |
Exposure time |
| 8 |
Medium |
5~10 |
The first three layers |
15 |
| Layer 4-20 |
4.5 |
| After the 20th layer |
3.5 |
4. Low speed printing mode
4.1 Mode introduction
It is necessary to decrease motor speed and increase rise height and exposure time when printing models with large printing exposure area for users should take motor torque and resin replenishing time into consideration.
4.2 Applicable models
| Printing Area A |
Solid |
Closed |
Wall thickness |
Necessary to insert holes |
| 50%≤A<100% |
YES |
- |
- |
NO |
| NO |
YES |
>3mm |
YES |
| ≤3mm |
YES |
| NO |
>3mm |
NO |
| ≤3mm |
NO |
4.3 Parameters setting
| Rise height |
Motor speed |
Cool down time |
Exposure time |
| 15 |
Low |
10~20 |
The first three layers |
15 |
| Layer 4-20 |
6 |
| After the 20th layer |
4.5 |
More detailed print parameter settings in [PDF]


