USAGE AND MAINTENANCE
In order to get a great work with UBEE 3D printer, it is important to maintain it correctly. In this chapter the most important maintenance tips are described. It is recommended to read them carefully in order to achieve the best results with your printer.
BUILD PLATFORM
The Build Platform is the platform where the first layer of the model burns in-to, its levelness and roughness are crucial to successful prints.
INSTALLATION AND REMOVAL OF BUILD PLATFORM
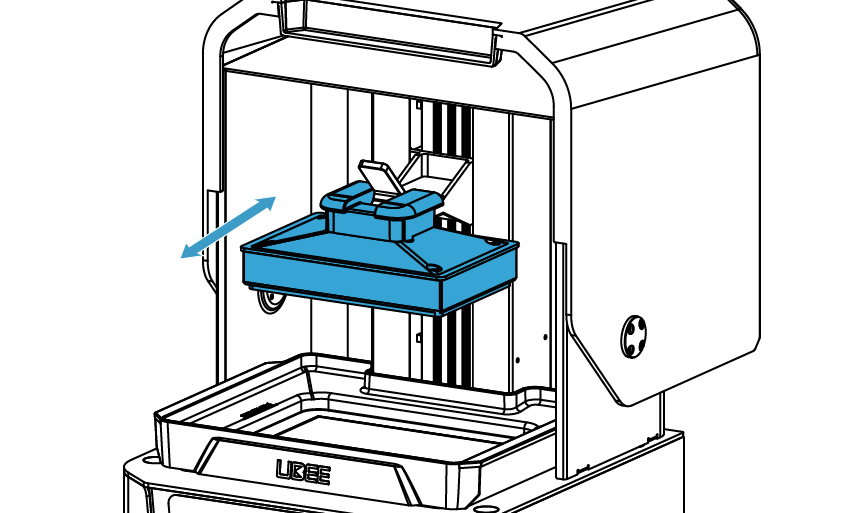
1. To unlock the Build Platform, lift the Platform Locking Arm upward. To secure the Build Platform, press the Platform Locking Arm downward until it locks into place.
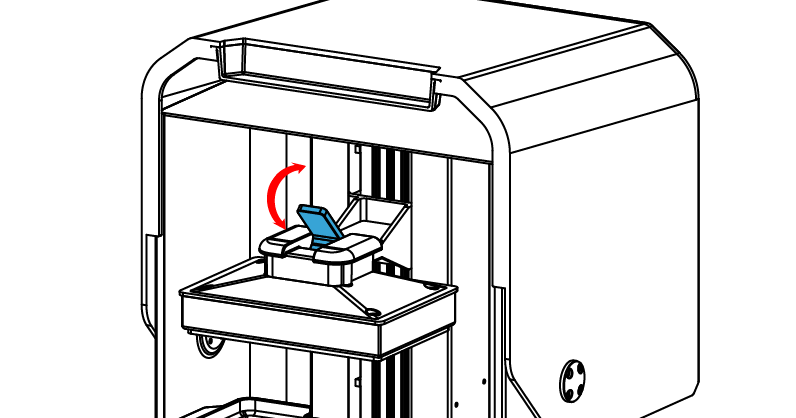
2. Install or remove the Build Platform.
SANDING BUILD PLATFORM
The surface of the Build Platform will be smooth after a long time of use, resulting in poor model adhesion and printing failures. To fix this problem, users need to sand the Build Platform.
1. Clean the Build Platform surface with alcohol.
2. Sand the surface into a grid shape with the sandpaper delivered with the machine.
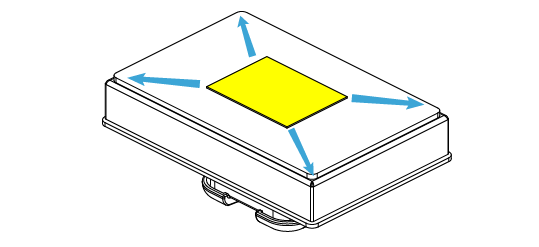
3. Clean the Build Platform with alcohol and a soft cloth again to make sure there is no residue left.
RESET Z-axis ZERO POSITION AND LEVEL THE BUILD PLATFORM
1. Prepare the cross screwdriver in the accessory box coming with the printer.
2. Click Tools > Zero & Leveling, remove the Resin Tank, and ensure that the bottom of the Build Platform and the screen surface are clean.
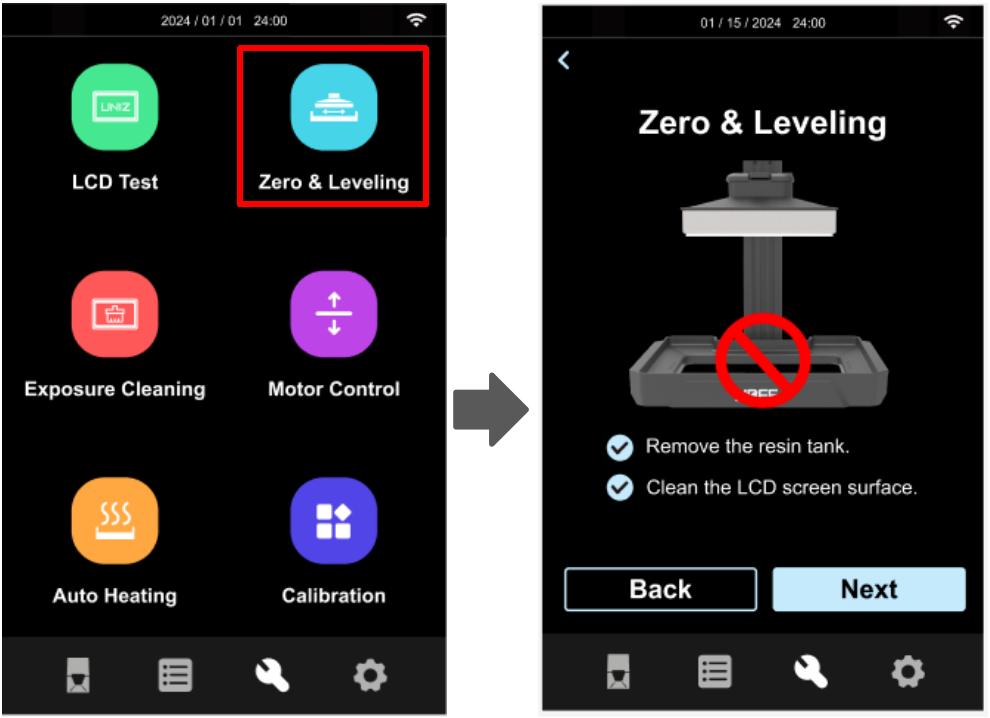

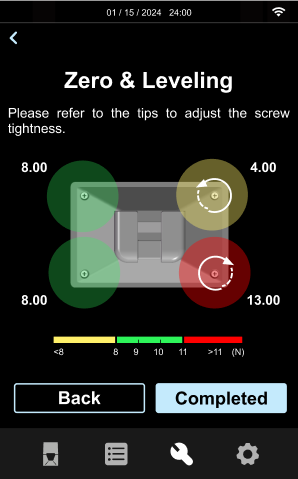
3. Wait for the platform to descend to its lowest position. Follow the on-screen prompts to adjust the corresponding screws:
Turn clockwise to decrease pressure.
Turn counterclockwise to increase pressure.
Continue adjusting until all indicators turn green. Then, click the Complete button to finalize the leveling process.
CLEAN THE BUILD PLATFORM
If a printing fails, there may be residues on the Platform which needs to be cleaned in time to avoid damage to the LCD screen.
Please remove the failed model on the Build Platform, and clean the solidified items on the button of the Resin Tank, dispose it properly.
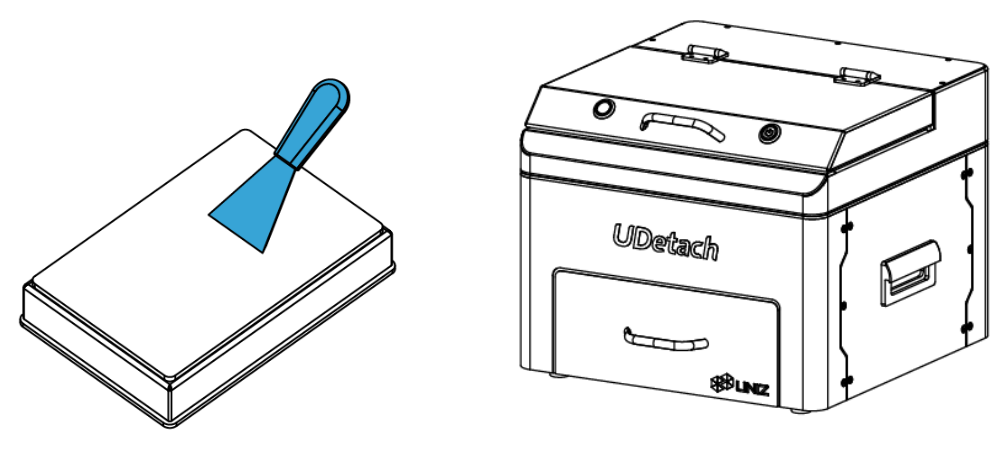
Upon completion of printing, we recommend using UDetach to safely and efficiently remove the printed models from the Build Platform.
Notes
1. After the failed model is removed, please clean the Build Platform with IPA (with concentration of 91% or higher) completely. Any solidified item on the Build Platform would damage the Resin Tank or LCD screen.
2. Please wear nitrile gloves to clean the Build Platform, and be aware of the sharp Scraper to avoid harm.
RESIN TANK
The Resin Tank is a crucial part for a successful print job, and requires constant maintenance and replacement if needed.
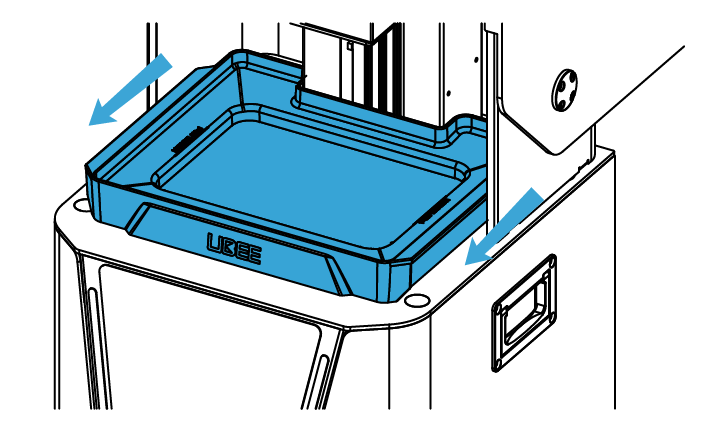
INSTALLATION
1. Make sure the LCD screen is clean and dry.
2. Align the resin tank with the back edge of the LCD screen, then slide it forward into its designated position until it locks securely in place.
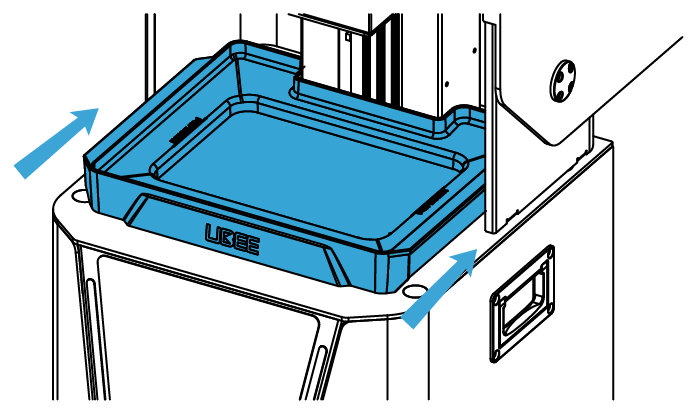
3.Make sure the Resin Tank is stably locked to get best performance.
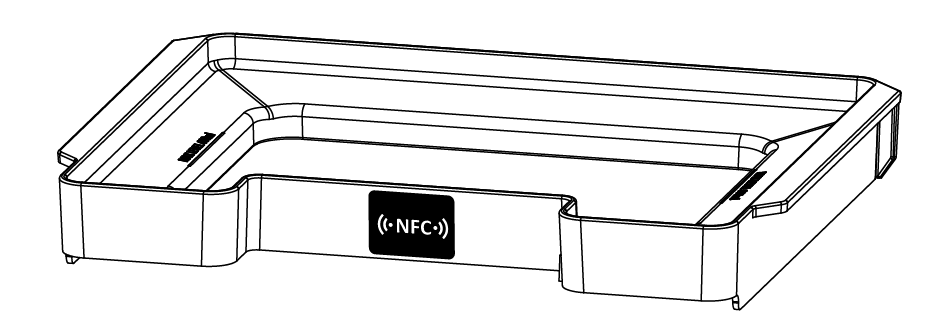
Note: An NFC label is attached to the back of the resin tank for installation and detection purposes. Do not remove this label and ensure the surface is clean and free of foreign objects. Do not fill the resin tank beyond the maximum scale line.
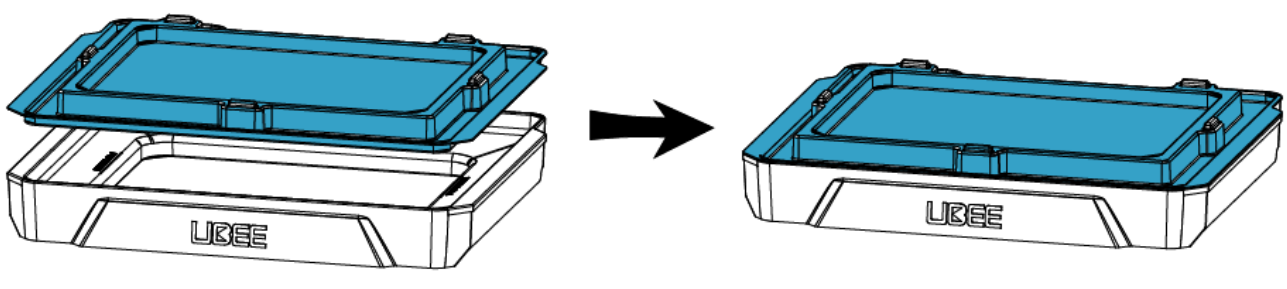
RESIN TANK COVER
For short-term resin storage in the Resin Tank, use the provided Resin Tank Cover to shield it from light exposure and prevent premature curing.
CLEANING THE RESIN TANK
If a printing fails, there may be residues in the Resin Tank which needs to be cleaned in time to avoid damage to the LCD screen. It is recommended to use the Full Screen Clean function as following.
1. Click Tools/Exposure Cleaning, choose the time and click Start to start exposure cleaning.
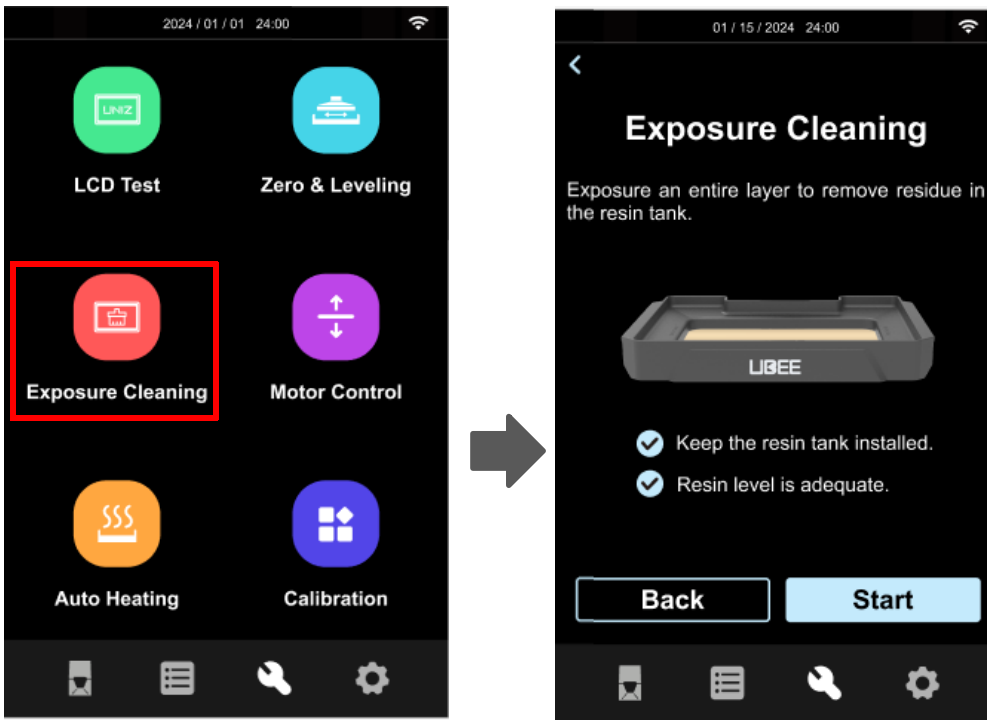
2. Once the EXPOSURE CLEANING is done, use a scraping card to take the solidified item out. DO NOT use metal scraper which will damage the release film and cause resin leakage. Repeat it if necessary.
CALIBRATION
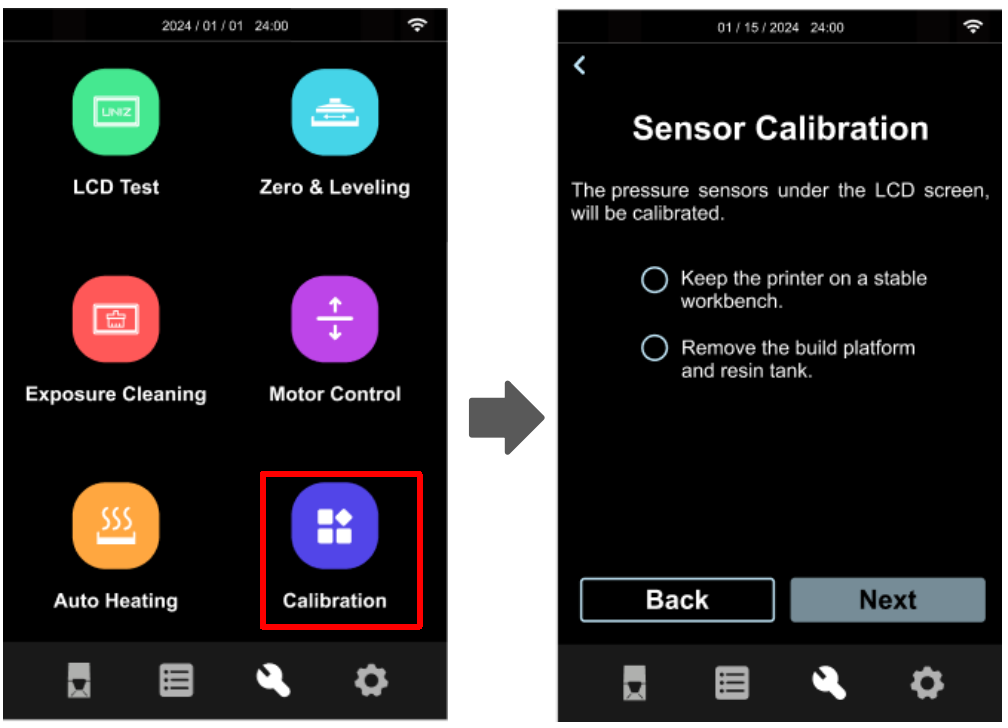
To ensure accurate pressure sensor detection results, it is necessary to calibrate the device using the calibration tool after a certain period of use or whenever the sensor shows abnormalities.
1.Click Tools >Calibration.
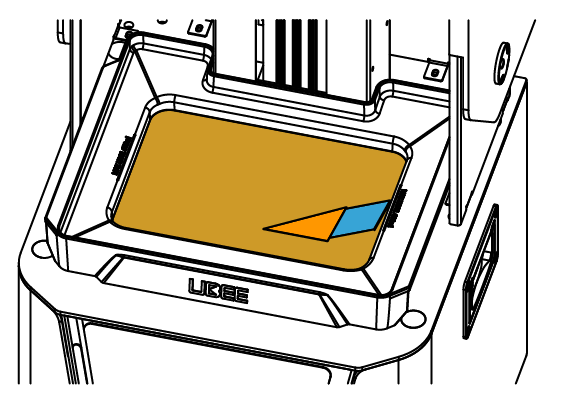
2.Remove the Resin Tank and Build Platform, ensuring the screen is free of any foreign objects.
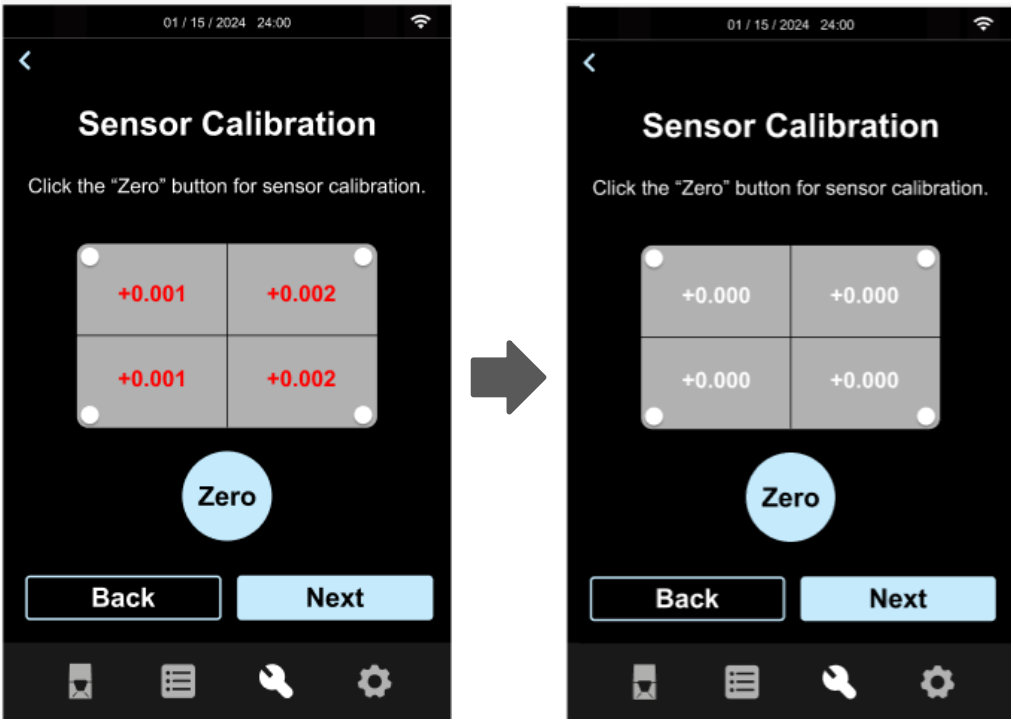
3.Click Zero,set all the numbers on the screen to 0, then click Next.
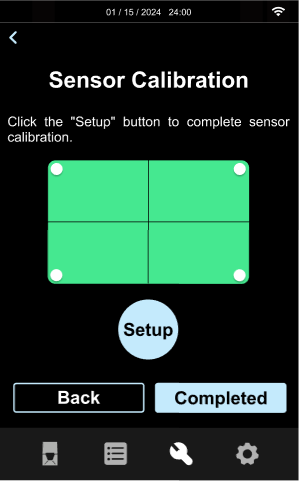
4.Reinstall the Resin Tank, then place the Build Platform in the Resin Tank, proceed to the next step, and then click the Setup button, The process is complete when the red area turns green.

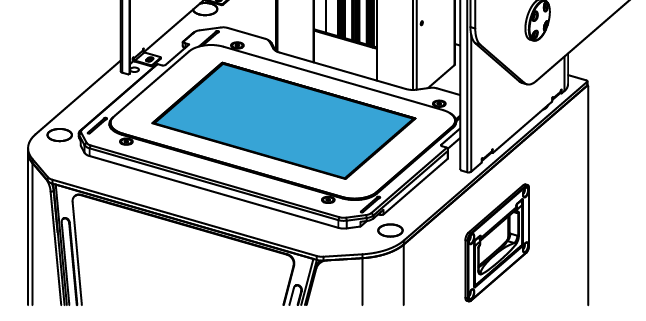
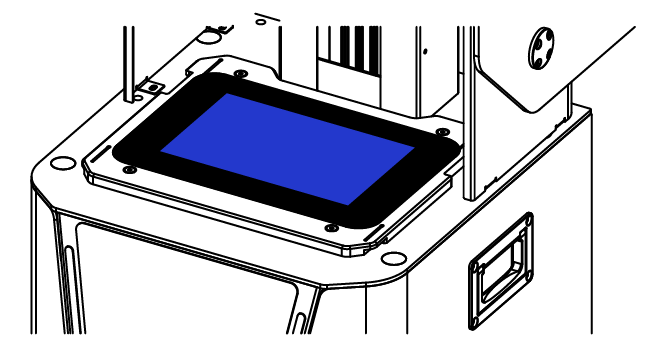
CHANGE LCD PROTECTIVE FILM
There is a protective film on the LCD. Change to a new protective film when it is scratched or dirty. Please keep one protective film on the LCD or the resin cured will left permanent damage to the LCD.
1. Peel off the old LCD Protective Film.
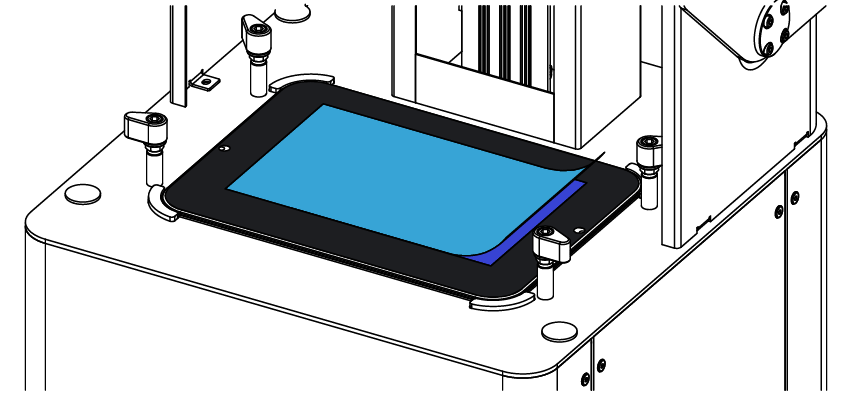
2. Clean the surface of the LCD and make sure there is no dust and residue left.
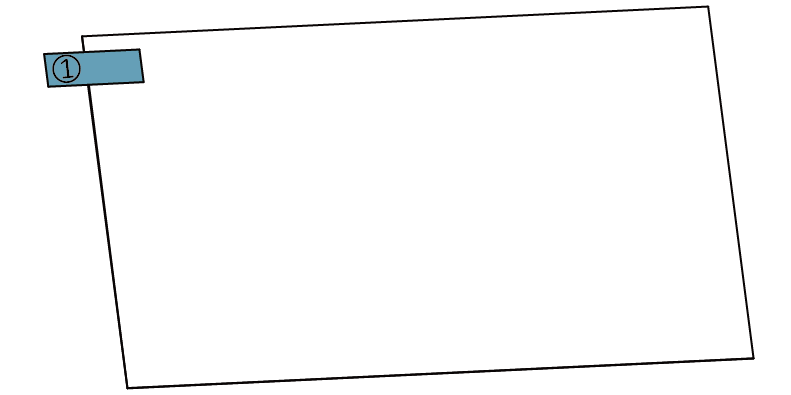
3. Take out a new LCD Protective Film and peel off the cover film marked ‘①’.
4. Using a card and cloth to paste the film onto the surface of LCD.
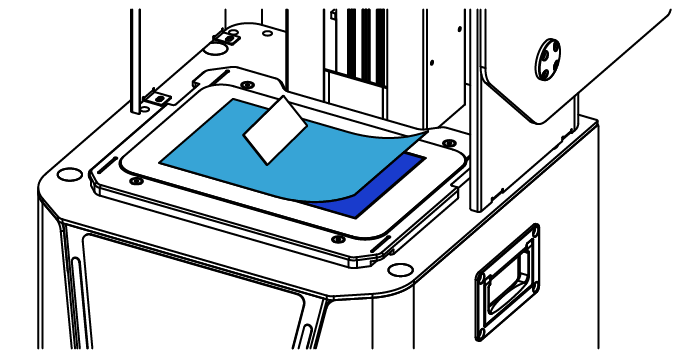
5. Peel off the cover film marked ‘②’.
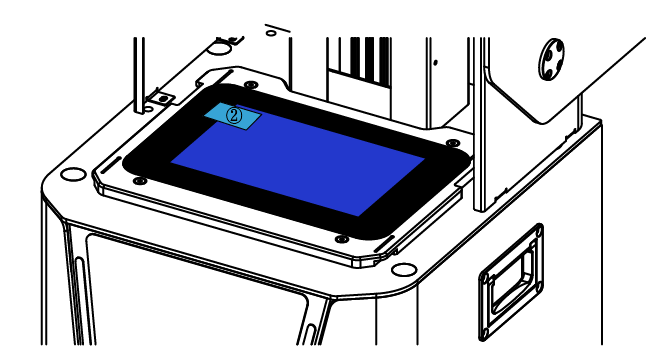
6. Any air bubbles between film and the LCD will disappear automatically in a period of time.

SUGGESTIONS
1. When removing the Resin Tank, please place it on a clean table to avoid scratch.
2. When slicing a file by UNIZ Dental software, it is recommended to save the sliced file to a solid state drive (SSD) for faster storage speed.
3. Please check whether there are residues left on the Build Platform or at bottom of the Resin Tank before each printing. If there are residues left on the Build Platform, clean it with a scraper. If there are residues left in the Resin Tank, use Exposure Cleaning function to cure and clean.
4. Please well mix the resin in the Resin Tank by stirring with a hard cardboard like business card before each printing.
5. Please keep the printer stable to avoid disturbing while printing.
6. Please keep the Cover in position while printing.
7. Please check and clean the Build Platform and the Resin Tank before each print.
8. Please clean resin dropped incidentally on the LCD screen, cover immediately.
9. Please drill a hole at the side of the bottom of a model if it is a closed hollowed model.
10. Please keep the printer and resin tank in a ventilated place, avoiding straight sunlight.
11. Use 80~200 mesh filter to filter the resin when put it back to bottle for storage.
12. Children are not allowed to get close or operate the printer to avoid harm to children or damage to the printer.
13. Do NOT move printer when there is resin left in Resin Tank to avoid spilling.
14. Do NOT gaze at the LCD screen when doing a test print without Resin Tank and Build Platform.
15. Do NOT leave resin in resin tank for more than 24 hours without printing.
16. Do NOT connect the printer with your computer via USB. The USB ports only support USB Flash Drive.
17. Operate the printer in an environment shielded from direct sunlight exposure


