INTERFACE INFORMATION
You may check the information of your printer, control the printer, and start printing projects using the touch screen on the front of UBEE.
Power on and wait until the animation ends.
MAIN INTERFACE
There are four main functions: Standby, File List, Tools, Settings.
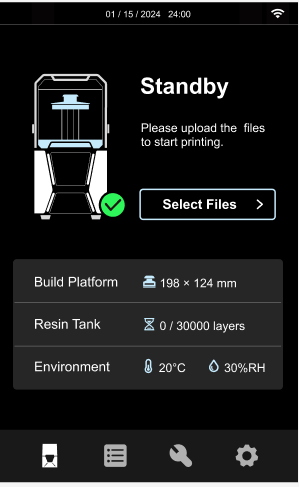
The main interface will display the connection status of the Build Platform and the Resin Tank, indicating yellow when not installed. Additionally, it will show information such as Print Area, Resin Tank Lifespan, Temperature and Humidity.
Notes
1. Some functions have 1~3 pages to introduce the details. Please read carefully and follow the instructions.
2. Some interfaces need to input all checkboxes  to the next step.
3. The user interface content may vary slightly due to UI & Firmware version upgrades. Please refer to your device’s the latest operating interface for the most accurate information.
PRINT WITH USB Flash Drive
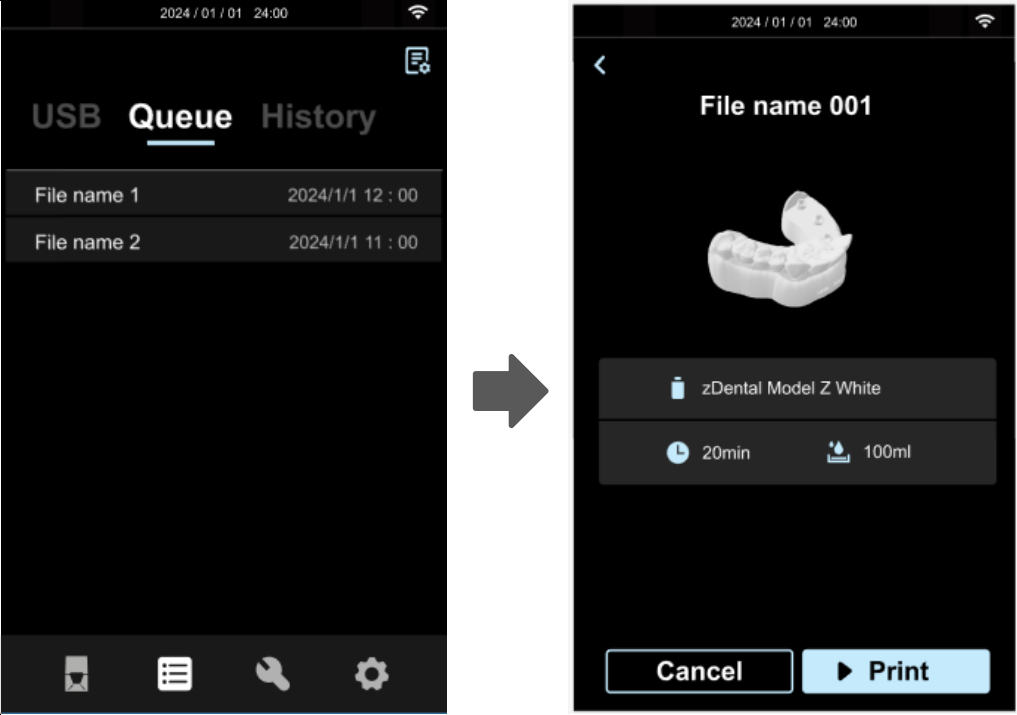
UBEE supports USB Flash Drive printing. You may use UNIZ Dental to slice the model on your PC then save it to your USB Flash Drive. Plug the USB Flash Drive into the USB port on the left of the printer, then choose the files you want to print and click the Print button. The printer will enter into the print details interface.
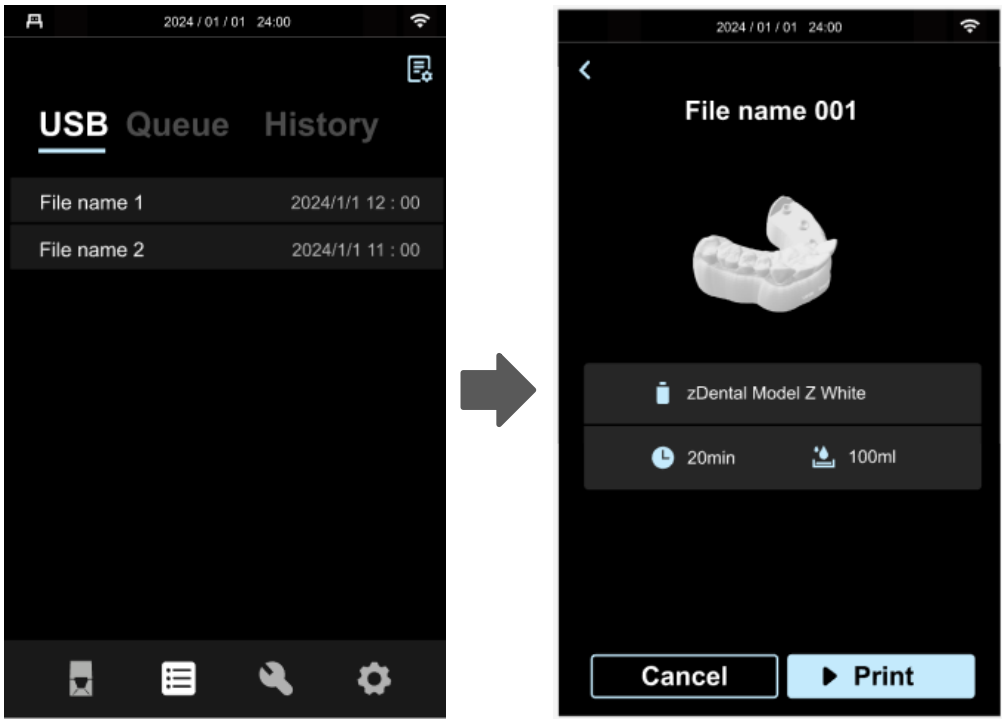
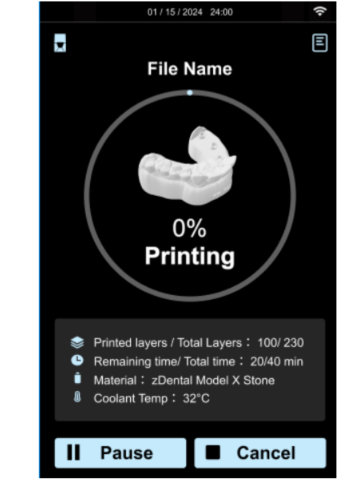
In this interface, you may check the preview and printing parameters of the print. Also you may pause/print or cancel the printing program by clicking the buttons at the bottom.
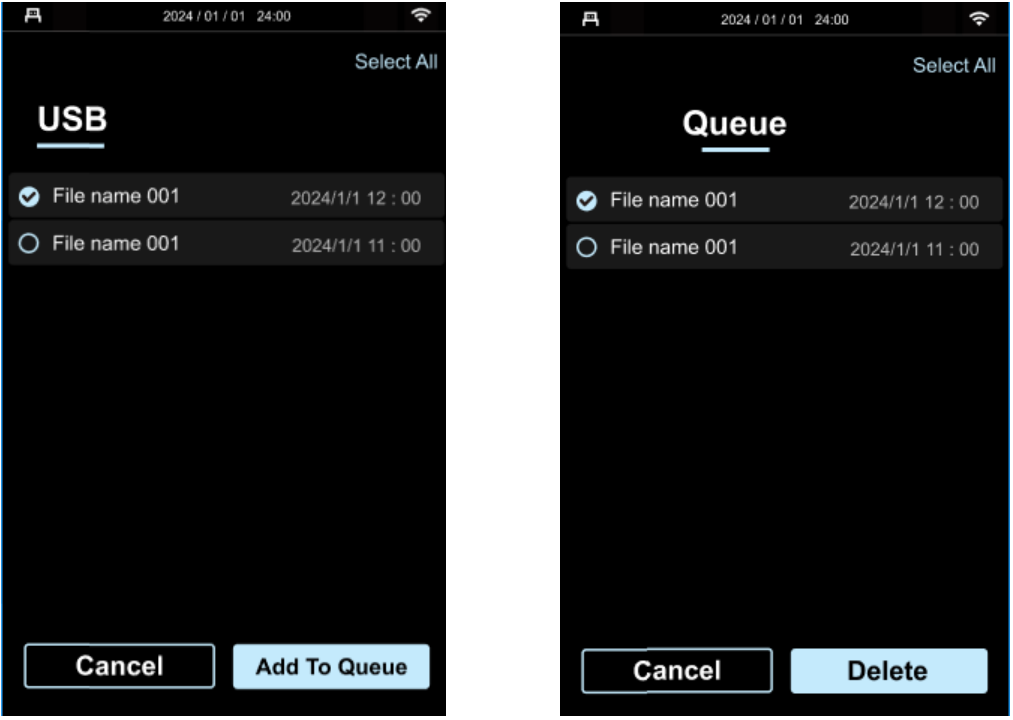
You can also select a slicing file and click the "Add to Queue" button to copy the file from the USB Flash Drive to the queue.
You can also choose a slice file and use the Delete function button to remove queue files individually or entirely.
PRINT LOCAL FILES
Click the queue function in the middle, you can see queue files in the printer, select the file you want to print, and then click the Print button, the printer will enter the print details page interface.Files in the queue will enter to History after printing.
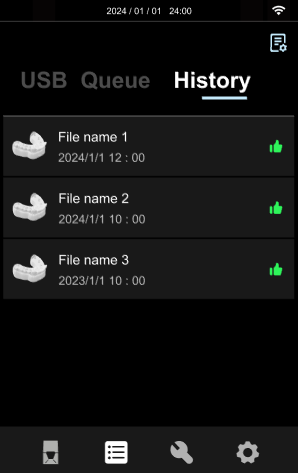
HISTORY FILES
The printed file will enter history interface. While print success, it will displayed  , however, print failure will displayed
 . All File listed in the history interface can be reprinted.
To ensure optimal printer performance in low-temperature environments, the system will automatically activate the preheating function. Note that preheating takes extra time, and it is recommended to use the printer in temperature controlled environment.
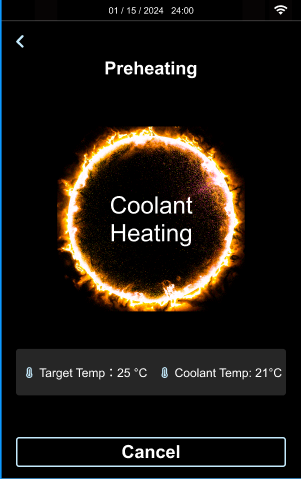
The system will detect the coolant temperature. If the temperature is below the target temperature (default is 25°C), it will start heating until the coolant temperature exceeds the target temperature and maintains it for 100 seconds or until the user clicks "Cancel". Then, it will stop heating and begin printing.
If the coolant temperature is above the target temperature, it will start printing directly.
During printing, the system will automatically monitor the coolant temperature. If the temperature drops below the target temperature, heating will be activated.
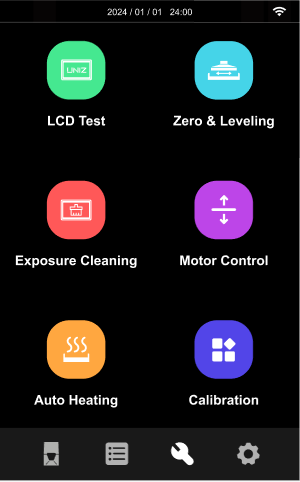
TOOLS
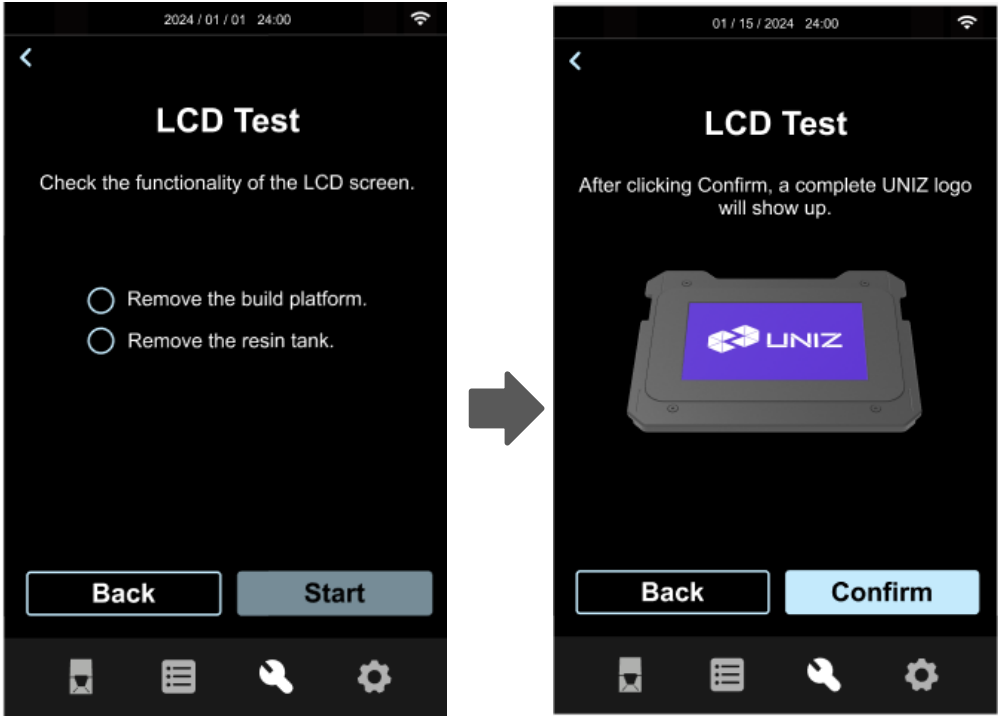
LCD TEST
The LCD TEST function is to ensure the proper functioning of LCD screen.
Click LCD Test you will see the UNIZ Logo appears on the LCD screen.
RESET Z-AXIS ZERO POSITION AND LEVEL THE BUILD PLATFORM
When installing a new Build Platform or if printing models fail to adhere properly, reset the Z-axis zero position and level the Build Platform. Use the provided cross screwdriver to make precise leveling adjustments.
It is recommended to calibrate the sensor before leveling.

Note: Please refer to Chapter D for details.
EXPOSURE CLEANING
When a failed print occurs, resulting in some residues left in the bottom of the Resin Tank, you will need to expose the Resin Tank to clean the residue. After that, please wear nitrile gloves and take the solidified piece out.

Note: Please refer to Chapter D for details.
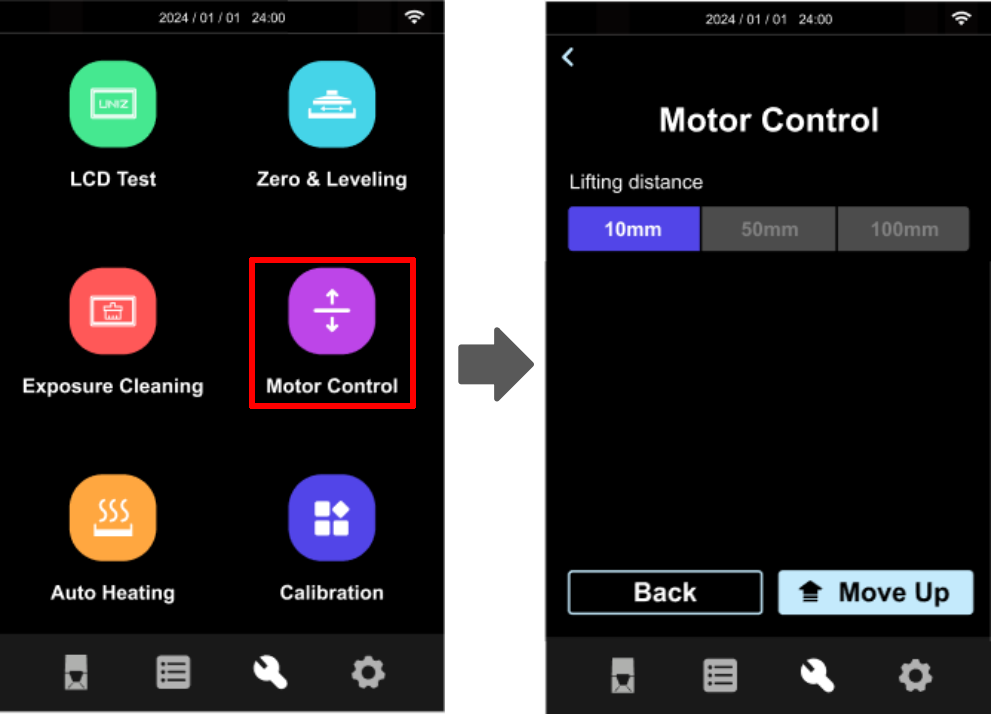
MOTOR CONTROL
To move the Build Platform upwards, choose a distance (10/50/100mm) first, and then click Move Up.
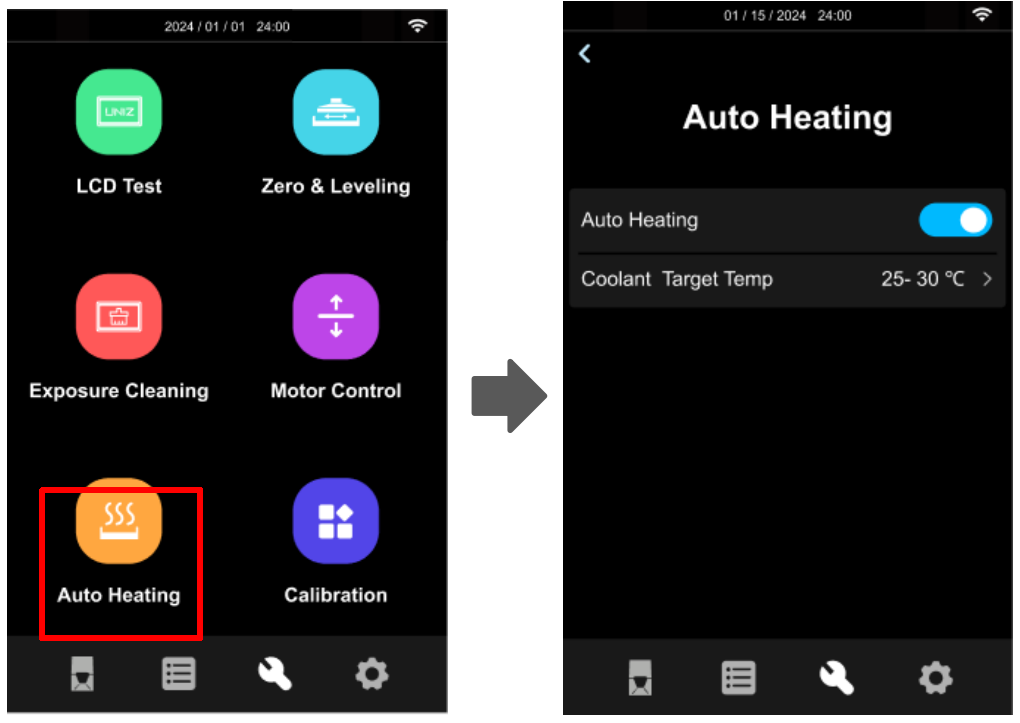
AUTOMATIC PREHEATING
To ensure optimal printing results, the preheating function will be activated before printing. This will heat the resin at the bottom of the Resin Tank to the optimal printing temperature of approximately 25°C.
1. Auto preheating is disabled by open, and remain the same status to the last use.
2. When the coolant temperature is below 25°C, it will be heated to 25°C~30°C with the LCD liquid circulation system.
CALIBRATION
To ensure accurate pressure sensor detection results, it is necessary to calibrate the device using the calibration tool after a certain period of use or whenever the sensor shows abnormalities.

Note: Please refer to Chapter D for details.
SETTINGS
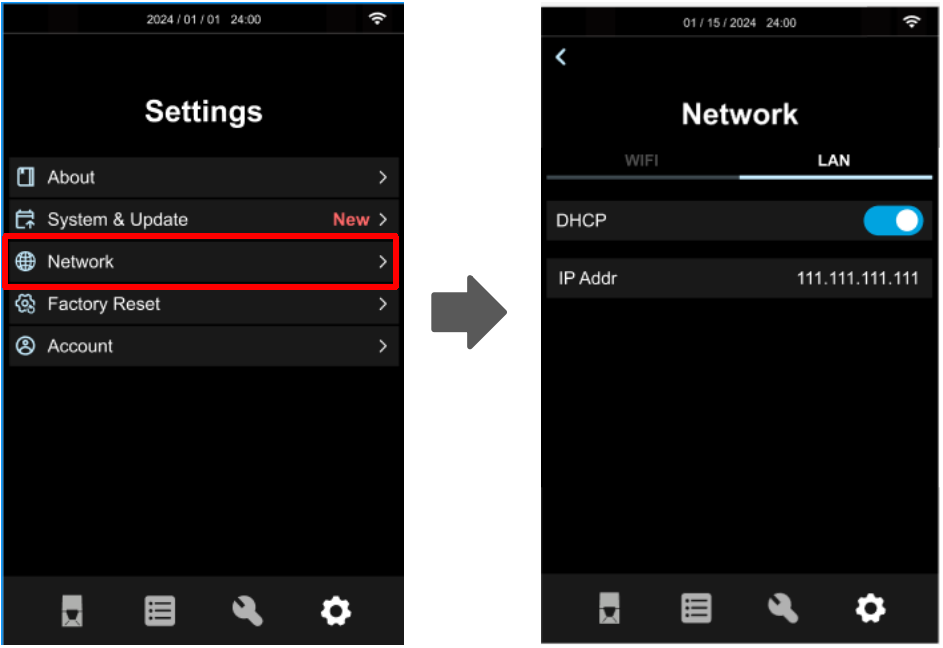
SETUP LAN
Connect the printer with your router via an Ethernet cable. Go to the SETTINGS menu. Click LAN button. Set to AUTO mode. Then the printer will get the IP address automatically.
If you set AUTO mode off, you will need to type IP address, Netmask, Gateway and DNS manually. Then click Connect. When you could see the Ethernet icon at the top right corner of the screen, it means the printer in connected with network.
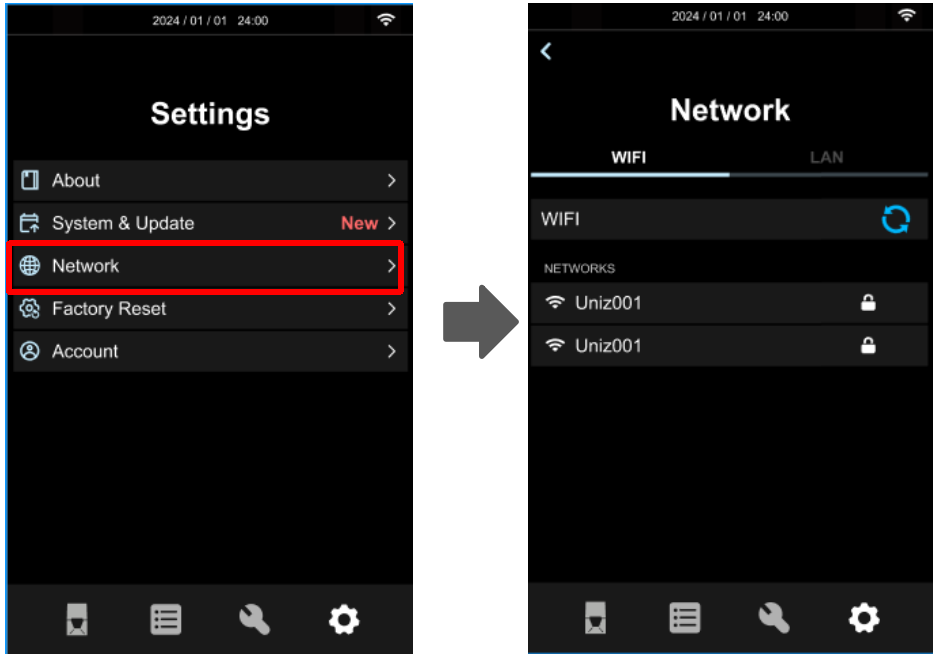
SET WIFI
You could connect the printer with your router via Wi-Fi. Go the SETTINGS menu. Click WIFI, there will be a list of available Wi-Fi. Choose the Wi-Fi network and enter the password. Click CONFIRM. When you see the IP address shown, it means the printer is connected well to the Wi-Fi network. There should be a Wi-Fi icon appearing at the top right corner of the screen.
SYSTEM
Enter Settings menu and click About.
1. On this screen, you can view the local storage usage and SN of the machine, or scan the QR code to obtain the SN.
2. You can also set the nickname of the printer in this interface.

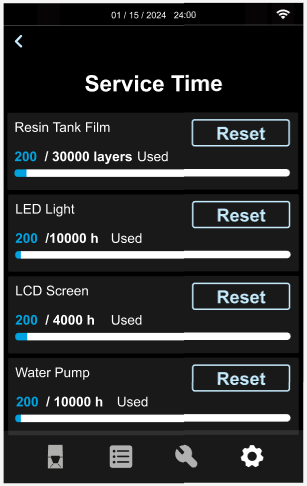
3. Click Service Time to access the parts usage statistics interface. This displays the total working hours for four key printer components: Resin Tank Film, LCD Screen, LED Light, and Water Pump. After replacing any of these parts, click the Reset button to reset the corresponding time counter.
4. If you need to check the current firmware version, upgrade firmware, set time or select a language version, please click System&Updates.
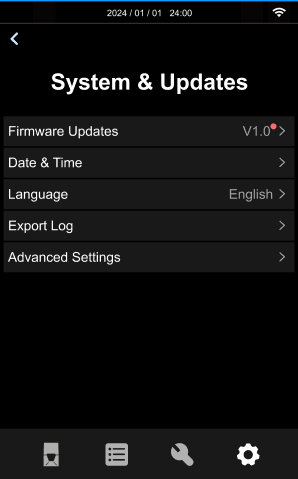
Note: Insert the provided USB flash drive into the USB interface on the left side of the machine, then click "Export Log" The system will save the relevant information of the recently completed printing task in” txt” format to the root directory of the USB Flash Drive.
5.Clicking Factory Reset will restore the machine to its original factory settings and delete all personal information.
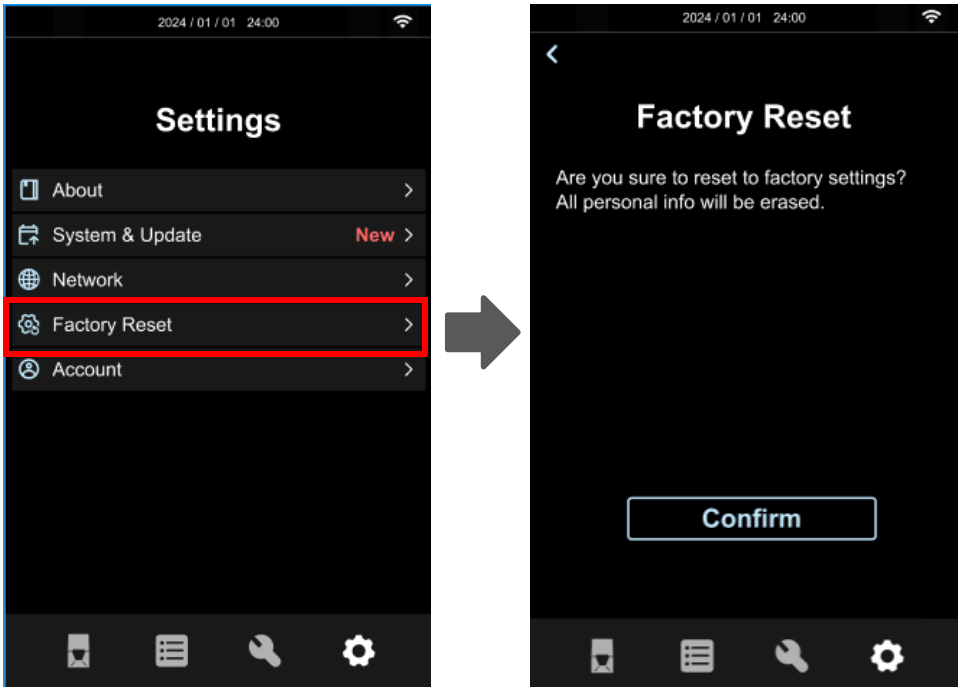
Note: The factory reset function will clear network settings, remove printer nicknames, delete local files, reset working time counters for the resin tank, LCD, LED, and water pump, however, it will not affect: printer light intensity calibration parameters and firmware version. Please use this function with caution, as the deleted information cannot be recovered.


